
Prep time
15 minutes
Cook time
40 minutes
Course
Preserves
Skill level
Intermediate
Season
All Seasons
Serves
1 pint
The way I use herb jam in my kitchen, it could be considered a mother sauce. The stuff is so flavorful, nimble, and dependable that it naturally finds its way into countless meals from spring through fall.
Let go of your preconceived notions of jam—this is not that. This is savory, complex, and deeply green, somewhere in betweenpesto, tapenade, and saag. It’s so versatile, it can be enjoyed with crackers, crunchy vegetables, crusty bread with soft cheese, slathered onto sandwiches, stirred into pasta, or spooned over poultry or fish.
It’s a workhorse condiment, serving many functions, simultaneously. One, it uses things that need to get used, like the surplus of greens that I seem to always grow or buy too many of, and the bits of herbs on the verge of wilting in the fridge. Two, it helps me incorporate large quantities of a diverse array of greens into my diet without having to stare down heaping mounds of salad every night. Three, it’s forgiving—I’ve never made one I didn’t like, even though I make it a little differently every time, and therefore, four, it’s never boring.
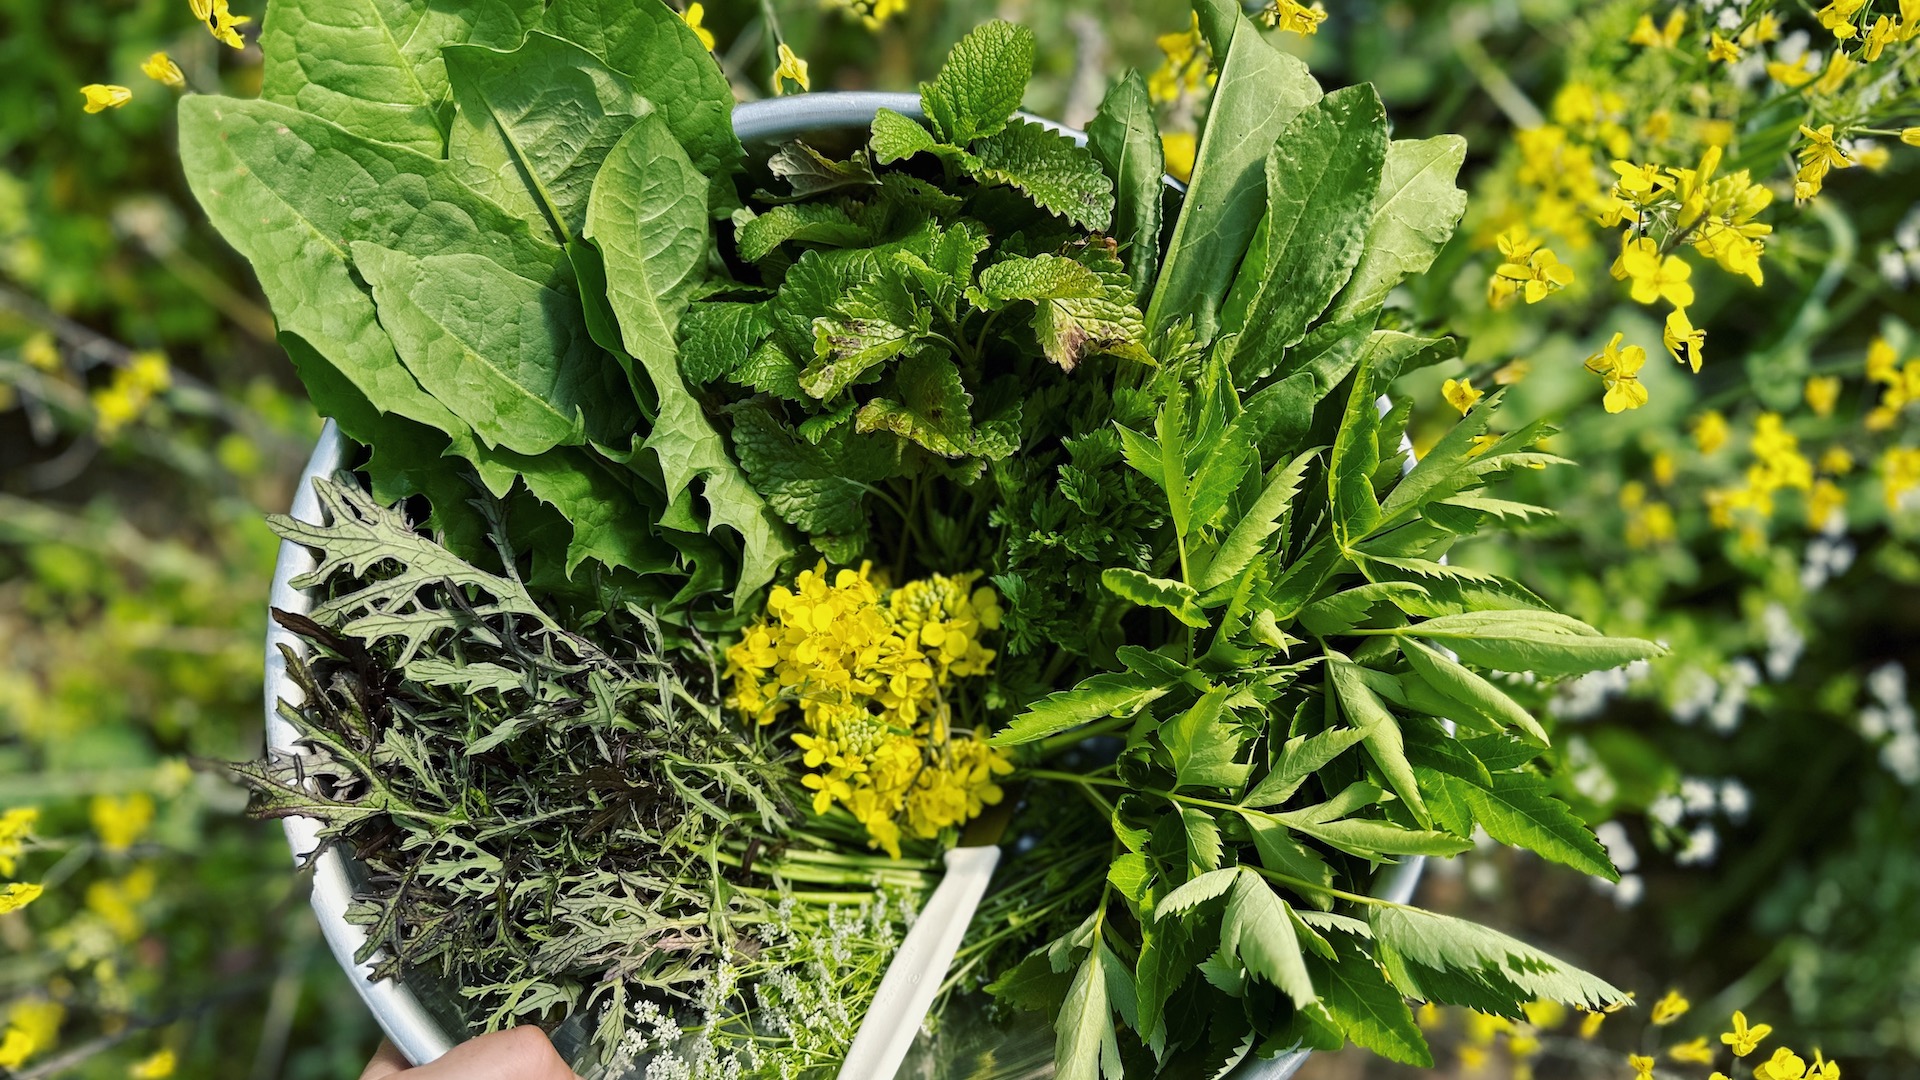
I first made herb jam following a recipe by the venerable Paula Wolfert, but have since come to see that it is less a recipe for one single, finite thing, but rather, a methodology, a scaffolding from which to create infinite iterations of herb jam, depending on the season, what’s in your fridge, and what flavors you’re desiring that day. Most versions I see online utilize familiar garden greens and herbs like spinach, parsley, and cilantro, which is the combination I began with, and is delicious, but I quickly realized that this is the perfect place to play with the forgotten flavors (and nutrition) of so manywild herbsthat are so often growing much more abundantly that spinach and parsley but get overlooked because we’re not sure what to do with them. This is what to do with them.
Ingredients
- 5 large cloves garlic, halved
- 1 lb. mild flavored cooking greens (spinach, chard, kale, wild spinach, spring dandelion, amaranth, chickweed, mache, etc.)
- 3 cups (lightly packed) tender, flavorful herbs, coursely chopped (parsley, cilantro, celery leaves, basil, carrot tops, sorrel, fennel fronds, nasturtium, chervil, tarragon, savory, mint, lemon balm, oxe-eye daisy greens, etc.)
- ⅓ cup extra-virgin olive oil, more for finishing
- 12 olives, pitted, chopped (black, green, or kalamata)
- 1½ tsp. smoked paprika, a pinch more for serving.
- ¼ tsp. cayenne
- ½ tsp. ground cumin
- Juice of ½ a large lemon for serving
- Salt to taste
Preparation
- Put the sliced garlic in the bottom of a large steamer basket over a pot of boiling water. If you don’t have a steaming basket, a large colander works fine. Pile all of your greens on top of the garlic, space may be tight but just pack them in, they’ll wilt quickly. Put the lid on and steam everything until everything is very tender and the garlic is soft enough to mash with a fork. About 20 minutes (make sure you’ve put enough water in your pot to boil this long without running dry).
- In a heavy bottom saucepan or skillet, over medium flame (with a flame-spreader if you have one), add half of your oil and heat until shimmering. Mash your garlic while you’re waiting for the oil to heat.
- Add mashed garlic, paprika, cumin, cayenne and olives, stirring to mix well over medium heat for about one minute, then add all of your greens.
- Lower heat just a touch to gently simmer until very soft, about 15 minutes, adding more oil if the pan goes dry. Use a large wooden spoon or spatula to mash everything to a soft paste. Taste as you go and salt or add more dry spices to taste. Keep in mind you’ll be finishing with a big squeeze of lemon, so if it seems like it needs acid, it does, but later.
- When you’re happy with the texture and the flavor, remove from heat and let cool. I love to leave it a little chunky, but sometimes there can be more stemmy bits than I want, in which case, I’ll put half of the cooled jam into the food processor for a few pulses and then stir it all back together.
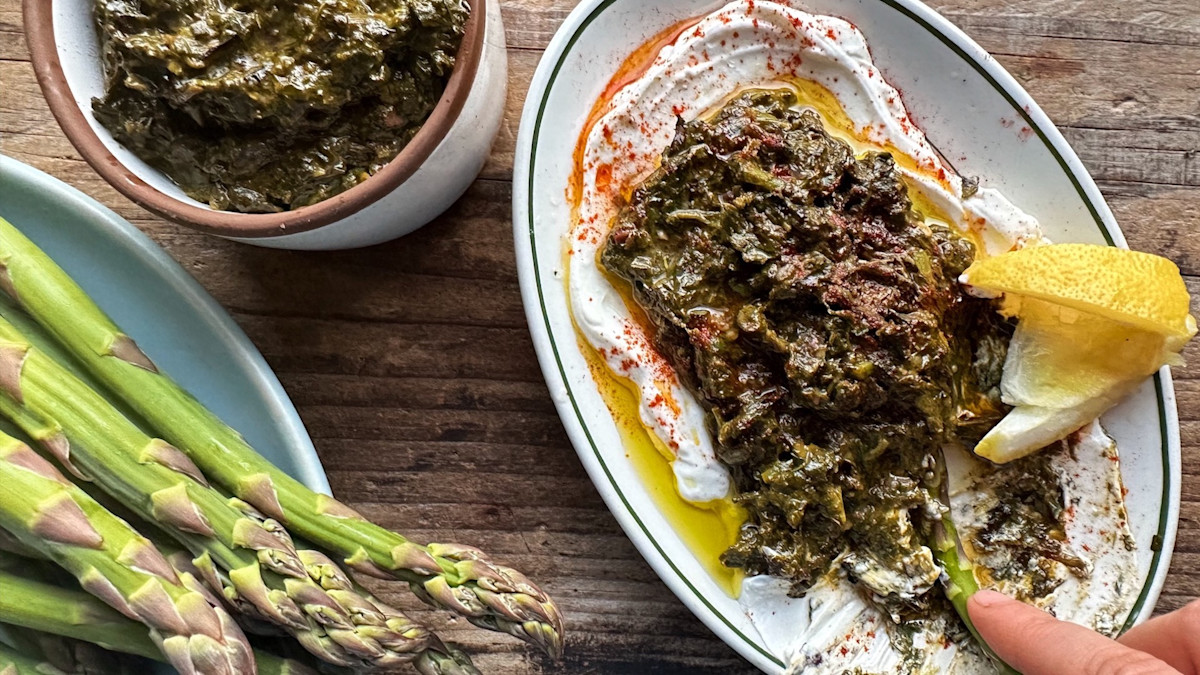
- You can eat immediately, but it really shines after at least a day in the fridge after all the flavors have married. Pack the cooled jam into a lidded container, pouring the rest of your oil over it before refrigerating. To serve, I like to spoon some out into a dish, on it’s own, or over a schmear of yogurt, labneh, or ricotta, then squeeze that half a lemon over, drizzle with a little oil, and dust with a little more paprika.
Shop
Sign In or Create a Free Account
Related

Recipes
Mulberry Jam
(0)

Recipes
Burger with Tomato Jam
(0)

Recipes
Clam and Lobster Stuffed Weakfish
(0)
Reviews
Wild Herb Jam
Prep time
15 minutes
Cook time
40 minutes
Course
Preserves
Skill level
Intermediate
Season
All Seasons
Serves
1 pint
The way I use herb jam in my kitchen, it could be considered a mother sauce. The stuff is so flavorful, nimble, and dependable that it naturally finds its way into countless meals from spring through fall.
Let go of your preconceived notions of jam—this is not that. This is savory, complex, and deeply green, somewhere in betweenpesto, tapenade, and saag. It’s so versatile, it can be enjoyed with crackers, crunchy vegetables, crusty bread with soft cheese, slathered onto sandwiches, stirred into pasta, or spooned over poultry or fish.
It’s a workhorse condiment, serving many functions, simultaneously. One, it uses things that need to get used, like the surplus of greens that I seem to always grow or buy too many of, and the bits of herbs on the verge of wilting in the fridge. Two, it helps me incorporate large quantities of a diverse array of greens into my diet without having to stare down heaping mounds of salad every night. Three, it’s forgiving—I’ve never made one I didn’t like, even though I make it a little differently every time, and therefore, four, it’s never boring.
I first made herb jam following a recipe by the venerable Paula Wolfert, but have since come to see that it is less a recipe for one single, finite thing, but rather, a methodology, a scaffolding from which to create infinite iterations of herb jam, depending on the season, what’s in your fridge, and what flavors you’re desiring that day. Most versions I see online utilize familiar garden greens and herbs like spinach, parsley, and cilantro, which is the combination I began with, and is delicious, but I quickly realized that this is the perfect place to play with the forgotten flavors (and nutrition) of so manywild herbsthat are so often growing much more abundantly that spinach and parsley but get overlooked because we’re not sure what to do with them. This is what to do with them.
Ingredients
- 5 large cloves garlic, halved
- 1 lb. mild flavored cooking greens (spinach, chard, kale, wild spinach, spring dandelion, amaranth, chickweed, mache, etc.)
- 3 cups (lightly packed) tender, flavorful herbs, coursely chopped (parsley, cilantro, celery leaves, basil, carrot tops, sorrel, fennel fronds, nasturtium, chervil, tarragon, savory, mint, lemon balm, oxe-eye daisy greens, etc.)
- ⅓ cup extra-virgin olive oil, more for finishing
- 12 olives, pitted, chopped (black, green, or kalamata)
- 1½ tsp. smoked paprika, a pinch more for serving.
- ¼ tsp. cayenne
- ½ tsp. ground cumin
- Juice of ½ a large lemon for serving
- Salt to taste
Preparation
- Put the sliced garlic in the bottom of a large steamer basket over a pot of boiling water. If you don’t have a steaming basket, a large colander works fine. Pile all of your greens on top of the garlic, space may be tight but just pack them in, they’ll wilt quickly. Put the lid on and steam everything until everything is very tender and the garlic is soft enough to mash with a fork. About 20 minutes (make sure you’ve put enough water in your pot to boil this long without running dry).
- In a heavy bottom saucepan or skillet, over medium flame (with a flame-spreader if you have one), add half of your oil and heat until shimmering. Mash your garlic while you’re waiting for the oil to heat.
- Add mashed garlic, paprika, cumin, cayenne and olives, stirring to mix well over medium heat for about one minute, then add all of your greens.
- Lower heat just a touch to gently simmer until very soft, about 15 minutes, adding more oil if the pan goes dry. Use a large wooden spoon or spatula to mash everything to a soft paste. Taste as you go and salt or add more dry spices to taste. Keep in mind you’ll be finishing with a big squeeze of lemon, so if it seems like it needs acid, it does, but later.
- When you’re happy with the texture and the flavor, remove from heat and let cool. I love to leave it a little chunky, but sometimes there can be more stemmy bits than I want, in which case, I’ll put half of the cooled jam into the food processor for a few pulses and then stir it all back together.
- You can eat immediately, but it really shines after at least a day in the fridge after all the flavors have married. Pack the cooled jam into a lidded container, pouring the rest of your oil over it before refrigerating. To serve, I like to spoon some out into a dish, on it’s own, or over a schmear of yogurt, labneh, or ricotta, then squeeze that half a lemon over, drizzle with a little oil, and dust with a little more paprika.