

Prep time
1 hour
Cook time
30 minutes
Course
Preserves
Skill level
Intermediate
Season
Summer
Serves
3 to 4 half-pint jars
The mulberry season comes and goes each summer, and the fruit itself doesn’t last long after harvest. Have you ever wondered why you never see mulberries at the grocery store? If you’ve ever handled mulberries, you’ll know how annoyingly delicate they are. It’s impossible to pick these purple-black fruit without crushing them and staining your hands for days. Also, mulberries don’t store well; the fresh fruit can deteriorate quickly. One way to enjoy this summer fruit longer is by making jam (or jelly or preserves).
The following recipe is for basic mulberry jam, except the cardamom, which I added to make the spread a bit more interesting—a nod to the popularity of mulberries in the Middle East. Add or skip the spice at your discretion. You can safely double the recipe below, but I will tell you that removing a pound of mulberry stems is tedious enough.
One last thought, don’t limit yourself to just breakfast and toast. One of my favorite ways to use jam and preserves is incorporating them into apan sauce. This mulberry jam is especially delicious with venison and duck: After searing meat, deglaze the pan with a bit of balsamic vinegar or red wine, add the jam to melt, and season to taste. Take off heat and stir in a pat or two of cold butter.
Ingredients
- 1 lb. mulberries
- 3 cups sugar
- ¼ cup lemon juice
- 1½ tbsp. pectin (powder)
- 1 tsp. ground cardamom
Also works with
Special equipment
Preparation
Scatter mulberries in a single layer in a rimmed cookie sheet and freeze until firm; they’ll be much easier to handle when frozen. Once frozen, snip off stems with kitchen shears or small pruners. Place trimmed mulberries in a heavy-bottomed, nonreactive saucepan and cook over medium heat. Mash with a potato masher to release juices. Then add pectin and lemon juice and bring to a boil for 1 minute.
Next, add sugar and boil for 3 minutes, stirring constantly to prevent the bottom from scorching. Be careful of skin contact and burning-hot sugar. Skim off foam. Once sugar is completely dissolved, take off heat. Stir in cardamom and set aside. Jam will thicken as it cools.
Remove lids from the canning jars and wash with soap and water. Allow to dry. Fit the basket/rack into canning pot and place glass jars, no lids, inside. Add enough water to completely submerge jars by at least 1 inch from the top. Bring water to a boil and sterilize jars for 10 minutes. (Canning jars should never sit directly onto the bottom of a pot, which can cause the glass to break from direct contact with heat.) Take out jars and allow to dry.
Use the jar funnel to ladle jam into the jars, leaving at least ½ inch of headspace. Wipe off the rims of jars, if messy, and screw on lids until just finger tight. Set the jam jars on top of the rack in boiling water, submerged by at least 1 inch of water above the lids. Process for 5 minutes. Then carefully lift the jars out of the water and place them on a towel or cooling rack. Leave them undisturbed for at least 14 hours.
As the jars cool, you will hear a pop sound, which means the jars have successfully sealed; there should be no give at the center of the lids when you push down on properly sealed jars. Those jars that have not sealed successfully after 14 hours will have to be eaten right away or re-processed using new lids. Canned jam should be shelf stable for at least 1 year.
Shop
Sign In or Create a Free Account
Related
Recipes
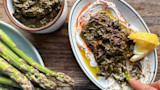
Wild Herb Jam
(1)
Recipes
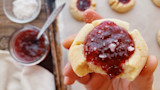
Rosehip Jam Thumbprint Cookies
(0)
Recipes
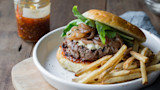
Burger with Tomato Jam
(0)
Reviews
Mulberry Jam
Prep time
1 hour
Cook time
30 minutes
Course
Preserves
Skill level
Intermediate
Season
Summer
Serves
3 to 4 half-pint jars
The mulberry season comes and goes each summer, and the fruit itself doesn’t last long after harvest. Have you ever wondered why you never see mulberries at the grocery store? If you’ve ever handled mulberries, you’ll know how annoyingly delicate they are. It’s impossible to pick these purple-black fruit without crushing them and staining your hands for days. Also, mulberries don’t store well; the fresh fruit can deteriorate quickly. One way to enjoy this summer fruit longer is by making jam (or jelly or preserves).
The following recipe is for basic mulberry jam, except the cardamom, which I added to make the spread a bit more interesting—a nod to the popularity of mulberries in the Middle East. Add or skip the spice at your discretion. You can safely double the recipe below, but I will tell you that removing a pound of mulberry stems is tedious enough.
One last thought, don’t limit yourself to just breakfast and toast. One of my favorite ways to use jam and preserves is incorporating them into apan sauce. This mulberry jam is especially delicious with venison and duck: After searing meat, deglaze the pan with a bit of balsamic vinegar or red wine, add the jam to melt, and season to taste. Take off heat and stir in a pat or two of cold butter.
Ingredients
- 1 lb. mulberries
- 3 cups sugar
- ¼ cup lemon juice
- 1½ tbsp. pectin (powder)
- 1 tsp. ground cardamom
Also works with
Special equipment
Preparation
Scatter mulberries in a single layer in a rimmed cookie sheet and freeze until firm; they’ll be much easier to handle when frozen. Once frozen, snip off stems with kitchen shears or small pruners. Place trimmed mulberries in a heavy-bottomed, nonreactive saucepan and cook over medium heat. Mash with a potato masher to release juices. Then add pectin and lemon juice and bring to a boil for 1 minute.
Next, add sugar and boil for 3 minutes, stirring constantly to prevent the bottom from scorching. Be careful of skin contact and burning-hot sugar. Skim off foam. Once sugar is completely dissolved, take off heat. Stir in cardamom and set aside. Jam will thicken as it cools.
Remove lids from the canning jars and wash with soap and water. Allow to dry. Fit the basket/rack into canning pot and place glass jars, no lids, inside. Add enough water to completely submerge jars by at least 1 inch from the top. Bring water to a boil and sterilize jars for 10 minutes. (Canning jars should never sit directly onto the bottom of a pot, which can cause the glass to break from direct contact with heat.) Take out jars and allow to dry.
Use the jar funnel to ladle jam into the jars, leaving at least ½ inch of headspace. Wipe off the rims of jars, if messy, and screw on lids until just finger tight. Set the jam jars on top of the rack in boiling water, submerged by at least 1 inch of water above the lids. Process for 5 minutes. Then carefully lift the jars out of the water and place them on a towel or cooling rack. Leave them undisturbed for at least 14 hours.
As the jars cool, you will hear a pop sound, which means the jars have successfully sealed; there should be no give at the center of the lids when you push down on properly sealed jars. Those jars that have not sealed successfully after 14 hours will have to be eaten right away or re-processed using new lids. Canned jam should be shelf stable for at least 1 year.