How to Grow Oyster Mushrooms
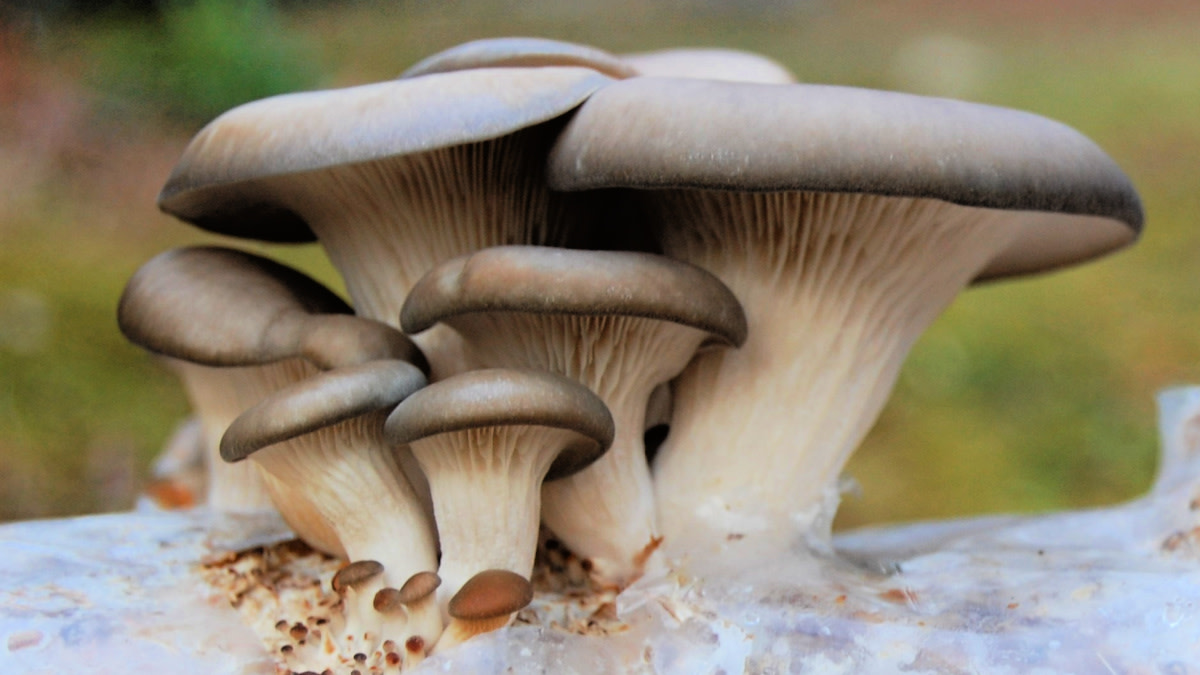

Oyster mushrooms (Pleurotus spp.) grow wild in both tropical and temperate forests all over the globe. They have likely been foraged by many cultures throughout history, but they were first intentionally cultivated by German soldiers who grew them on stumps in the forest during World War I.
In nature, oyster mushrooms grow on dead and dying hardwood trees. Their mycelium, which is similar to a root system, breaks down the wood and begins the process of converting it back into soil.Oyster mushroomsare packed with nutrients and flavor, so if you don’t find them when they’re fresh, you will likely be sharing at least some portion of your quarry with insects, slugs, and other woodland critters. If you don’t like the idea of eating a mushroom that a beetle just crawled out of, or maybe you don’t have access to a wooded place to search for wild mushrooms, growing them at home is a rewarding and fruitful alternative.
MaterialsTo grow oyster mushrooms at home, you essentially need three items: a container to grow them in, a growing medium, and oyster mushroom spawn. Our preferred containers are cylindrical plastic grow bags which you can purchase online, but any water-tight container will work if it’s free of contamination. When it comes to the growing medium, oyster mushrooms have very aggressive and adaptable mycelium, which can grow on almost any dead plant material.
We’ve successfully grown them on rehydrated wood stove pellets, straw, wild grasses, and most recently, we grew a batch on ground-up dry corn stalks from our garden. The final and most crucial element is the oyster mushroom spawn. This can be produced at home using advanced techniques, but we choose to purchase ours online for a very reasonable price.
Inoculating Growing MediumOyster mushroom mycelium is very aggressive and can outcompete many other fungi, but it’s best practice to pasteurize your growing medium in a hot water bath. This process destroys the mold and mushroom spores naturally present in straw and sawdust, and it gives the oyster mushroom spawn a leg up when you add it to the growing medium. It’s essentially like weeding your garden beds before planting vegetable seeds. We typically heat our growing medium to 160 degrees Farenheit in a large pot for an hour or so and then let it drain and cool completely before sprinkling in the mushroom spawn and stuffing it tightly into the grow bag.
Spawn RunOnce you pack everything into the container, the mycelium needs time to fully colonize the growing medium. Mycelium requires oxygen to survive, so you will want to cut holes in the container about every 6 inches to allow your fungus to breathe as it works its way through. High humidity is critical at this stage, so I recommend placing your growing container inside a large plastic bin with a lid and opening it daily to refresh the air.
After a few days, you will see white fuzz forming throughout the container; this is the oyster mushroom mycelium getting to work. If you see little patches of green or other colors growing in your medium, these are likely molds that made it through the pasteurization process. If this happens, it’s not the end of the world because the oyster mushroom mycelium will sense it as a competitor, surround it, and prevent it from spreading further. After about a month, you’ll notice that the growing medium has become almost entirely white and formed into a solid block. At this point the oyster mushroom mycelium has fully colonized the growing medium and it has nowhere else to grow so it will transition into the fruiting phase.
FruitingIf you have mild weather (50 to 70°F) and relatively high humidity, you can simply place your growing container outside and allow the mushrooms to fruit naturally. In our case, the winter is too harsh, so we built a fruiting chamber in our basement. Our “fruiting chamber” is essentially a metal rack covered in thick gauge plastic sheeting with a humidifier running at the base to keep the mushrooms from drying out and a grow light at the top to provide artificial sunlight.
After a few days outside or in a fruiting chamber, you will notice tiny white bumps forming around the air holes you previously cut in the growing container. These bumps are called mushroom “pins” and they will eventually grow into clusters of mushrooms. At this stage, it’s critical that you don’t let them dry out. If you don’t have a humidifier or you are using a different type of fruiting chamber, I recommend misting them with water a few times daily while they are in this stage. Once the mushroom caps are about the size of a pencil eraser, they are a little bit more resilient and less likely to dry up if left alone for a day. Many oyster mushroom species double in size every 24 hours at the peak of their growth, so once you get to the pencil eraser stage, it won’t be long before you have something sizable to harvest.
HarvestingOyster mushrooms are perfectly edible at any growth stage so when you pick them is up to you. When the caps are about the size of a quarter, they are very tender and you can almost crumble them up for different dishes that call for really delicate mushrooms (enoki, for example). If you harvest them that young, you will sacrifice some yield, however. We like to let them grow until the caps are just starting to curl up and flatten out to maximize the quality and quantity of the harvest.
The first “flush” of mushrooms is generally the biggest one, but if you keep the humidity consistent you can expect to harvest about three or four more flushes after that. Each one will be a less substantial harvest than the last. Freshly picked oyster mushrooms can last in a refrigerator for about a week. If you’d like to store them for longer than a week, they can bedehydratedor cooked andfrozen.
If you’re feeling a little intimidated by the process outlined above, note that oyster mushrooms are one of the most aggressive edible fungi on Earth. They want to live and they’re good at it. While there are a lot of steps and several things to keep in mind for best results, growing oyster mushrooms is actually a pretty forgiving process and you’re likely to have success even if everything doesn’t go as planned. Remember that in the forest, oyster mushrooms are tasked with breaking down and composting wood, so when your mushroom blocks are spent, throw them in yourcompost pileor bury them in your garden beds to put them to work feeding your vegetables for the following season.
Shop


Sign In or Create a Free Account
Related
Gardening
How to Grow Shiitake Mushrooms
Gardening
How to Grow Lion’s Mane Mushrooms