How to Save Seeds From Your Garden


“Let your food be your medicine,” I proudly remarked as I poured black bean seeds into a weekly pill organizer. My wife rolled her eyes and then popped the container into our refrigerator’s crisper drawer.
We’ve been storing seeds like this for years, and in some cases, we’re even starting to develop our own varieties of beans through selection. If you’re a home gardener, there are a number of reasons to start saving your own seeds; it’s not nearly as complicated as you might think.
The primary reason we save our own seed is to develop varieties that thrive in our garden’s specific micro-climate. By simply saving seeds from plants with favorable traits and discarding seeds from plants with unfavorable traits, you can start to develop your own heirloom varieties in just a few seasons. We’ve been saving seeds from our sweetest and biggest pumpkins every year for four years, and now reliably get pumpkins with enough flesh to last us through the entire winter (even from a small patch).
Another important reason to save seeds is to maintain the genetic diversity of our global seed stock. If we rely only on seed companies to maintain heirloom varieties, we could easily lose them if they go out of style or if producers have a series of crop failures. You might remember the “out of stock” labels plastered across every major seed company website in the spring of 2020. Home vegetable gardening is all about self-sufficiency, and this might be the last element of your garden that relies on an external supply chain.
Before we get into the specific crops, there are a few categories of seeds that necessitate definition. The first category is “heirloom” or “open-pollinated” seeds—these are the seeds that you want to save because they breed true, meaning that the offspring will strongly resemble the parents.
The next category of seeds are “hybrids,” which are nothing more than two open-pollinated varieties crossed to select for specific traits from each of the parents. Hybrid seeds should be avoided for seed saving because the second generation that they produce shuffles the deck of traits and often results in a variety that is nothing like the parents. Hybrid seeds are always marked either “hybrid” or “F1.”
The final category of seeds are genetically modified organisms, or GMO seeds. GMO seeds are the product of crop scientists using advanced laboratory techniques to splice genes with specific attributes directly into crop DNA. Many GMO seed varieties are actually the patented property of the companies that developed them, making saving seed from them legally prohibited. Now, that might make you want to save them even more, but the reality is that GMO seeds are primarily produced for the commercial market and a home gardener is unlikely to come into contact with them.
Now that we’ve established that heirloom or open-pollinated varieties are the best option to save from, it’s time to choose some crops to get started. Some seeds are more complicated to save than others, so I put together the following list of beginner-friendly vegetables.

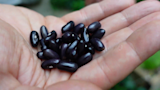
BeansDry beans are the easiest crop from which to save seeds because the food itself is the seed that you save. You can easily reserve seed from green beans by simply letting some of the pods mature and dry out on the plant. Once the beans are hard enough that you can no longer make an imprint on them with your fingernail, they are ready to store. Beanscancross-pollinate, when pollen from another variety of bean pollinates the flower, but they generally pollinate themselves so long as you put distance between different varieties. With just a little space, you can expect them to breed true to the parent plant.
PeasSimilar to green beans, the process for saving pea seeds involves simply allowing them to mature and dry on the plant. The hardest part of saving seeds like this is fighting the urge to eat them when they’re fresh! When your peas are rock hard and slightly shriveled, they are ready to store. Like beans, peas generally self-pollinate, so spreading out your varieties by a few feet should be enough to isolate them.
Winter Squash and PumpkinThis is a fun one. If you grew winter squash or pumpkins last season, there’s a good chance you still have one in storage and it’s filled with viable seeds that can grow this year. When we save winter squash or pumpkin seeds, we typically rinse them off in clean water and then rest them on a paper towel until they are bone dry.
When it comes to isolating varieties, squash and pumpkin are insect pollinated so they are much more likely to cross-pollinate with other varieties. If you want to increase the likelihood that you’re isolating squash varieties, you should avoid planting different varieties in the same section of your garden. We only grow one variety of winter squash that we have been saving seed from for years—it grows so well in our garden now that we have no need for any other types.
TomatoesTomatoes are the first crop on this list that require no sacrifice of edible parts to save seed. In fact, you’re probably discarding thousands of ripe tomato seeds every time you cook them. Here’s how you save tomato seeds: Simply squeeze out the seeds and pulp from the biggest, ripest tomato on the plant, rinse them in clean water, and dry them out on a paper towel like the winter squash seeds. Tomatoes are self-pollinating so they’re not likely to cross-pollinate. Thus, you can grow multiple varieties side by side and confidently save seeds from them.
Peppers and ChilisPeppers and chilis are very simple to save seeds because they’re self-pollinating and the seeds break away easily from the fruit when mature. But it’s important to remember that capsaicin, the chemical that makes peppers spicy, is most highly concentrated in the seeds and pith. If you’re going to be handling a lot of these, avoid touching your eyes or using the bathroom for some time afterwards (speaking from experience).
Keep in mind that peppers are typically red, yellow, or orange when they’re ripe and the seeds won’t be viable until that point. If you want to save seeds from a jalapeño, make sure to let the fruit ripen all the way to its bright red form on the plant before collecting the seeds. Then simply lay the pepper seeds out on a paper towel and let them get bone dry.
Storing SeedsOnce your seeds feel hard and dry to the touch, they are ready for long-term storage. The ideal conditions for storing seeds are essentially the opposite of the conditions you would want to grow seeds: cool temperatures, low moisture, and low light. As I mentioned earlier, we store our seeds in plastic pill organizers in our refrigerator. Any plastic or glass container that keeps out moisture (and pests) is ideal for long-term storage. If you’re looking to store seeds for only a year or two, a paper envelope at room temperature will work fine as long as you keep it dry.
The final step in saving your own heirloom seed (and most fun part) is coming up with names. I’m partial towards descriptive names like “Big Chunky Flesh Orange Squash,” but some other names tell a story like “Carolina Princess Pumpkin.” We selected that name for big, round, Cinderella-style pumpkins from seeds my mother-in-law sent us.
It’s important to note that you don’t need to save seeds from every variety you want to grow every year. If you store the seeds of the five crops mentioned above in ideal conditions, they can remain viable for about five years. The way I look at it, I have a bank of seeds stored for each variety, and when they start to get low, I save seeds the next season to replenish them. They’re truly the gift that keeps on giving.
Shop


Sign In or Create a Free Account
Related
Gardening
Video: How to Save Seeds from Your Garden

Gardening
How to Prepare Your Garden's Harvest for Winter Storage
