As the summer heat gives way to crisp fall air in much of the country, the average vegetable garden is starting to fade in its brilliance. Our vibrant green rows of tomatoes are now sad, brown, and drooping with the last fruit of the season. Winter squash vines that once threatened to tear down garden fences are shrinking under the burden of powdery mildew. It might feel like your days of eating homegrown meals from your garden are numbered, but with a little bit of know-how and preparation, this couldn’t be further from the truth.
Before the world had refrigerated trucks lugging out-of-season vegetables to grocery stores thousands of miles from where they were grown, people in temperate climates made do all year with the vegetables produced during their growing season. To preserve these perishable vegetables throughout the winter, our ancestors developed methods of slowing down the decomposition process. Some of our favorite foods around the world were born this way, like pickles, kimchi, and sun-dried tomatoes. As I’ll outline below, we can learn a lot from these old ways and use the same techniques to eat homegrown meals all winter long.
How to Cure Vegetables Use this method with potatoes, sweet potatoes, winter squash, dry beans, dry corn, onions, and garlic.
The most basic form of preserving vegetables is curing. There is very little work involved because the applicable vegetables for this process were specifically bred to store for long periods of time. The most important step in the curing process is to ensure that your vegetables are fully ripe and have been given enough time to develop a tough outer skin before putting them in storage.
What we call “winter squash” is essentially just the fully ripe version of summer squash. Summer squash has a shelf life of less than a week unrefrigerated, but winter squash can last for months or years at room temperature due to its thick mature skin. Cured winter vegetables will last for relatively long periods of time in most conditions, but they will last the longest in a cool, humid environment with very little natural light. Basements and insulated garages are excellent for storing cured vegetables because they act very much like the root cellars of yesteryear.
How to Store Vegetables in Moist Sand Use this method with carrots, beets, and other root vegetables.
Root vegetables have a naturally long shelf-life because in order for this type of plant to produce seeds, they need to preserve the energy stored in the root to flower in the spring. Technically these vegetables can be left in the ground and harvested throughout the winter, but that risks losing them to predation from hungry critters or damage from heavy freezes.
To simulate that in-ground environment inside your basement or garage, you can stack the harvested root vegetables in buckets with layers of clean, moist sand, making sure to cover them completely. This ensures they are safe from predation and protected from extreme weather. If they’re left out on a shelf without the protection of moist sand, root vegetables will become shriveled and soft.
How to Dehydrate Produce Use this method with tomatoes, peppers, mushrooms, and most fruit.
Two of the primary perpetrators of what we call “rotting” are bacteria and fungi. These organisms colonize vegetables and break them down as they propagate their population, but like all forms of life they require water to survive. Before we even knew what bacteria and fungi were, people knew that removing water from their food prevented it from rotting. For soft-bodied fruits that can’t be stored for long periods of time, dehydration is the most effective method of preserving them at room temperature.
Depending on your environment this can be as easy as slicing your tomatoes and leaving them on a sheet pan in the sun for a day or two. For others, an electric food dehydrator or oven will do the trick. After dehydrating your produce it’s important to seal it in an airtight container to prevent moisture from reentering the flesh. In this state, you can store dehydrated produce indefinitely.
How to Can Produce Use this method with tomatoes, peppers, and most fruit.
As mentioned above, bacteria and fungi are the primary decomposers of produce. Restricting their access to water can stop them in their tracks. How then are we also able to preserve vegetables in water like canned tomatoes and peppers? The trick to this method is restricting another essential element to their survival: oxygen.
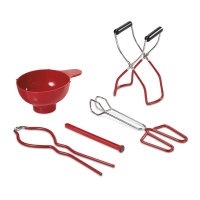
The process of canning vegetables in glass canning jars seals them off from the outside world and prevents oxygen from entering the container, suffocating most of the organisms that break down our vegetables. While it’s true that some bacteria can survive without oxygen (including the dreaded Clostridium botulinum bacteria which causes botulism), these can be eradicated by intense heat achieved by a pressure canner. For those without a pressure canner, water bath canning is a safe and effective method of preserving produce with a high enough natural acid content, as well as produce that is adequately acidified by the addition of citric acid, vinegar, or lemon juice. If you are new to canning, you should consult an experienced canner or follow guidelines on the USDA’s National Center for Home Food Preservation website to avoid making rookie mistakes.
How to Ferment Vegetables Use this method with cabbage, radishes, carrots, peppers, and cucumbers.
As opposed to the previous two preservation methods that seek to fight bacterial growth, fermentation uses beneficial bacteria to our advantage. Fermentation is often referred to as “controlled rot” because this process allows safe Lactobacillus bacteria to break down our vegetables in such a way that it creates an acidic environment that other bacteria and fungi find uninhabitable. Lactobacillus are naturally present on untreated produce, so in order to ferment homegrown foods you essentially just need to create an environment that the bacteria can thrive in. Luckily for us, Lactobacillus tolerate salt well while harmful bacteria generally don’t, making it easy to encourage the good growth and stifle the bad by putting produce into a brine that is 2 to 5% salt by weight.
Our go-to method for fermenting cabbage is to chop it up relatively small, coat it in salt to draw out moisture, and then press it into a glass jar, squeezing out liquid until it covers the top of the vegetables. Then we cover the top of the jar with a towel or coffee filter to keep insects out and let it ferment until it tastes sour enough for our liking. Make sure to keep the vegetables covered in water throughout the entire fermentation process to prevent fungi and unwanted bacteria from colonizing them.
How to Pickle Vegetables Use this method with radishes, beets, carrots, cucumbers, peppers, okra, and squash.
The process of preserving vegetables by pickling is very similar to that of fermentation except in this case, the acid is coming from the addition of vinegar rather than the digestive action of bacteria. Pickling is great for folks who aren’t too keen on the funky flavor of fermented vegetables but love the tangy crunch of pickles. Because the acidity of vinegar is so high, the environment inside your pickle jar is inhospitable to the bacteria and fungi and therefore they can be stored for very long periods of time in the refrigerator or even canned in your pantry, but make sure to follow a recipe specifically tested for canning.
How to Blanch and Freeze Vegetables Use this method with greens, green beans, broccoli, sweet corn, and peas.
The final and perhaps most well-known method of preserving the harvest is freezing. Keeping produce at temperatures below 32 degrees Fahrenheit doesn’t kill fungi and bacteria, but it does prevent them from spreading throughout your food over time as they would in warmer temperatures. Enzymes that occur naturally in vegetables and initiate decomposition will also be slowed down, but not stopped, by freezing. However, you can destroy these enzymes by briefly submerging your vegetables in boiling water. This is why blanching vegetables before putting them in the freezer will give them a better taste and texture when you pull them out to eat later.
For greens, roughly chop several bunches at once and put them in a pot of boiling water for at least 30 seconds, then put them into a bowl of cold water to stop the cooking process. Then, scoop serving-sized portions with your hands and squeeze as much water out as possible before placing them on a cookie sheet in the freezer. After they are frozen solid, put them in plastic bags and remove all air, which prevents freezer burn and allows you to take out exactly how many servings you’d like without trying to chisel them off of a giant green block.
If you’ve been spoiled by delicious homegrown produce over the past few months and you’re dreading the transition back to anemic, commercially produced vegetables from the grocery store, give some of these methods a try and see if you can’t extend your homegrown meals even further into the winter!


Conversation