How to Grow Microgreens


Microgreens are most often found in high-end restaurants and culinary publications. They have become synonymous with extravagance and “style-over-substance” cooking, but in reality they are dirt cheap to produce at home and an excellent way to inject fresh homegrown produce into your diet.
I’ve also heard the criticism that they’re wasteful because they use so many seeds for a relatively minor harvest. Generally I would agree with that sentiment, but as is the case with most home gardeners, we have an ever-growingpile of seedsthat weren’t used in previous seasons which would likely go to waste if not used growing microgreens over the winter. If you find yourself similarly drowning in old seeds or you really need some fresh homegrown greens to kick the winter blues, read on and learn how to grow your very own microgreens.
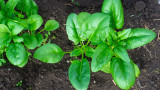
Types of MicrogreensClassic microgreens are usually mild brassicas like kale and cabbage consisting of nothing but a stem and the first two leaves that emerge from the seed, called cotyledons. These are some of the most visually appealing microgreens, but there are several others that offer different textures and flavors.
If you’re fiending for the aroma offreshly-picked herbs in winter months, basil and cilantro microgreens will help take the edge off. To maximize their herby flavor, let your basil and cilantro form at least one “true leaf,” the first leaves to grow after the cotyledons. Peas can be grown as microgreens and unlike most other varieties, can even be harvested a second time by leaving a half inch of stem when cutting to regrow. They have a nice crunch and a mild pea flavor. Sunflower seeds are very cheap and easy to grow and the shoots provide a unique nutty taste and texture. Other great options are mustard greens,radishes, onions, and rainbow chard.
Basic SetupYour microgreen set-up can be as complicated or simple as you want it to be. We like to spread out a one-inch layer of potting soil in a 21x10 inch seedling tray and then liberally spread our seeds on the surface, pressing them down to increase soil-to-seed contact. First moisten your potting soil so it holds together when squeezed, but remains fluffy. If it drips any water when squeezed, it’s too wet. The amount of seed you will use varies greatly depending on seed size. Microgreens can be spaced much more tightly than other seedlings since you harvest them so quickly, but you should still provide a little bit of space in between seeds so they don’t have to compete for soil and light.
To germinate the seeds, cover your tray with a wet towel and place it in the warmest spot in your house. We like to sit them on top of our radiator. After a few days the seeds will begin sprouting and at this point you should immediately move the tray under a grow light or into a sunny window. Keep a spray bottle on hand and check them for dryness a few times a day. Your microgreens should not be constantly dripping with water, but the soil should always be moist. The time from seeding your tray to harvest can be as short as a week so for gardeners who are used to nurturing tomatoes for months before tasting their fruit, it will seem like the blink of an eye.
Potential IssuesMicrogreens are more or less foolproof, but there are a few things to keep in mind for best results. As I mentioned above, microgreens are prone to drying out so you’ll want to check them regularly and add water as needed. Conversely, if you are hovering over your newborn tray and spritzing it with water every 15 minutes, you risk creating an environment that fungal diseases can thrive in. The happy-medium is a tray with moist potting soil and sprouts that are free of water droplets.
The only other thing to keep in mind is the amount of light that your microgreens are receiving. Low light levels will not technically ruin your microgreen crop, but they will result in pale, underdeveloped sprouts with long stems and tiny leaves. If you don’t have a sunny window that gets at least six hours of light per day, you will want to supplement with a full spectrum grow light for best results. Grow lights are becoming more and more affordable and you can find them at most hardware stores.
Harvesting and StorageOnce your microgreens have reached your desired size, you can harvest them by simply pinching the leaves in your fingers and cutting the base of the stem with a pair of scissors. For many of us who have cut our own hair over the last two years, this will be a very familiar process. Microgreens are best eaten fresh right off the tray, but they can store in a refrigerator for around a week. They make a great topping fortacos, sandwiches,steak, or anything in need of a pop of freshness. And just like that you can turn your home kitchen into a five star restaurant.
Shop


Sign In or Create a Free Account
Related
Gardening
How to Grow Spinach

Gardening
How to Grow Oyster Mushrooms
