How to Grow Ginger

When I was a kid, any time my sisters and I came down with a stomach bug, my mother ran to the store for a bottle of ginger ale. Though it looked like any other soft drink in a green plastic container, we were taking part in a tradition of plant medicine that dates back over 5,000 years.
Gingerols, the active compounds in ginger, have been used for millennia to treat nausea, motion sickness, and other gastrointestinal ailments. For those of us who might sometimes be skeptical of traditional medicine, clinical studies have confirmed that ginger is highly effective in treating nausea, and in one study it even outperformed Dramamine at preventing seasickness. Beyond its medicinal properties, ginger is an excellent aromatic spice and welcome addition tostir-fries, hot sauces, andfried rice.
The exact origins of ginger are currently unknown, but it was likely first cultivated by Chinese and Indian farmers before being traded around the globe and finding new fertile ground wherever it landed. Although it is typically thought of as a tropical plant that can only be grown around the equator, with a little coaxing from a green thumb, ginger can be grown in much of North America. If you follow the principles outlined below, you can even grow your ginger right in your own backyard.
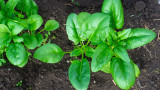
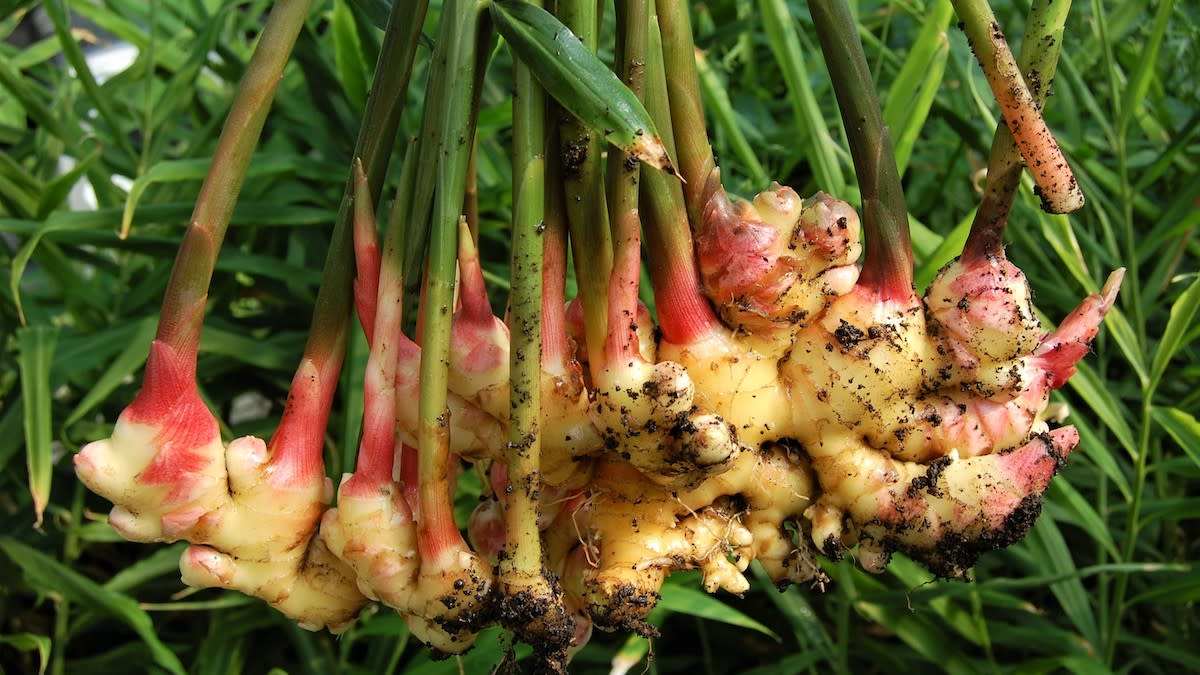
Growing ConditionsGinger grows as a rhizome, which means the blocky root-like clumps grow just beneath the soil with leafy growth sprouting out of their top and roots reaching down from their bottom. As it grows it spreads out laterally in all directions and produces more rhizomes (the part of the plant that we use). Similar to growing garlic or potatoes, when you are first growing ginger you want to start with a certified seed ginger from a reputable supplier (I recommendHawaii Clean Seed). Ginger from the grocery store is often sprayed with growth inhibitors to prevent it from sprouting on the shelf and it can also carry diseases that could wipe out your crop mid-season.
Once you have your certified seed ginger you can sprout it inside by laying it flat on a tray of potting soil, covering it about 1-inch deep, and keeping it evenly moist for 4 to 6 weeks. In areas with a shorter growing season, sprout your ginger inside and keep it in a sunny window or under a grow light until the outside low temperatures are above 55 degrees. In warmer growing zones you can sprout your ginger directly in your garden or sprout it inside and immediately transplant it.
Once you are ready to transplant your ginger into its permanent growing bed the name of the game is organic matter. Ginger likes to grow in incredibly rich and well-drained soil, so working in lots ofcompostand organic matter to your garden beds is critical. Ginger also likes high nitrogen fertilizer so a monthly application of fish emulsion or well-composted manure will result in larger rhizomes. A good organic slow-release fertilizer will also work well. As your ginger grows, the rhizomes may begin to push through the soil surface in which case you should either hill up some soil to cover them or add an additional layer of compost.
As for water conditions, ginger wants to be consistently moist but not drowning in water. The rich compost-filled soil will help retain moisture and drain well to prevent puddles of water from hanging around the plant. If you are in a dry environment, this soil type is prone to drying out so you will need to water it regularly if you are not getting at least an inch of rain per week.
Pests and DiseaseIn certain areas, caterpillars will attack the green leafy growth on ginger. However, the older the plant gets, the more defense compounds it produces to naturally repel these insects. If the caterpillars become a big problem and you are noticing a large loss of leafy growth, an application of BT (Bacillus thuringiensis) will take care of them. This is an organic pesticide that specifically targets caterpillars, so is relatively safe to use around other beneficial insects.
If you are growing certified seed ginger from a reputable supplier, diseases shouldn’t be much of an issue. On the other hand, if you are attempting to grow ginger that you purchased at a grocery store you may experience bacterial wilt or fusarium wilt which will eventually lead to a crop failure.
Harvest and StorageIn northern growing zones, you will want to harvest your ginger as “new ginger” right before the first frost. As opposed to the fully mature tan-skinned ginger that we see in the store, new ginger has pink and yellow skin and has a much less fibrous texture. In southern growing zones with a longer season, your ginger will likely have time to form a mature root which can be harvested as needed; just make sure to harvest everything if the temperatures dip down and you are going to get a frost. Homegrown ginger also comes with a bonus harvest of ginger leaves which can be dried out and made into a tea or juiced for a mild-ginger beverage.
If you harvest your ginger as new ginger, remember that it is not fully mature and it will not store well on the shelf. It should be refrigerated or frozen for long-term storage. Another option for long-term storage is to slice thin and pickle your ginger or dehydrate it and grind it into ginger powder.
Whether you are growing it for your medicine cabinet, your spice cabinet, or both, ginger is worthy of a spot in your vegetable garden and I encourage you to give it a try.
Shop


Sign In or Create a Free Account
Related

Gardening
How to Grow Watermelon

Gardening
How to Grow Carrots