How to Make Deer Tallow Soap

One of the greatest feelings after a successful hunting season is the satisfaction of providing for yourself and your loved ones. Anticipating all the delicious meals ahead, where the star of the table is something you acquired with your own hard work, makes all those chilly days in the stand or blind worthwhile. While there have been great strides in highlighting the versatility of venison and expanding our palate beyond just the backstrap and the grind pile, venison tallow still has a bad reputation andmany hunters discard it.
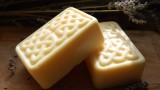
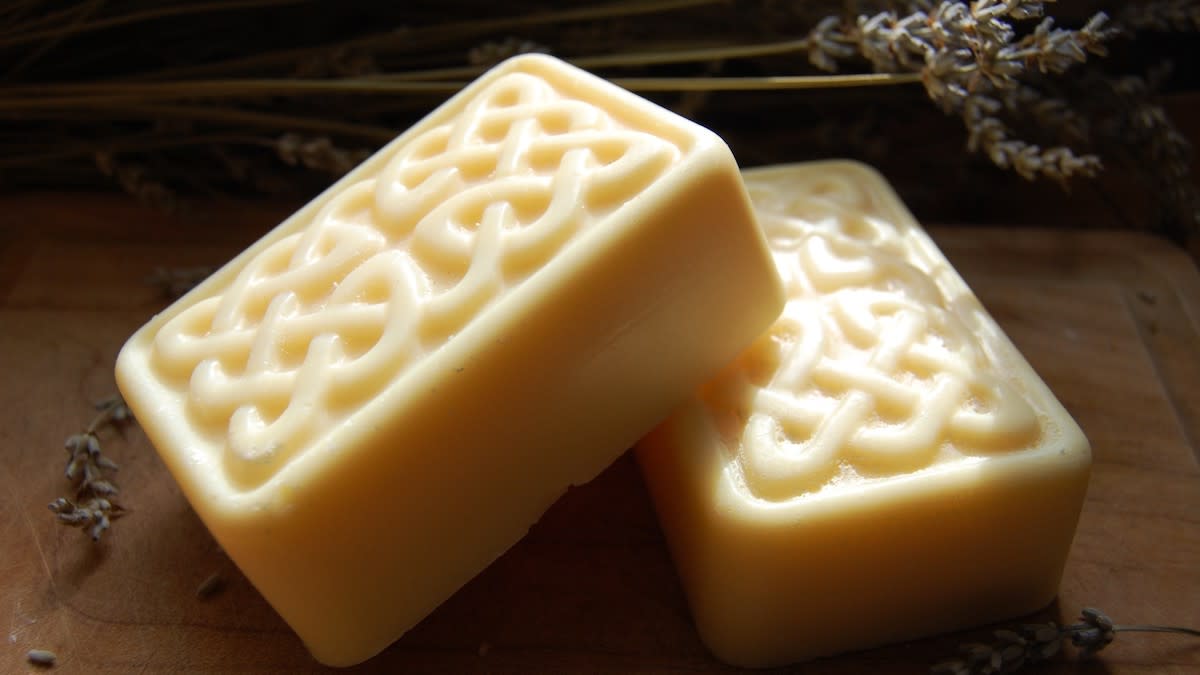
While my family thinks venison tallow also deserves a place on the dinner table, there are other ways to use it and get closer tousing every part of the animal. Our favorite is venison tallow soap, an easy process that gives us the majority of the soap we need for the year. Tallow is an excellent fat for soap, resulting in a hard, long-lasting bar that generates a nice lather that is gentle but very effective at cleaning. Many people with skin conditions like eczema swear by tallow soap. And as you’ll see, making soap from tallow is really not that hard.
How to Harvest TallowThis part is simple, though it does require some elbow grease (if you will). Deer are pretty lean animals, especially compared to farm-raised pigs or cows, but there is usually enough fat to make it worth your while.
Last year we killed a doe with enough tallow to make soap for the whole year. We also got a young buck with hardly any fat at all that probably wouldn’t have made it through winter. The variation between animals is considerable.
Thetallow is easily identifiableas the thick white substance coating the internal organs as well as various other deposits throughout the body. You can usually be pull it off by hand with a strong grip. The smaller sections that you remove from your various butcher cuts can also be rendered and used. You want to work quickly to remove the fat and put it in the fridge or freezer because deer tallow has a high percentage of omega-3 fatty acids, which go rancid quickly when exposed to oxygen at warm temperatures.
Rendering TallowOnce you've collected all the tallow, you want torender itto get rid of any pieces of meat and filter it into a neutral, shelf-stable state. There are a couple of methods of rendering out tallow from your venison fat, but for the purpose of making soap, wet rendering results in a much cleaner finished product.
To wet render, first chop the tallow into small pieces right out of the freezer or fridge and add to a slow cooker with several cups of water and some salt.
After a couple hours, the tallow will have melted completely and risen to the top of the water where you can skim out any large chunks of meat. Let it cool until it hardens into a solid disk. Take this disk out of the water and flip it over. The underside will likely be brown and flecked with small pieces of meat and dirt. Scrape this off to discard and you are left with a solid block of relatively clean tallow.
Purifying and Infusing TallowRendering once is usually good enough for tallow to use in cooking. However, unless you relish smelling slightly like a deer (though that might be a benefit during hunting season), you’ll want to purify it more. To do so, repeat the rendering process above by reheating the tallow water until it melts. Then, recool it and scrape off any sediment at the bottom of the block of tallow until it is pure white and odorless.
If you’d like to infuse your tallow with some scent without using essential oils, you can add dry herbs during the last round of rendering. Take care to strain them out when you pour your tallow into a bowl. We’ve added dried lavender flowers to ours with good results. Otherwise, you can add essential oils during the soapmaking process or leave the tallow unscented.
Weighing Your IngredientsMeasure out your ingredients ahead of time to make the process go smoothly. While there are various recipes available for tallow soap, the easiest thing to do is use an online soap calculator like soapcalc so you can tailor the recipe to the exact amount of tallow you have. You will need a kitchen scale to weigh your finished tallow, and after plugging that into the calculator it will tell you how much lye and water to use.
One thing that keeps people from getting into soap making is a hesitance to use lye or sodium hydroxide. Lye is an extremely alkaline and caustic substance that can cause burns if it gets on your skin in a form that's too concentrated. That being said, there's no reason to be scared of using lye if you take proper safety precautions, which include wearing safety goggles and nitrile gloves when handling it. Add it to your mixture outside so that any harmful fumes have adequate ventilation. Always add lye flakes to your liquid, not the other way around, which can cause the lye to bubble up dangerously. A helpful saying to remember this is: “the snow falls on the lake.”
Making the SoapNow that you have all of your ingredients prepared, thesoap-making processis fairly simple. Here are the steps:
Melt your tallow in a slow cooker or double boiler until it reaches 100°F (use a frying or candy thermometer to check this).
Take your water and lye outside and add the lye to the water in a heat-safe, non-reactive container, being sure to wear gloves and eye protection. As you stir gently, you will feel the solution heat up as the lye reacts with the water. It may also cause some fumes which is why doing it outside or in a well-ventilated place is important.
Let the lye solution cool for 10 minutes. After 10 minutes, check that your tallow is still at 100°F and pour the lye solution into the tallow.
Now you mix the tallow and lye solution, which is where the saponification chemical reaction happens, creating soap. This will go much faster if you use an immersion blender. As you blend, you’re looking for the mixture to reach a state called “trace.” The mixture lightens in color and thickens until you can see the path of the immersion blender (or a spoon) as you move it through the mixture. Getting to this pudding-like texture can take several minutes.
Now that your soap is done, there are two options for getting it ready to use: hot processing or cold processing. In cold processing, you pour the soap into a mold and wrap with towels to cool slowly over 24 hours. You can then cut it into bars, but you have to leave it to cure on a rack for four weeks before using. If you decide to cold process and want to add fragrance to your soap using essential oils, mix these into the soap before pouring it into your mold. Or, if you’d like to be able to use your soap sooner, go on to the next step for hot processing.
In hot processing, you reheat the soap mixture gently over about an hour until the consistency turns glossy and waxy, similar to Vaseline. If you hot process, you should wait until the soap is ready to pour into the mold before adding any fragrance because the heating will cause the scent to dissipate. The reheating allows the lye and fats to react faster, resulting in a usable bar of soap after only a week of curing rather than a month.
We’ve found that our deer tallow soap lasts much longer than storebought bars, providing a rich lather and pleasant scent from the lavender with no deer smell. From the tallow harvested off of two deer, we’ve made enough soap to last us the year and give away to family. It’s a great way toutilize a part of the animal that might otherwise be wasted. We think you’ll find that once you start the rewarding process of making tallow soap, it’s hard to stop!
Shop
Sign In or Create a Free Account
Related
Homesteading
How to Transform Tallow into a Soothing Skin Salve

Cooking Techniques
How to Make the Perfect Fried Rice