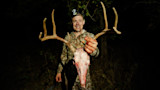
Ask MeatEater: How Do You Make a Skull Mount?

For thousands of years, hunters have been mounting antlers, horns and all manner of animal skulls on their walls to celebrate the memory of a successful hunt. For many hunters, that requires a trip to thetaxidermist. At MeatEater, we appreciate shoulder and full body mounts but for displaying trophies in our homes, a lot of us prefer making our own European skull mounts, or “freedom mounts,” asSteven Rinellalikes to call them.
Since we get so many questions about the process of making a skull mount, we thought we’d share how to do it. Just as butchering and processing your own game meat is very personal and satisfying, making your own skull mount also creates a deeper connection to the hunt.
From a practical standpoint, skull mounting will also save you time, money and space. There’s no need to meticulously cape out an animal’s head, neck and shoulders and pack the entire thing out of the woods. You can make your own skull mount in a couple days but it will likely take weeks or months for a taxidermist to finish one. Since good taxidermy isn’t cheap, the money you save making your own skull mount can go a long ways towards funding a new rifle or an out-of-state hunting trip. When it’s time to display your trophy, a skull mount can be put in convenient places, unlike a bulky shoulder mount. You can hang it on the wall, place it on the bookshelf or set it on your desk.
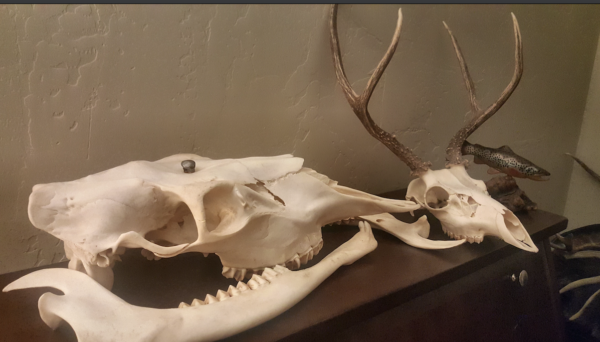
Plus, any skull mount is a really cool totem, even if it’s not from an animal with giant antlers. A small spike whitetail buck or bobcat skull makes for a great mount. We’ve done it with everything from javelina and cow elk to wild turkey and beaver. Even some fish skulls look incredible and make for great conversation pieces.
How to Skin an Animal Skull
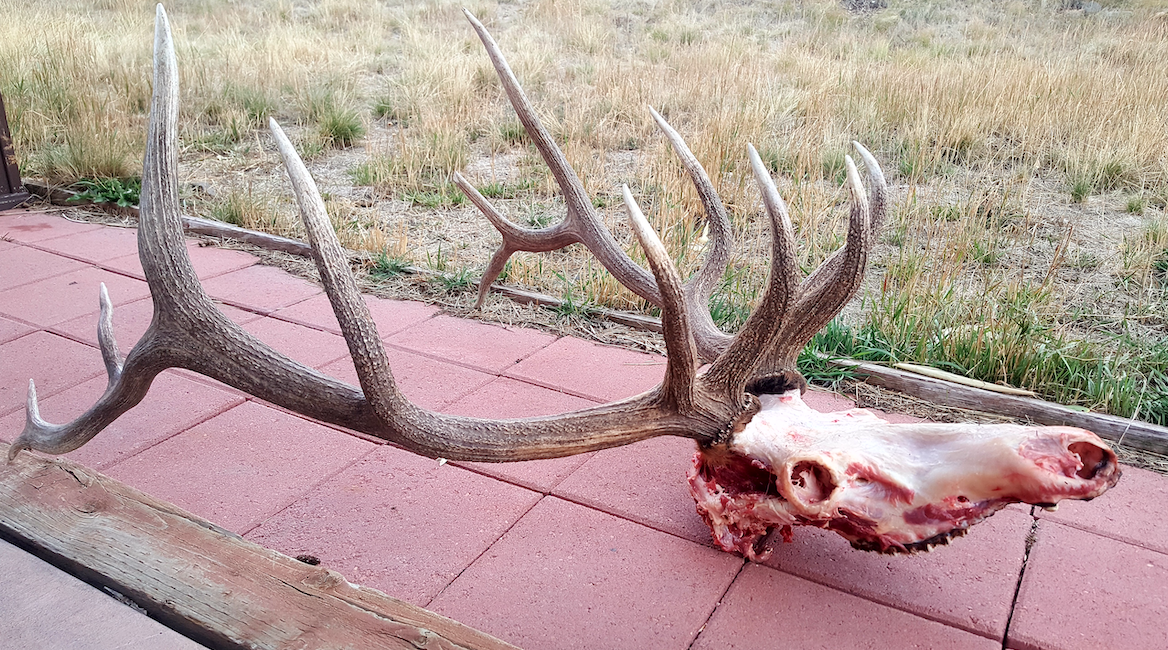
Before skinning the head, you need to remove it by sawing through the spine directly below the base of the skull. You can also use a knife to cut through the meat and tendons in the upper neck that connects the top of the spine to the base of the skull. After that, it’s easy to separate the skull from the neck.
You may want to skin the head in the woods as part of the field dressing process. If you have a long pack out, you’ll shed a lot of weight by doing this. Also, the hide comes off the skull easily if it’s skinned shortly after death. If you wait until you get home to deal with the head, don’t put off skinning for too long. In warm weather it’ll start to rot. Additionally, the hide will be much tougher to remove if the head dries out too much. You can store a skull in the freezer for months skinned or with the hide left on.
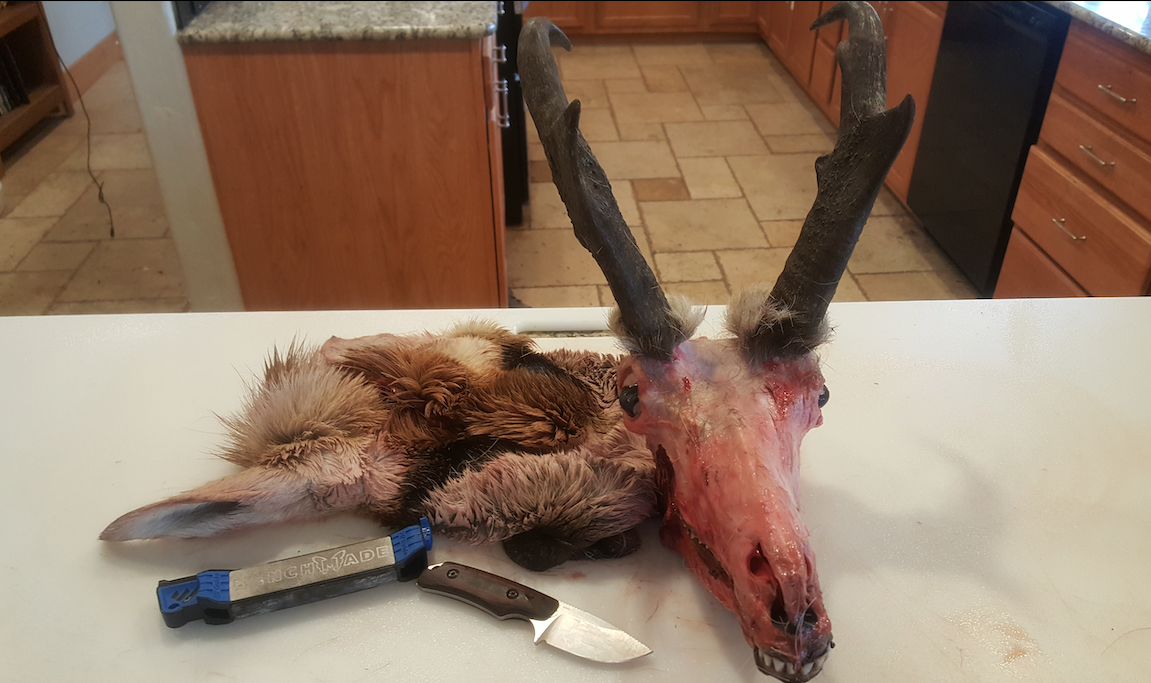
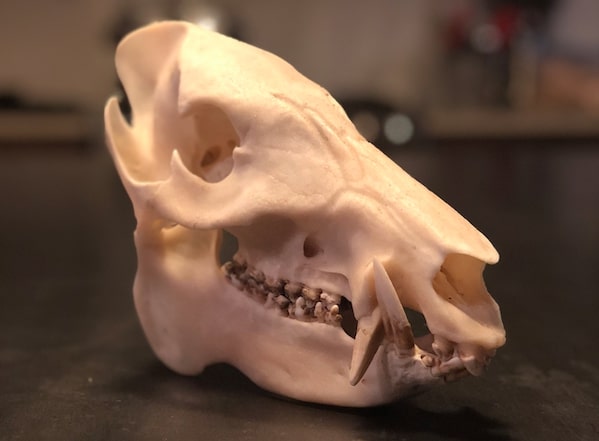
Skinning a skull is no different than skinning any other part of the animal. Start on top with a length-wise incision through the hide from the base of the skull to the tip of the nose.Skin the hide down and away from the skull and around the eye socket on both sides of the skull.
The hardest part is the top of the skull around the antler pedicles where the hide is tough and thick. A flathead screwdriver will help you pry it loose.
When you’re working around the ears, cut through the meat under the hide and through the base of the ear canal to free up the ear and hide in one piece.
When you reach the lower jaw, skin that as well. You’re going to want to remove the lower jaw, and skinning makes that easier.Then cut through the muscles where the underside of the jaw and neck meet. Also cut through the muscles where the jaw hinges behind the eye socket. Those muscles are higher and further back than you think and they are filled with lots of tough tendons.
Once you’ve cut through those muscles and loosened the lower jaw, you can remove it by slowly forcing the mouth open and pushing the lower jaw down and away from the upper jaw until it separates from the skull. It will take some effort and will require some additional cutting.
The skulls of antlered and horned game are typically displayed without the lower jaw, but you’ll want to keep it from animals like beavers, wild pigs, bears and predators to show off their teeth.If you are going use the lower jaw as part of your skull mount, it’s unnecessary to separate it from the skull before boiling. It’s easy to pull it off after the boiling process is complete. You can wire the lower jaw to the skull when it’s ready for display.
You should also remove the eyes before boiling the skull. This isn’t easy or quick, but it will save you time later. Work a sharp knife around the inside circumference of the eye socket, loosening the eyeball until you can reach in to pull and lift the eyeball out of the socket by its base. Cut it free from the eye socket by severing the optic nerve.
How to Boil a Deer Skull
You’ll hear a lot of people say theyboil skulls to clean them. I say it myself. The fact of the matter is, if the water is actually “boiling,” it’s way too hot. You want just the slightest simmer with only occasional bubbles rising here and there. If you allow the water to get too hot for too long, there’s a good chance you’ll ruin your mount before you have a chance to hang it up. Teeth will fall out and the skull will split where the bone plates are fused together. You can fix some of this later with a little super glue but it’s best just avoid it altogether by simmering and checking often.
If you’re working with small game, small predators, birds or even young big game animals, the process is the same but keep in mind that these skulls can be very fragile. Handle with care and don’t overcook them or the whole damn thing may fall apart. Also,if you’re going to do your own skull mount with a horned animal like antelope, goat or sheep, there are some additional steps that should be taken with the horns. We’ll address that process in a later tutorial.
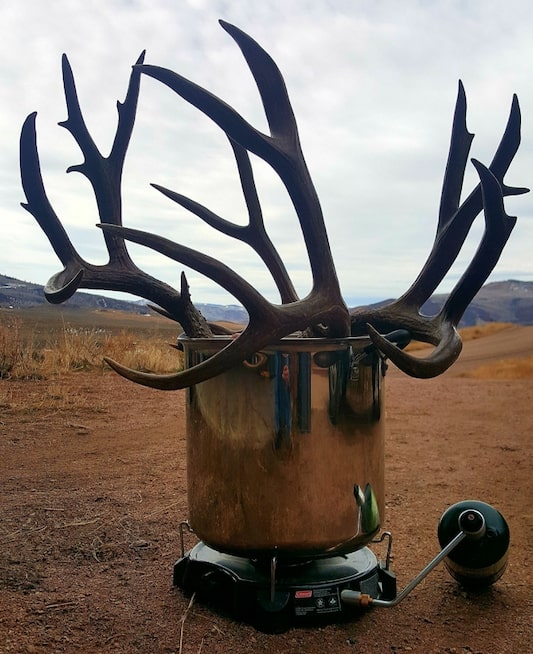
You’ll want to work outside or in a garage. Boiling skulls put out some strong odors that can linger, so avoid the temptation of the kitchenstovetop.
The size of your cooking vessel will depend on the size of the skull you’re boiling. You could use a sauce pan for small skulls or a big stockpot for deer. For elk and moose, you’ll need something bigger like a metal tub or feed trough.
First, add some sort of degreaser to the water. This will clean the bone and help loosen up fat and meat during the cooking process. Dawn dish soap works great.
Do not add bleach! Some people do this thinking they’ll get a whiter skull, but bleach will cause skulls to become brittle, crack and fall apart.
Now add the skull and heat up the water.A single propane burner works well for this. The kind that attach to small propane canisters are ideal.
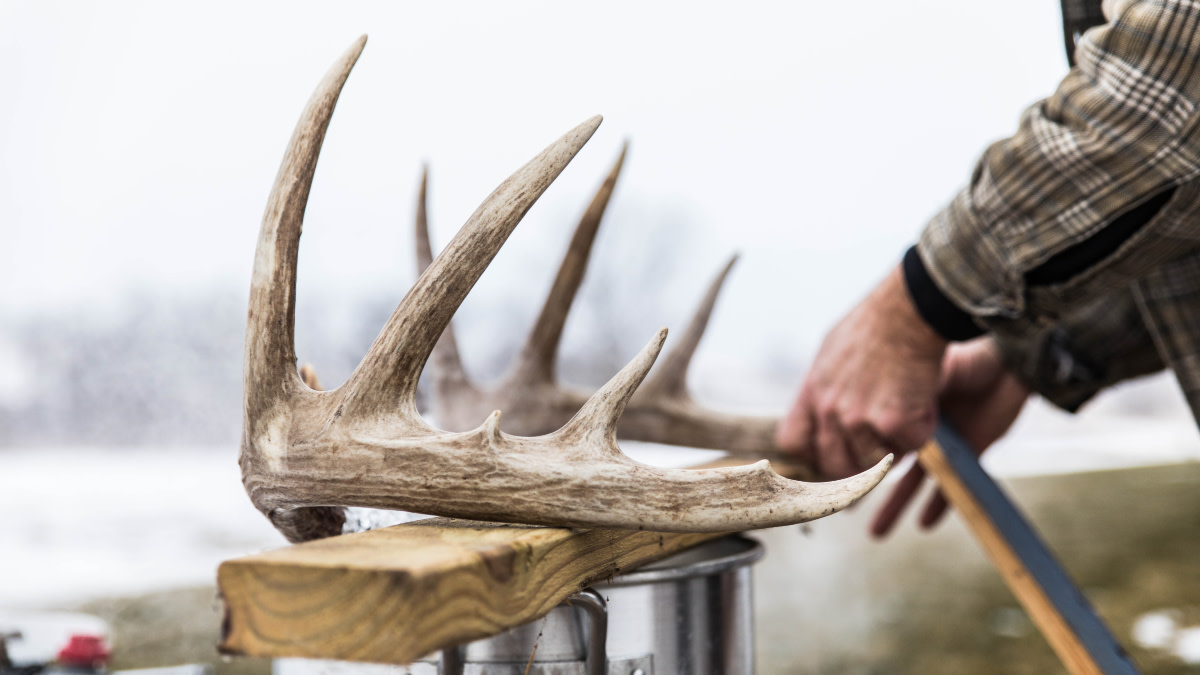
If you’re boiling a skull that has antlers, wrap the first few inches up from the base of the antler in tinfoil or plastic wrap and tape it off. This will help prevent hot water from discoloring the antler. Try to keep the antlers out of the water as much as possible. Use just enough water to cover the top of the skull.
Cook the skull until the meat begins to fall away from the bone. It’s very difficult to pull the meat and fat away from the skull if it doesn’t cook long enough. But, if you cook the skull too long, you’ll run into the same problems you’d have if you let the water boil.
The simmering time will vary depending on a lot of factors. Small and young animals will take less time than large or old ones. Start with two hours for big game skulls. If it needs to cook longer, check the skull every 15 minutes. Allow it to cool for 15 minutes before the cleaning process.
Cleaning a Deer Skull
Some do-it-yourself skull mounters will use a pressure washer instead of hand cleaning. This can work well on large, heavy skulls from moose or bison, but it can also destroy thin, fragile skulls unless the pressure is set very low. For example, I tried it on an antelope buck skull and broke the nose bones and some teeth right off the skull. It’s not something I’ll try again.
Remove every last piece of meat, tendon, cartilage and fat that’s left clinging to the skull after boiling. It is a messy, tedious job so you may want to wear rubber gloves.
The bigger chunks of meat should pull off easily but you’ll need to work to get rid of the smaller stuff that’s lingering in all the cracks and crevices. A small knife and a pair of needle-nose pliers will come in handy. Be meticulous, especially around the back and base of the skull, inside the eye socket and around the teeth.
Now you need to clean out the nasal cavity. Inside you’ll see a couple long, white pieces of cartilage and dark brown layers of nasal tissue as well as the paper-thin, interior nasal bones.You should be able to wiggle the cartilage free with a pair of pliers. A flathead screwdriver works well to loosen up the nasal tissue so it can be pulled out.
Some people try to keep the thin interior nasal bones intact. However, these bones are very fragile and it’s much easier to just remove them altogether. You can break them free easily with your pliers and screwdriver. This makes cleaning the whole nasal cavity out a lot easier.Use a garden hose or faucet to wash out any tissue that’s left inside the nasal cavity.
Now you need to get rid of the brain. First, get a piece of coat hanger wire or a long, thin screwdriver and stick it in the hole where the spinal cord enters the skull. Swirl it around inside the cranium to break up the brain.
Next, stick a garden hose or faucet in or against that hole and wash the brain matter out of the cranium with a strong flow of water. It will come out in chunks and it may take several tries to get it all out.There will be a thick, dark membrane left inside. Use a screwdriver or needle-nose pliers to pull it out.
Rinse the skull and let it dry for a while and then go back and get rid of anything you missed. You want pure bone and nothing else.
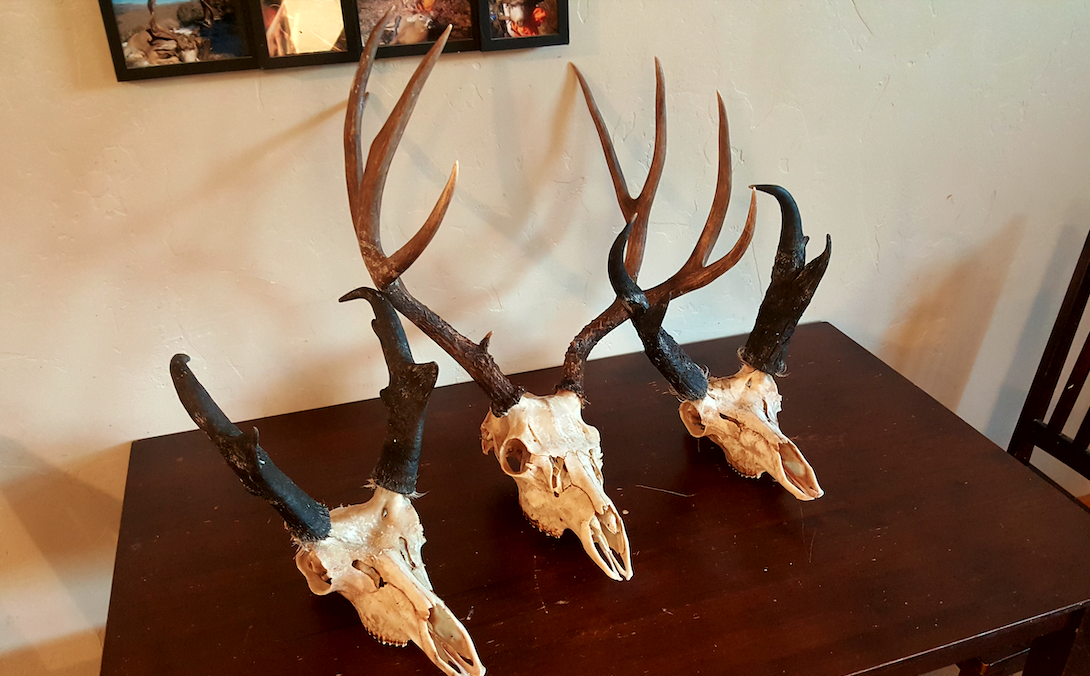
Whitening the Skull
Your skull mount isn’t done until it’s been whitened. If you skip this step, you’ll be left with a skull that’s a sickly, pale yellow color. I’ve tried a bunch of different ways to whiten skulls. Bleach, as I mentioned earlier, is a very bad choice. You can buy powders that you mix with water and brush onto the skull. They don’t do much other than coat the skull with white powder and do a poor job of actually whitening the bone.
Hydrogen peroxide is the way to go. The liquid stuff in your medicine cabinet is a very weak solution so you want to get the high-test40v hydrogen peroxide gel.It’s powerful stuff that’ll peel your skin so wear rubber gloves while you’re using it.
Some folks will mix the hydrogen peroxide gel with baking soda or some other powdered whitening agent. I’ve found it doesn’t help to make skulls any whiter and as the powder dries up into a crust, it flakes off the skull, taking the hydrogen peroxide gel with it.
Use a small paintbrush or soft plastic barbecue brush to generously coat the skull with hydrogen peroxide gel. Take the time get a healthy amount into every nook and cranny.The gel clings to the skull pretty well so I’ll do a first pass, let it sit for while to set up, then come back to hit any spots I missed.
Hydrogen peroxide does an even better job of whitening if your skull is left out in bright sunlight. If sunlight isn’t an option, don’t let it sit in the dark; leave it under artificial light.
You want to leave the gel on the skull for at least a couple days to get the full whitening effect. After rinsing, if you think the skull could be brighter, give it another coat of gel and repeat the process.
Displaying/Mounting Your Skull
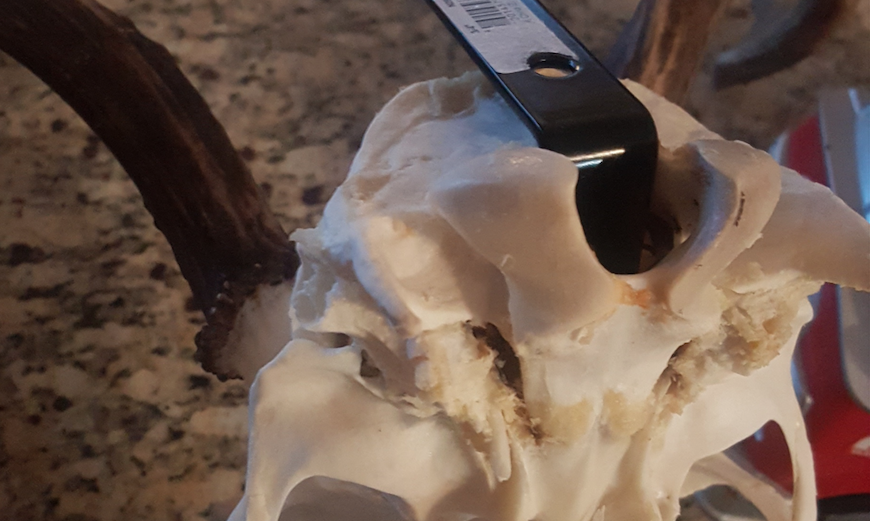
The real beauty of skulls mounts is that you don’t need a bunch of space to display them. You can buy commercial wall mounting kits that are easy to install. Some of them are inexpensive, simple and can’t be seen, while others are so big and garish they distract from the natural beauty of a skull. You can also make your own wall mounting kit with a few simple pieces of hardware.
For deer-sized or smaller mounts, all you need is an elbow bracket and a couple screws. Heavier skulls will require more serious support and stabilization for wall mounting.
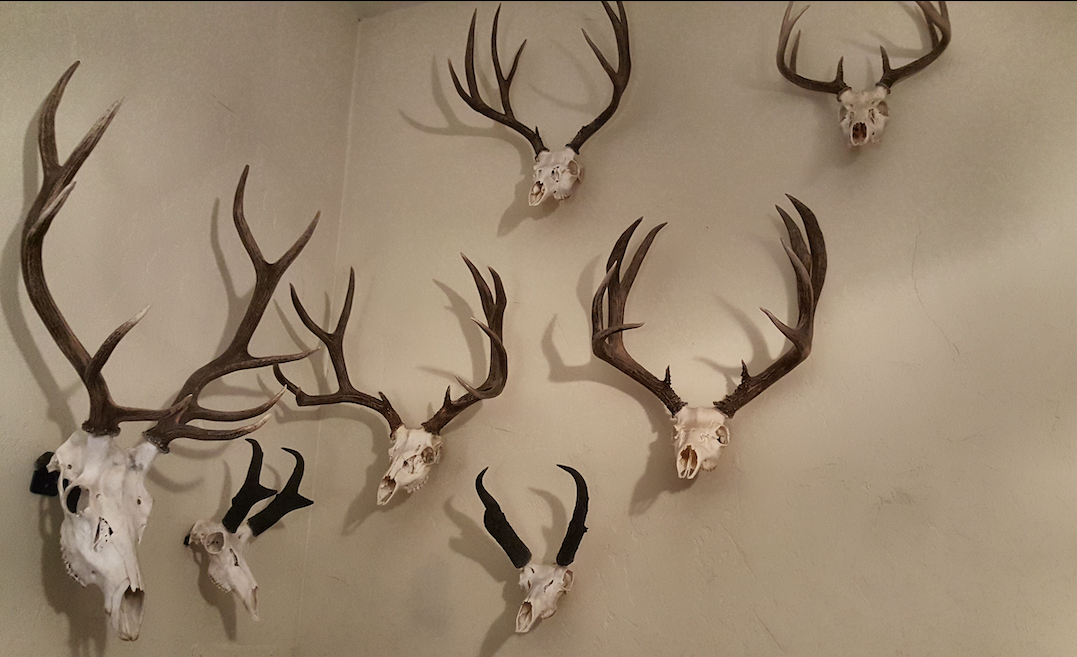
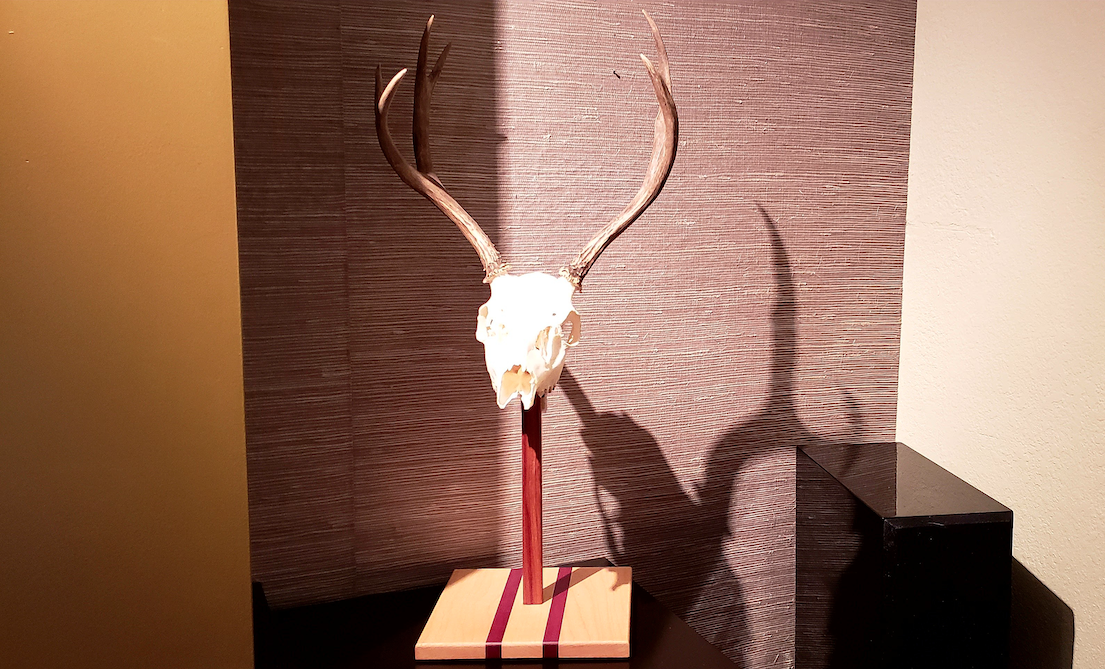
You can also skip the wall mounting process altogether. A friend of mine makes his own wooden pedestal style mounts that can be placed anywhere. I’ve got my Colorado Shiras cow moose skull resting on my work desk. A beaver skull that used to live on my bookshelf now resides in my son’s collection of feathers, teeth, bones and other natural oddities. Meanwhile, I can easily rotate the skulls on my wall each year as I add more mounts to my collection.
I do enjoy taxidermy that features hide, fur or feathers. Wood ducks rarely appear in western Colorado, so when I shot a beautiful drake years ago I paid to have it mounted. Taxidermy is always the first thing that catches my eye when I step into an old country bar or a sporting goods store. For my own trophies though, it’s hard to beat the raw, individual beauty of each new skull mount I make myself.
Feature image viaCaptured Creative.
Shop
Sign In or Create a Free Account
Related

Hunting
Ask MeatEater: How Do You Make a Skull Mount?
Hunt
3 Common Mistakes Hunters Make with Euro Mounts


