Photos: How to Build a Mobile Chicken Coop

With folks taking such interest in becoming more self-sufficient and getting in touch with where their food comes from, raising chickens has become a popular hobby. Whether for meat, eggs, or both, chickens provide an excellent source of protein—and never mind the fact that befriending the little dinosaurs is actually quite addicting.
The barrier ofentry to chicken farmingis surprisingly inexpensive, as it can be done on as small or large a scale as you wish. In this breakdown, we’ll check out a great way to build your own “tractor-style” coop that’ll have you chirping on the cheap. The tractor method allows someone with a smaller yard space to move the coop around, offering a fresh feeding ground for your birds as often as is required. Starting with a sketch always helps, and I always recruit my young son for that job.

Tools and Materials-Drill/drill bits -Skill saw -Oscillating saw -Hammer -Tape measure -Handheld bolt cutters or fencing cutters -3” screws -⅝” screws -1 sheet corrugated plastic -3, 5 gallon buckets -8 2x2x10’ pressure treated -2 galvanized hinges -1 galvanized locking latch -2 rolls 24” galvanized welded wire at 25’ long -Feeder and waterer -1 lb. box of ¾”x14-gauge poultry wire staples
 1. Cut Framing Lumber to LengthFor this coop, I made it 6’ in length, 44” wide, with a height of 21”. This height gives you just enough extra room to attach the welded wire with staples. Cut four, 6’ runners for the top and bottom along the length of the frame, seven, 44” pieces for crossmembers, and six studs for attaching the upper and lower frames together.
The length and width can house 3 to 4 full-grown egg layers comfortably. The height is dictated by the 24” welded wire that wraps the perimeter. I use welded wire over chicken wire because it is much stronger and can better withstand the prying claws of racoons and other predators.
 2. Assemble Framing MaterialThis is most easily accomplished by building the top and bottom frames in their entirety, and then fastening the two together. Be sure to pre-drill all frame connection points to prevent splitting the wood with the 3” screws.
Once the perimeter frames are constructed, add in the crossmembers. Crossmembers on the top frame should be installed 2’ from each end so your welded wire will easily overlap and fasten onto them with staples. With the lower perimeter frame complete, install one crossmember, centered in the frame.

 3. Install Welded WireInstall welded wire across ⅔ of the top frame while it lays on the ground to prevent any damage from hammering on it before the structural integrity is sufficient. Use the ¾” poultry wire staples, fastening every 5” wherever the wire contacts wood (around the perimeter and across the 2 crossmembers in the middle).
The easiest way to install the wire is to stretch out the roll with plenty of extra stretched out so it can be flattened to the framing as well as straightened out to stay centered on the wood. Put a couple staples on each side and then go back around adding them in every 5”. This will make it simple to keep the wire straight. Once you’ve got the wire stapled down, cut the remainder of the roll loose from the stapled panel.

 4. Assemble CoopWith the wire stapled down to two sections of your top frame, it’s time to complete the assembly of the structure. Fasten studs at each corner and the center of the bottom frame and flip it over so the studs are pointing upward. Now place the upper frame (wire side up) onto the studs and fasten the upper frame.
 5. Staple Wire to SidesStretch the wire all the way down the side, adding staples every couple feet to hold it straight and secure. With it run completely down the side and straightened nicely, staple every 5” around the perimeter, as well as to the stud support. Continue adding wire to the front in the same manner, then flip structure onto its other side stapling to that side as well as the rear.

 6. Install DoorThe opening in the top will house the door for egg and food/water access. Construct the frame for this door so that it fits the opening in the top, with ⅜” of room to spare. If it fits too snug it won’t open easily. This door frame will sit flush in the door opening, and be attached by hinges to the crossmember. In order to keep the door from falling into the opening, attach small diagonals to the bottom of the upper frame near the end to act as catches. With the door frame securely hinged and resting on the diagonals, install the locking catch.
 7. Build a RoofCut a 48” piece of the corrugated plastic to serve as a roof and attach it to the door section. Chickens require a dry, shady spot to retreat to, and this will serve perfectly. Metal can be used here, but plastic is much lighter, and less likely to cut you or your children while tending to your birds. Fasten the plastic to the door frame, not the perimeter of the structure, using ⅝” screws.
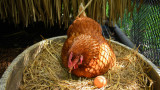
 8. Install Nesting BoxesGrab the buckets and remove the handles. Mark and cut a “U” shape into the sides of the buckets. Fasten them to the lower framing portion inside the door area with the cutout facing inward, using the ⅝” screws. These will be excellent nesting boxes once filled with some pine shavings, and will allow for easy egg retrieval when the time comes.
 9. Build RoostYou also must give your new critters a nice roosting spot. While they can roost on the edge of the bucket nesting boxes, a secondary location in a sunny spot is always nice. Cut a 50” 2x2 in half lengthwise. This will slide right into the welded wire openings from one side through the other. Add a ⅝” screw to each of the ends that hang out, and sink it in only about half way. These will keep the birds from accidentally knocking down their new roosting station.
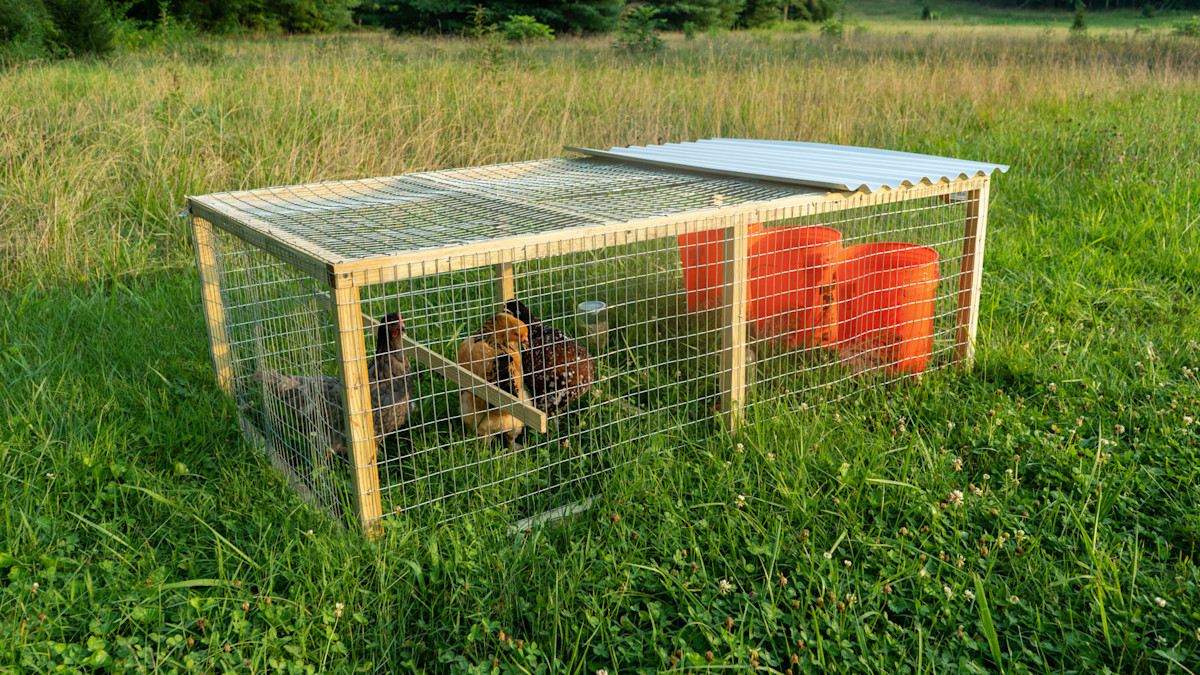
Now it’s time to turn your chickens loose. They will love the ability to scratch fresh grass whenever they desire. This coop is designed to be mobile. It can be relocated with the birds inside by slowly dragging it from one grassy spot to another. This coop is lightweight but secure, and in a few short weeks you can have a fertilized area large enough to support a nice garden all while collecting a few daily eggs in the process.
Shop
Sign In or Create a Free Account
Related

Homesteading
How to Give Your Chicken Coop a Spring Cleaning

Homesteading
The Perfect Chicken Breed