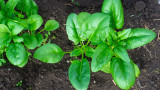
How to Grow Chives


Chives are one of the simplest plants to grow in your vegetable garden and they have the magical ability to elevate any boring-looking dish to a five-star masterpiece. As Danielle Prewett and many others have said, “We eat with our eyes first.” For that reason alone, chives are worth including in your garden. Aside from their visual appeal, they add a wonderful onion-garlic flavor to tacos, stews, mashed potatoes, and whatever else you choose to eat them on.
Chives also pull double duty in the garden, acting as a delicious herb andattracting pollinatorswith purple-pink flowers. We don’t typically think of onions as flowers, but they are an excellent nectar source for pollinators and a beautiful ornamental in the garden.
Starting from SeedThe best way to start chives from seed is to spread out an inch-deep layer of moist potting soil in a tray and sprinkle the seeds on top, misting with water as needed to maintain the moisture level. As with most plants in the onion family, you need to be very patient when starting chives from seed. Often, onion seeds take so long to germinate that people think they’ve gone bad and scrap the whole batch.
Placing your tray of seeds on a heat mat or radiator can accelerate this process. Keep in mind that raising the temperature will increase the chances of your tray drying out so you’ll need to be extra vigilant if you use this technique. When your chives are about 3 or 4 inches tall and have established roots, you can transplant them into their permanent home in your garden or a pot.
Splitting your ChivesOnce you have an established patch of chives, you can propagate them around your yard or share with friends by simply digging up a clump from your patch and transplanting it. Conversely, if you know somebody with a chive patch and you want to skip the seed-starting step, ask if they’re willing to share a little clump with you.
Growing ConditionsChives do best in a part of the garden that receives full sun (at least 6 hours a day), but they can also be grown in less ideal conditions like a sunny window. You’ll sacrifice some yield if you grow them indoors, but if that’s your only option or you just prefer the convenience of being able to cut them right into your dinner, it’s a great alternative.
Chives are pretty self-sufficient and don’t require too much care in the garden, but it doesn’t hurt tospread a little bit of compost around their baseeach spring to replenish the nutrients they used in the previous year. You want your chives to be receiving about an inch of water per week in the summer, so if you live in an area with little rainfall, you’ll want to water them every few days for best results.
Harvest and UseYou may harvest chives at any point in their growth, including as microgreens. If you want them to be perennial (meaning they continue to grow year after year), you should wait to harvest them until their roots and bulbs are well-established. This usually takes about two months from seeding but depends on environmental factors like temperature, water access, and sunlight hours.
As mentioned above, chives are most often used as a fresh garnish to add oniony-garlicky flavor and provide visual appeal to homogenous-looking dishes with a sprinkle of bright green. The most commonly eaten parts of the plant are the tubular green leaves, but chives also produce an edible flower. I learned from my in-laws to harvest the flowers before the seeds form and then soak them in vinegar to create chive vinegar for topping Carolina barbecue or French fries. Cutting the flowers before they are fully developed can also “trick” the chives into continuing their vegetative growth stage where they will produce more leaves. This process is known as “dead-heading.”
Chives are a true “cut-and-come-again” herb because they grow from the bulb up rather than expanding from buds on the tip of their growth. On our homestead, we regularly hack the chives right down to the top of the bulb to dress up our meals for the week. Within a month you wouldn’t know that we touched them. If you’re a more careful gardener than me you can cut individual leaves and use them as needed. To store your chives for long-term use you can either dehydrate them at a low temperature (around 100 degrees Fahrenheit) or pickle them in vinegar.
If you’re new to gardening and looking for some simple edible plants to get started with, chives are an excellent option. They take very little work to establish and maintain and are good to eat with almost any savory dish. Because of their versatility, you’ll have no shortage of opportunities to incorporate some homegrown food into your diet. If you’ve been gardening for a while, chances are you already have chives in your garden. But if you don’t, here’s your sign to get some started!
Shop


Sign In or Create a Free Account
Related
Gardening
How to Grow Potatoes

Gardening
How to Grow Onions