How to Build a DIY Minnow Cart

It’s no secret that we live in a world of click now and have it on your doorstep tomorrow. While that can be super convenient, it also doesn’t work for everything when it comes to the outdoors. In the same way that a small old-school tackle, fly, or bait shop just always seems to have what you can’t find anywhere else, sometimes anglers have to take things into their own hands. One such item is a minnow cart.
I guess the first question is, what the heck is a minnow cart, and why do I need one? While I have no idea why they are called minnow carts since they aren’t a cart and are kind of hard to maneuver. I do know they have been around longer than me and are very successful at holding large amounts of minnows and keeping them much healthier than that small bait container or bucket we’ve all used at some point.
I made my first minnow cart many years ago to hold minnows all winter long when fishing off of an island on the Great Lakes where you couldn’t catch or buy minnows. When you have to keep one batch of minnows all winter long in order to have bait, you better have something better than a bucket with an aerator. My islander buddy is famous for saying, the only thing locked on the island in the winter is the minnow carts.
While there are many ways to make a minnow cart, here are the steps I took to make a minnow cart to keep my minnows healthy all winter long.
1. Get a Big Drum
In most cases, you can get a used plastic 50-gallon drum for little to nothing. Just make sure the previous owner didn’t have something like oil in it, or it’s not worth the effort to clean up. Large car washes can be a good place to look for a free one, as the soap they use is delivered in them.
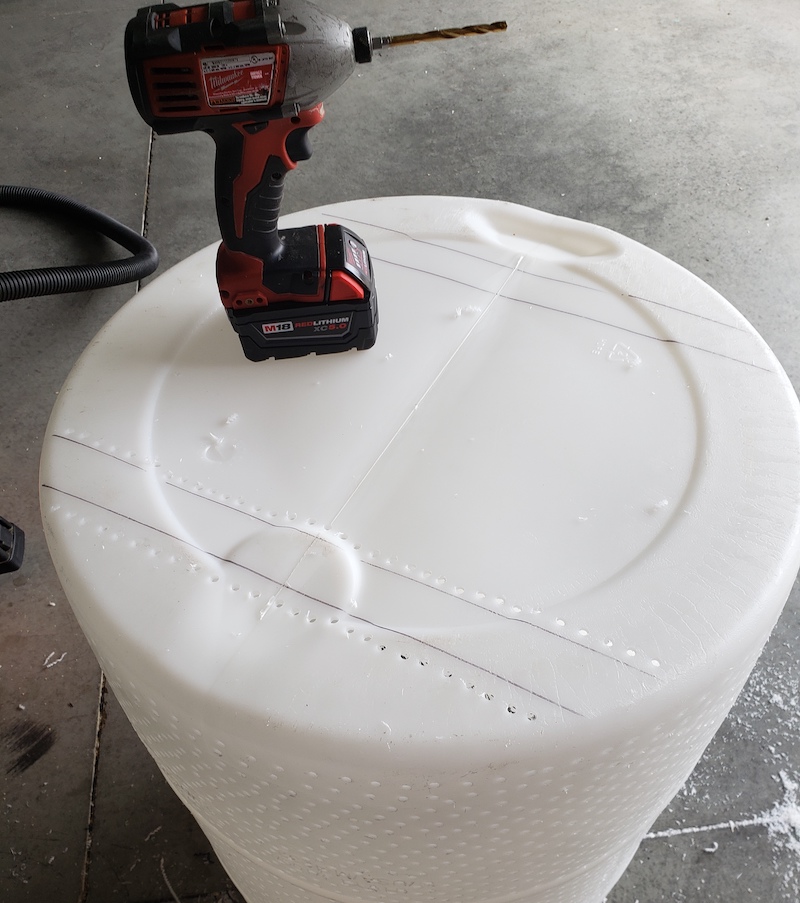
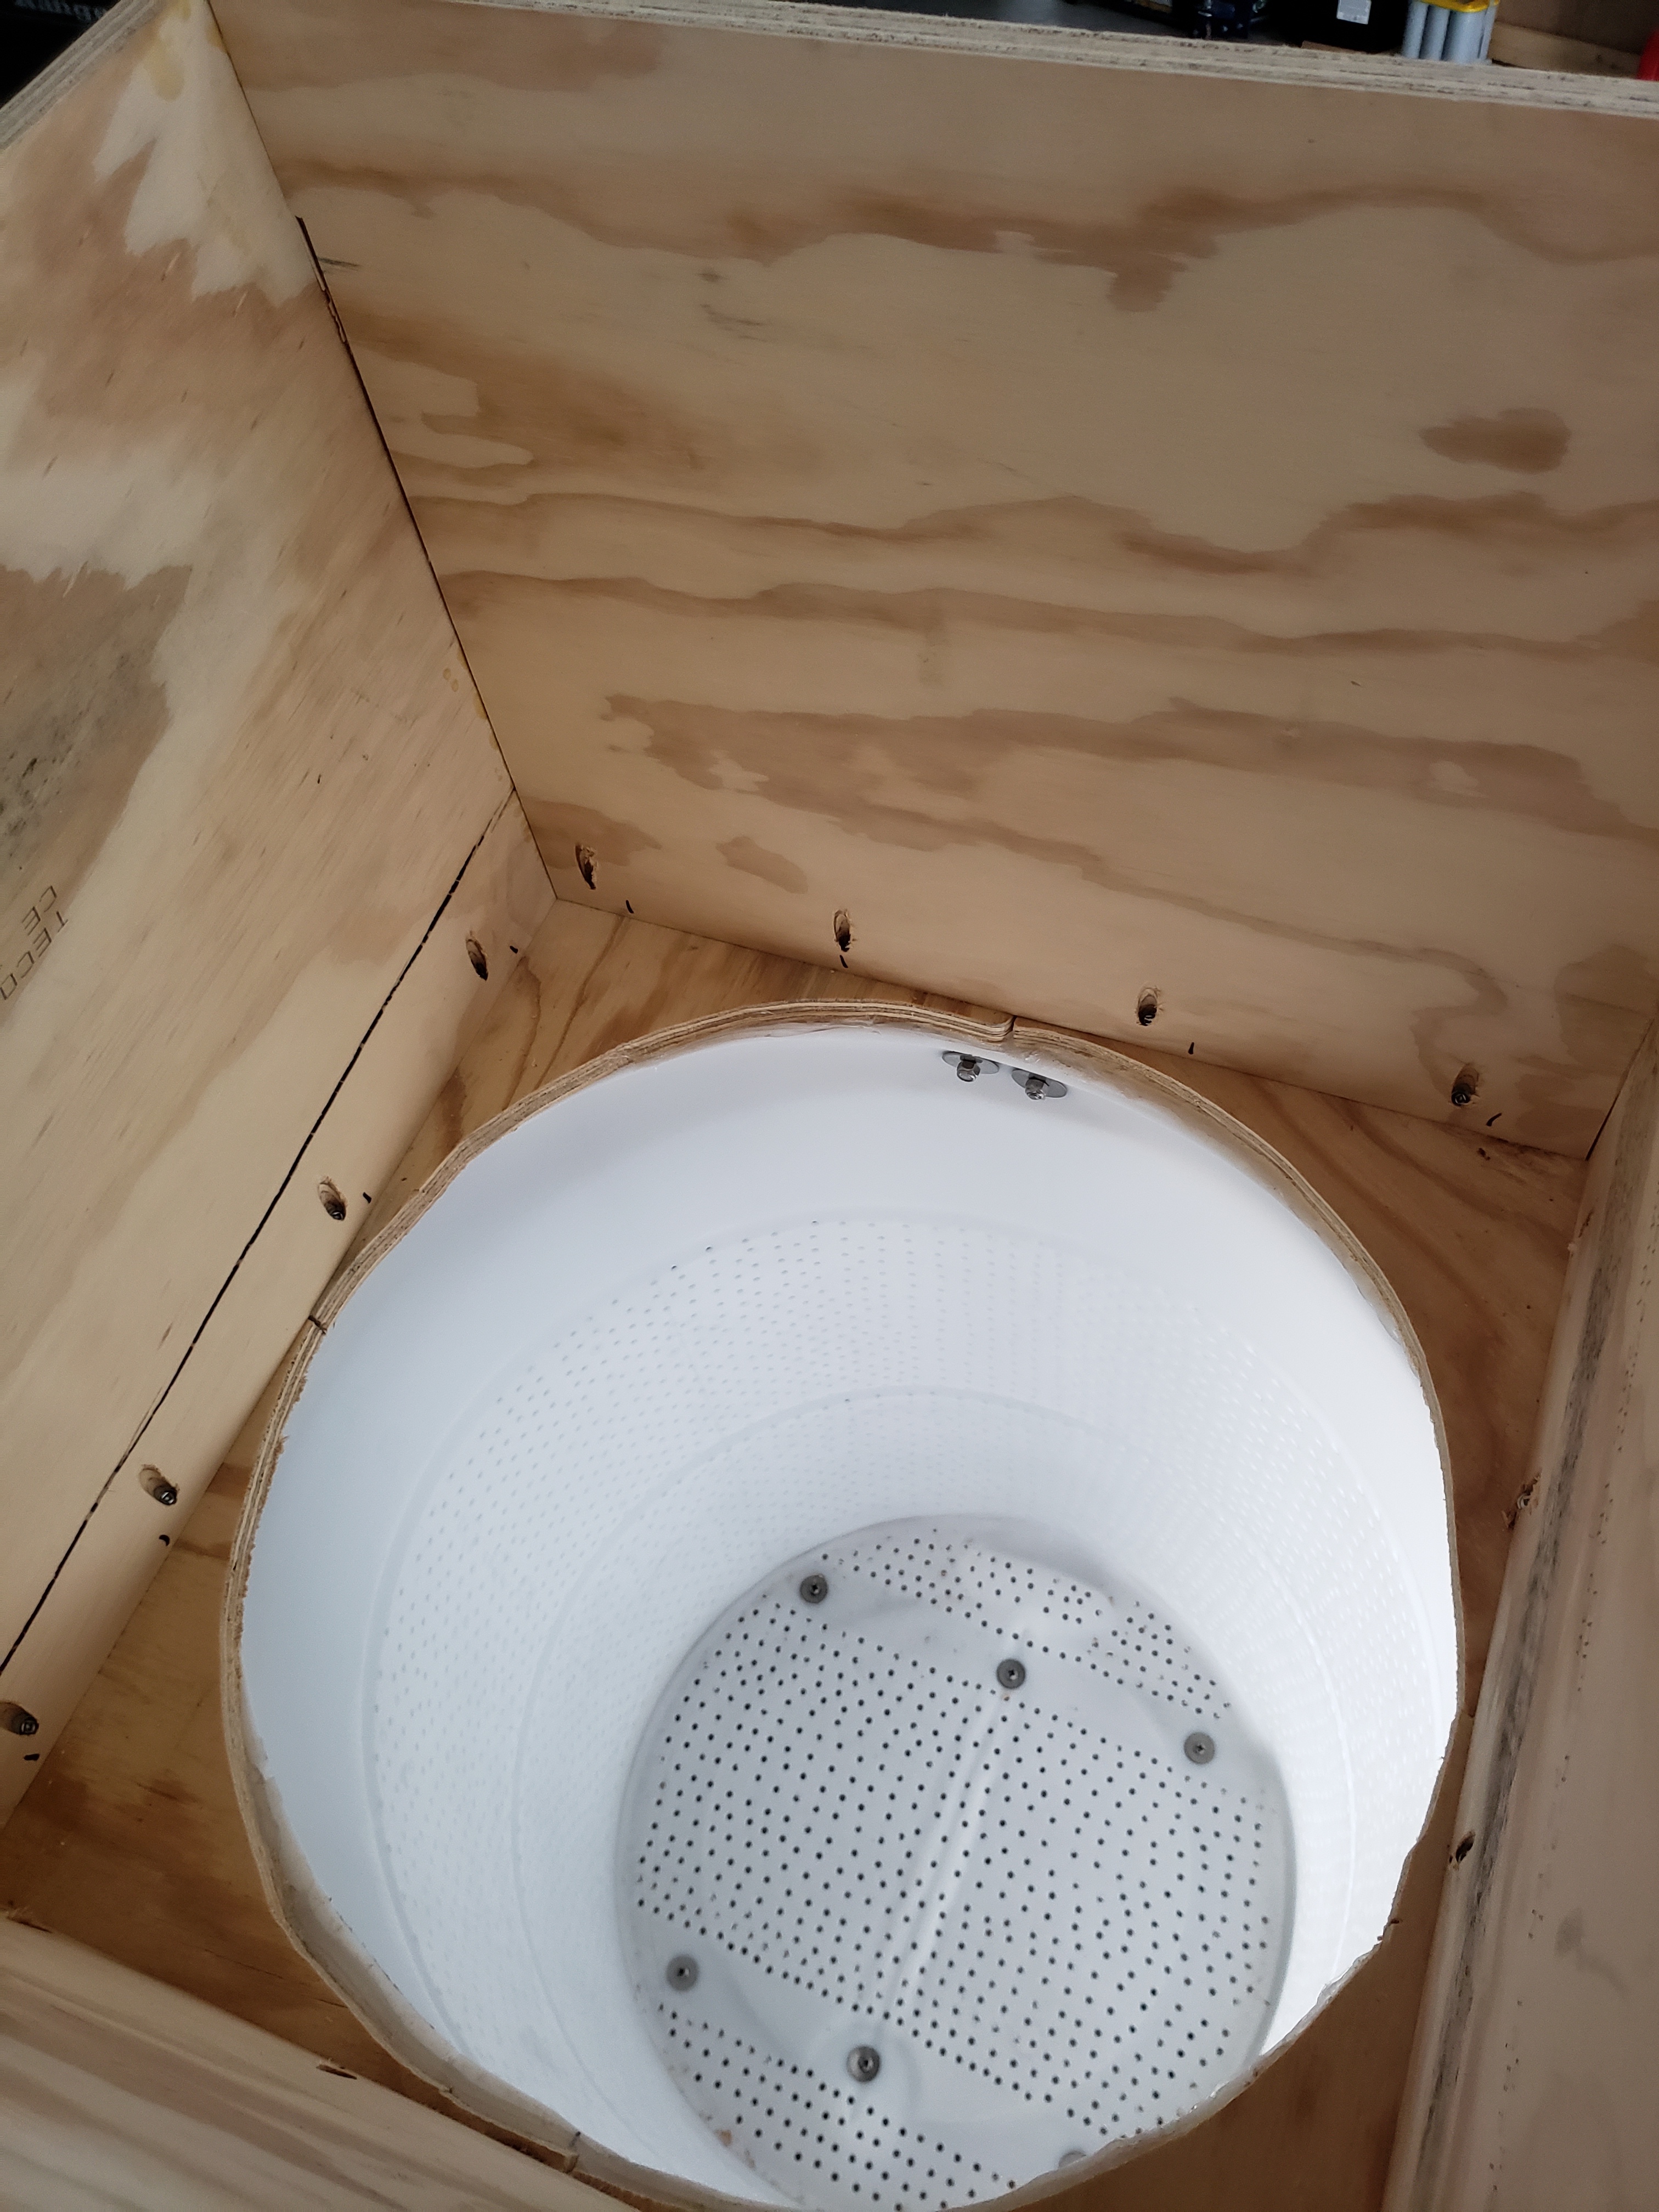
2. Vent It
Drill as many holes as you can at a size no larger than the minnows you are hoping to contain. The old-school carts used sections of wire or mesh screen to allow for water and “minnow poop” to flow through the cart. While drilling the holes takes much longer upfront than sections of screens, it’s much more durable and will provide more flow and ultimately keep minnows better long term. Before you get to drill happy, make sure to leave two sections 1½-inch wide without holes, as seen in the picture.
3. Cut the Top
Use a jigsaw or something similar to cut the top off completely. This will also allow you to sand the inside of the barrel where the vent holes may have caused rough spots that could damage the minnows from rubbing on it.
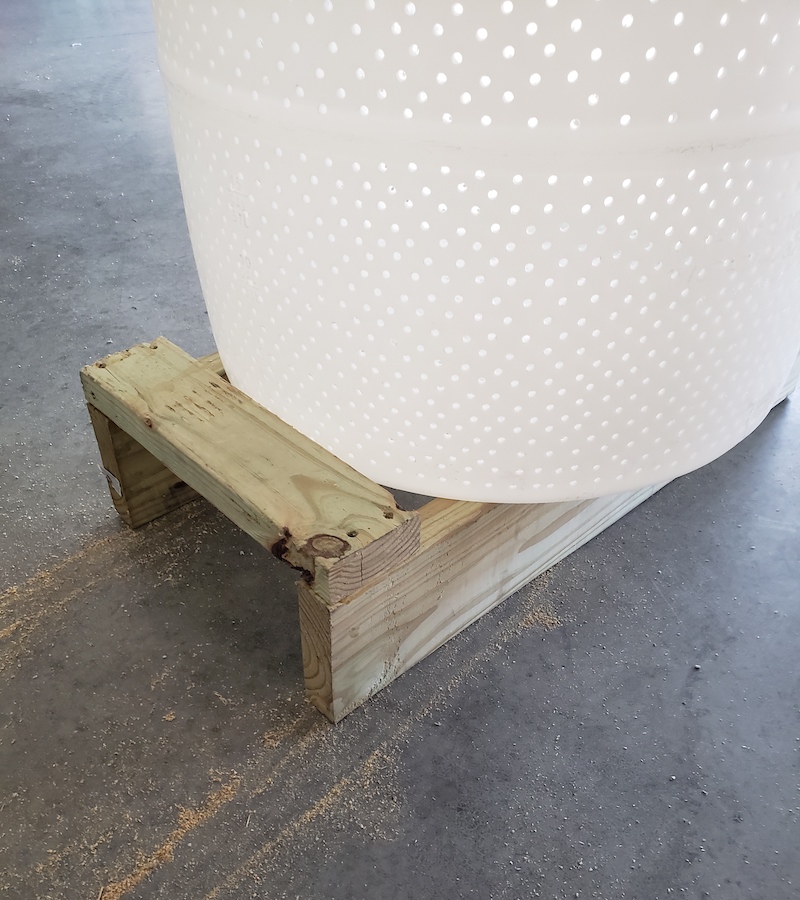
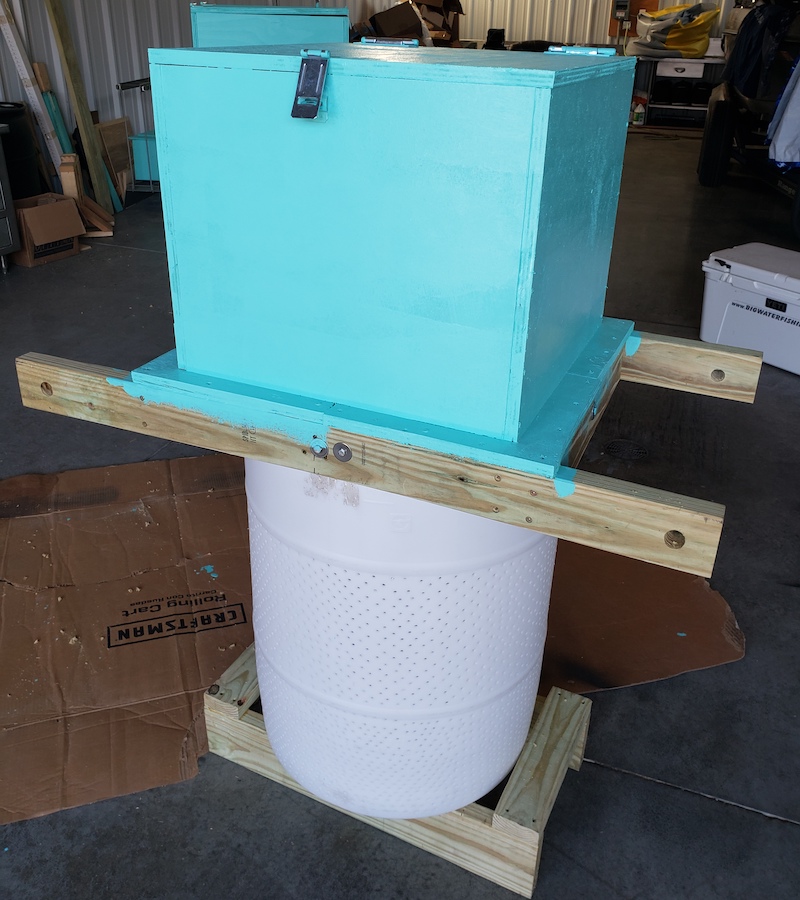
4. The Stand
Next you want to make a stand for the bottom out of treated lumber. This will allow you to both store it in the off-season and keep it off of the lake bottom so you get better flow and the “nasties” can sink out easier. Either screw or bolt the base to the bottom of the drum.
5. Make a Frame
Make a frame out of treated 2x4s that will fit the top of the drum as closely as possible, with arms protruding off both sides as pictured. It’s important to make this very sturdy since this will act as handles for carrying and be used when deploying and removing it from the water. Once constructed, bolt the frame to the top of the drum, using stainless hardware and large fender washers to prevent it from pulling through.
6. The Top
A top needs to be made to go over the just-built frame. I wanted to make this cart last for a while and slightly overbuilt it so it can withstand the weather and wear and tear of putting it in and out of the water, so all plywood used was ¾-inch.
Use a piece of cardboard to make a template for the odd shape you’ll need to cut out. The template will allow you to save a lot of wood and possibly use scrap pieces. Once fit to the opening, secure it with screws to the frame.
Before moving on, it can be a good time to put a bead of silicone on any gap you have from the wood top to the barrel to make sure minnows have no place to escape.
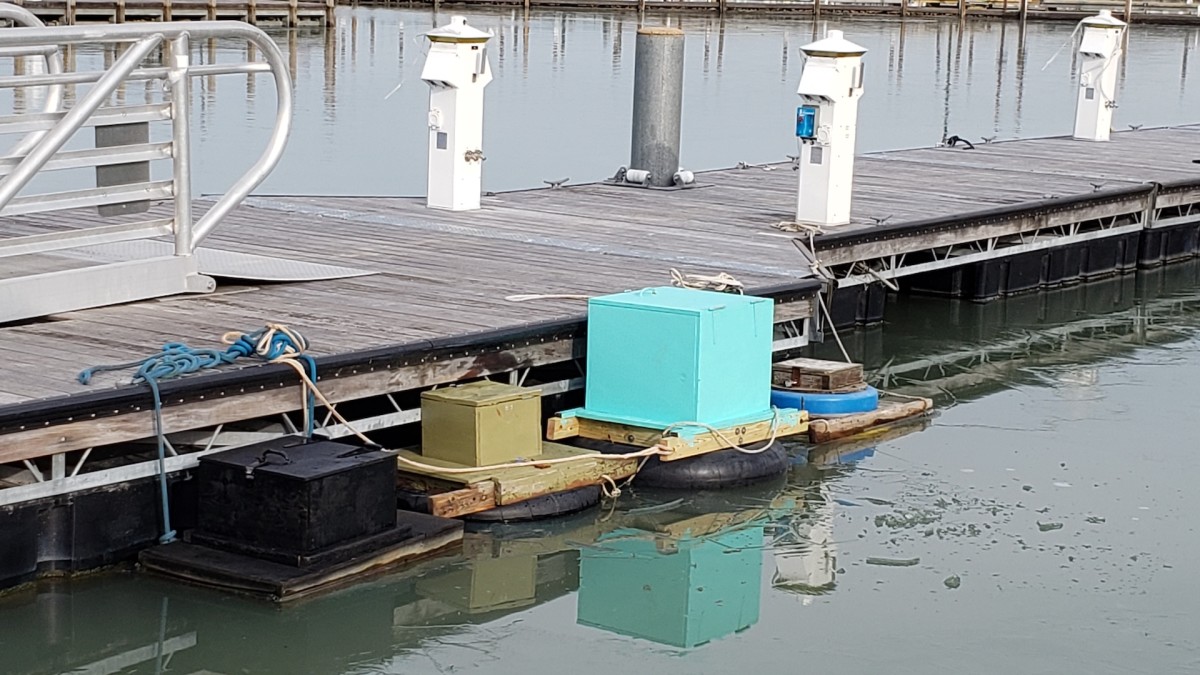
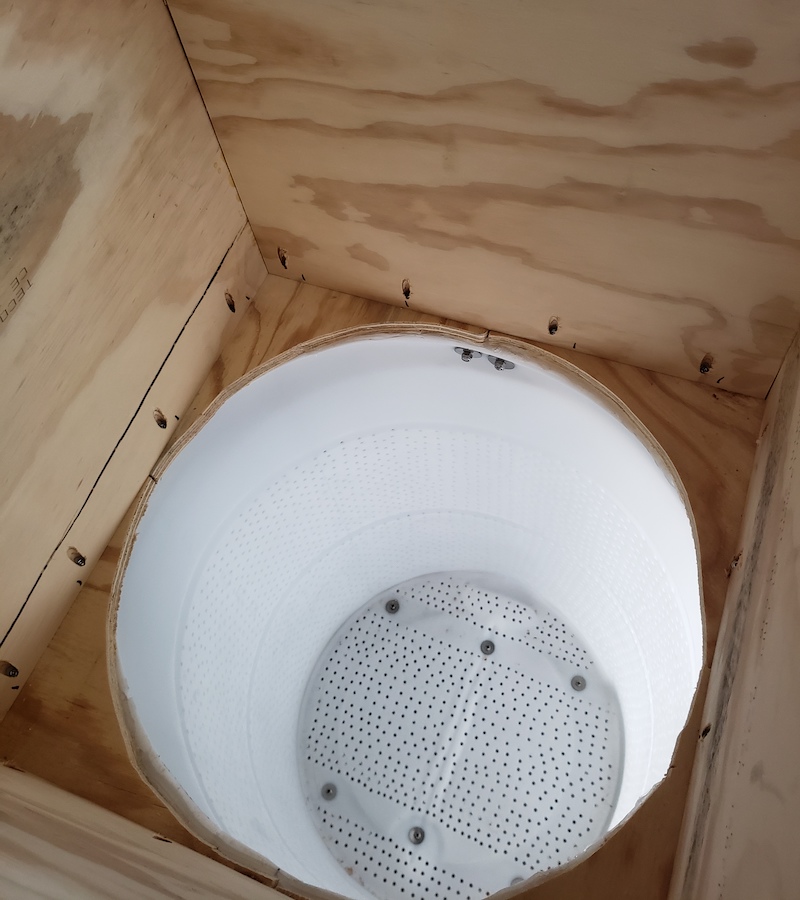
7. The Box
After you secure the top, you’ve basically made a nice foundation for what will be the top box. On the first few minnow carts, I made the mistake of making the box too small. Rather it was accessing the bait, cleaning it out, or dealing with the ice in the winter, bigger made everything better. The added height made it easier to get at with less bending over in my dock situation.
Again, ¾-inch plywood was used for durability and ease in making the box itself. Once built, secure it to the top, ideally with pocket holes or using some type of angle brackets.
8. Finish It
Make the time to slap several coats of paint on the box or any untreated lumber so that it won’t soak up as much water and last a little longer. Add some hinges and a latch to the top box so you can lock it, and you’re almost home.
Drilling a few large holes on the end of the long 2x4 arms will allow you to place ropes through them to secure them to something once it’s in the water.
Finally, you need to find an old truck tire to help it float upright. Most car tire tubes won’t be large enough to go around the drum. If you’re local tire or auto store doesn’t have a tube large enough, you can get one with a few clicks on the computer.
While I’m sure you are already judging me for my carpentry skills, I will remind you I’m not Norm Abrams, but a fishing guide who needed a way to keep minnows alive all winter, and that’s what this minnow cart will do.
If you decide to make your own minnow cart, let us know how you tweaked it to make it even better.
Shop
Shop AllSign In or Create a Free Account
Related

Waterfowl
How to Build a Portable Duck Blind

Whitetail
Photos: How to Build a Deer Blind From Pallets

