
Most of us are aware that prices are rising for building materials (up 300% in some cases). While that can tend to put a damper on jumping into a project, there are still ways to get things done on a tight budget.
For a while now, I’ve been wanting to put a box blind on our property to give my young family a spot to hunt that allows a little wiggle room. Buying a prefabricated polyethylene palace was not in the cards and a damned 8-foot 2x4 is nearing $10 these days, so I decided to hit the industrial park in town to look through job site dumpsters and get this done for cheap.
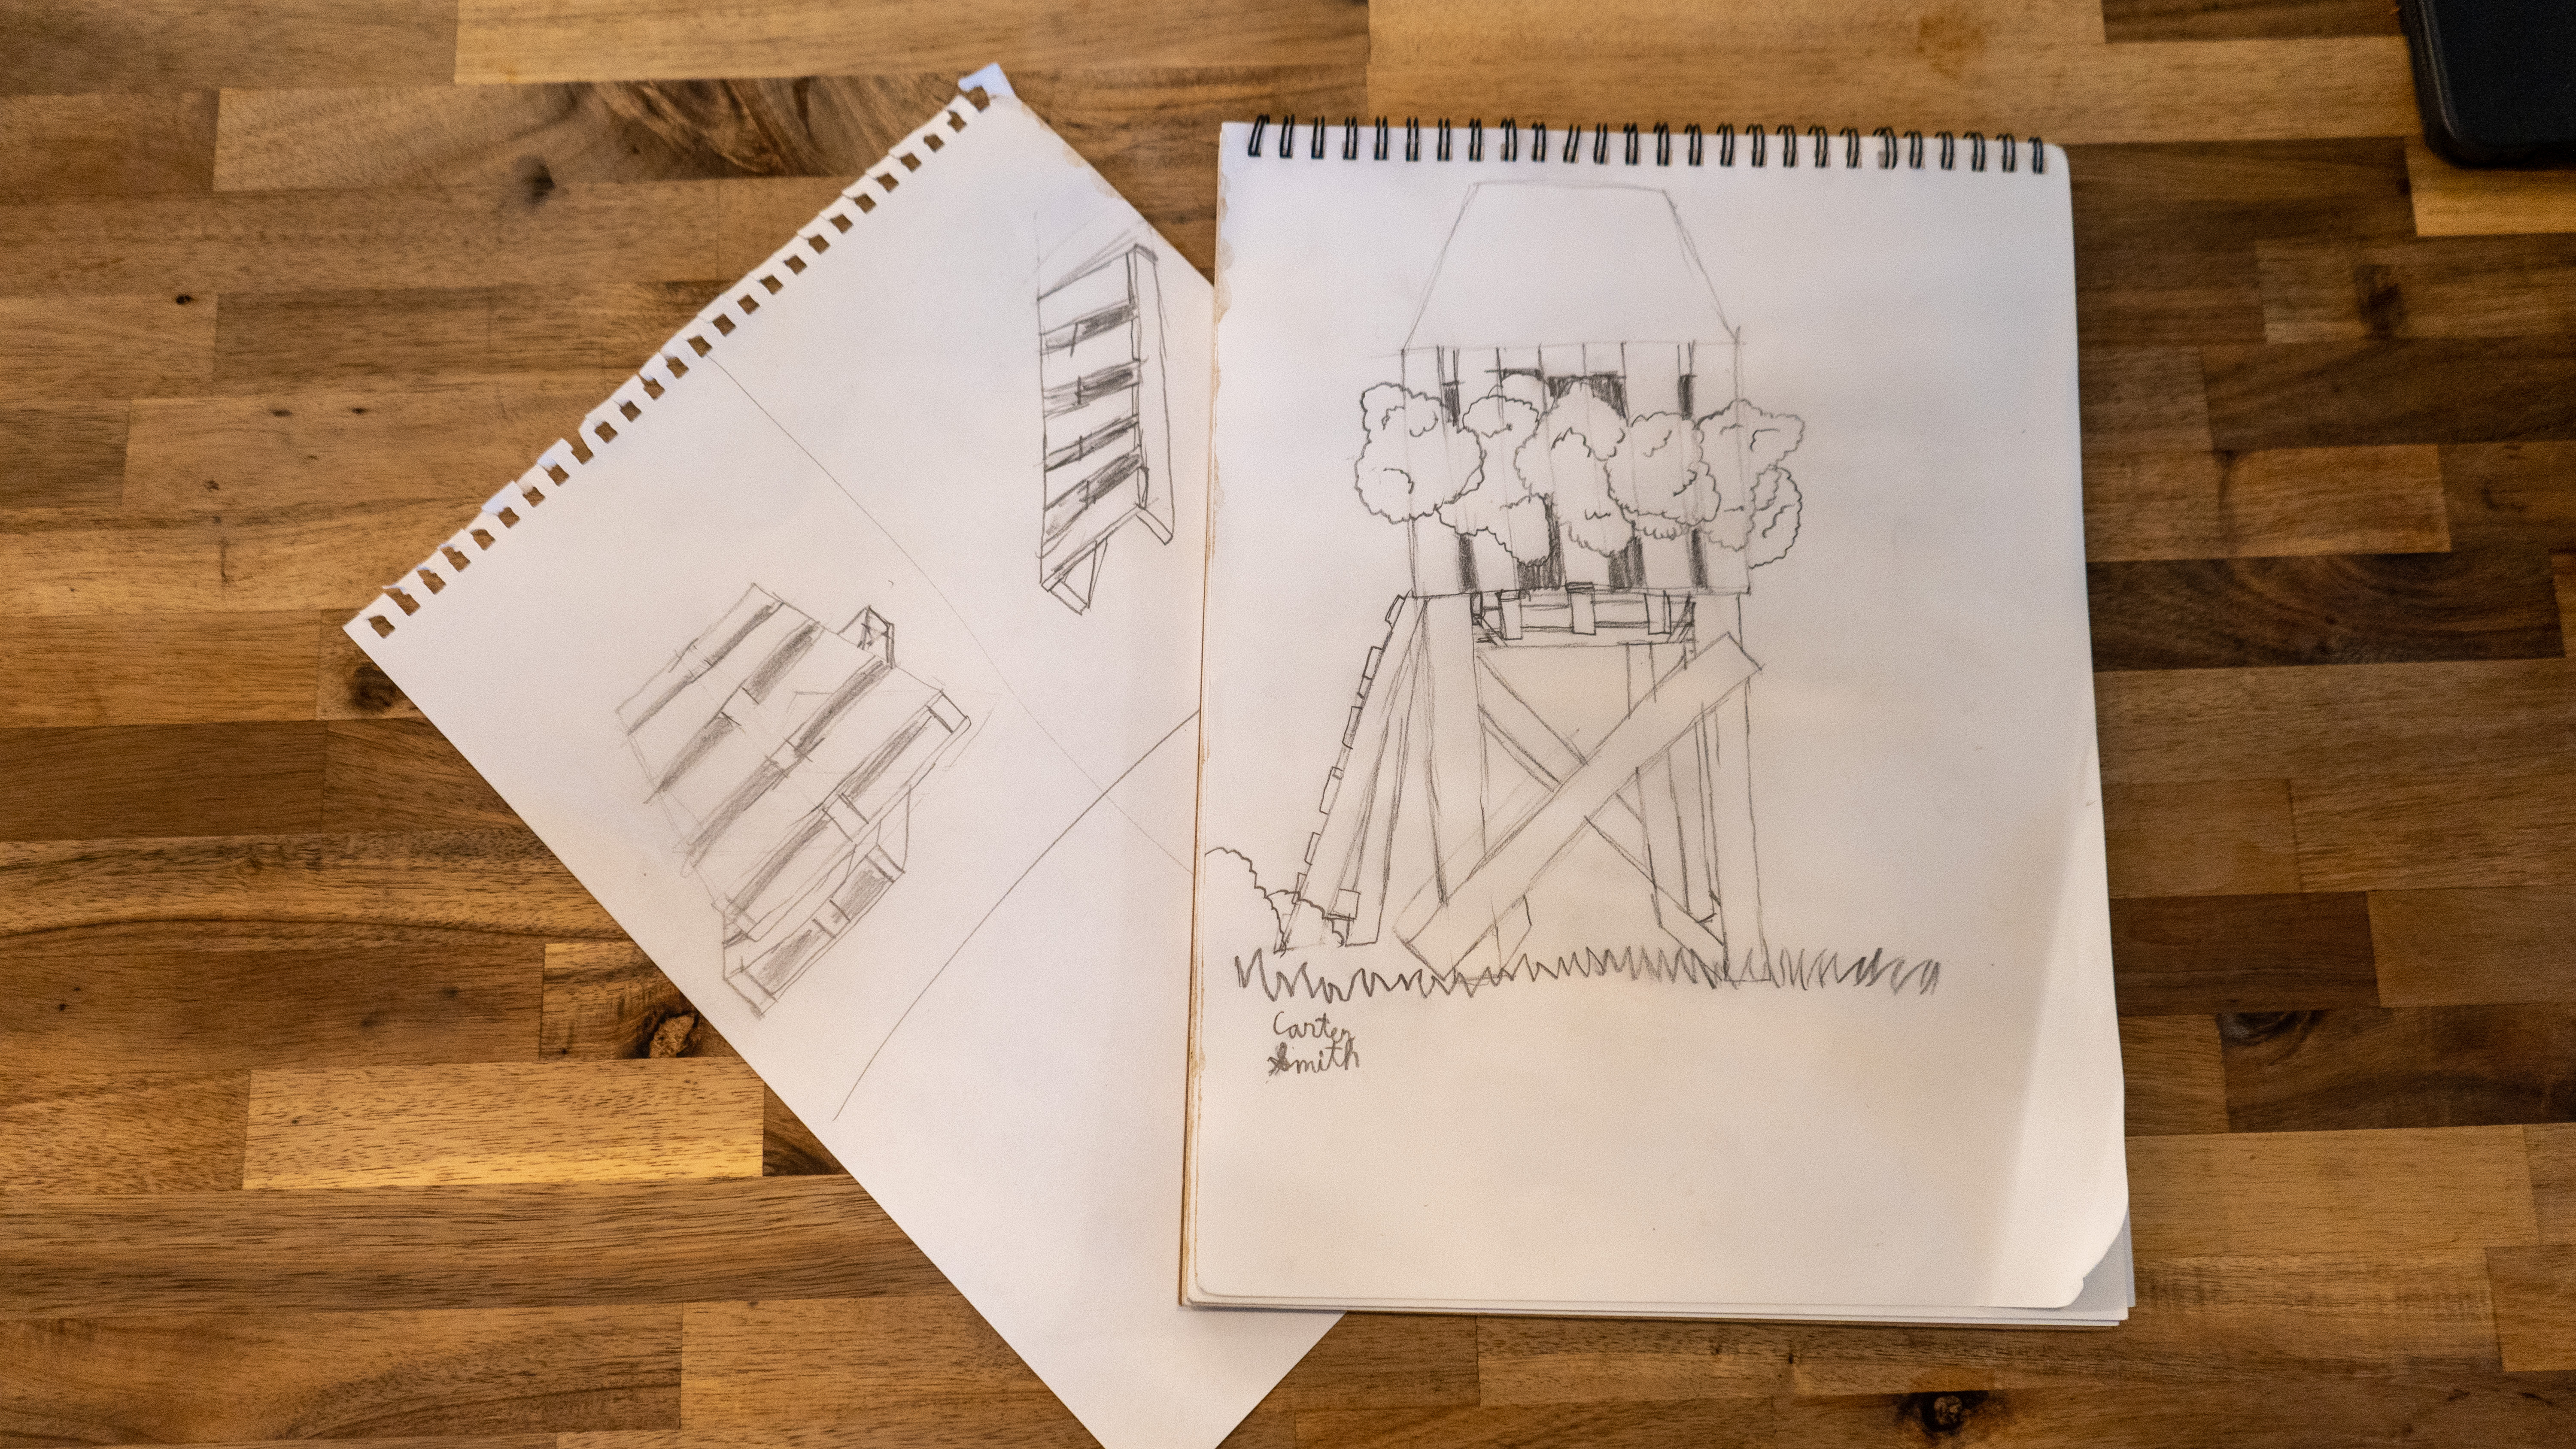
This job doesn’t require a vast skill set and can be done by just about anyone willing to give it a shot. As a side note, when building something freehand like this, it can be extremely helpful to jot down a quick sketch before you get started to give you a plan to refer to while working. I’m not much on drawing, so I delegate the sketching to my young son who loves to draw. Not only is the sketch useful, it gives us one more opportunity to get the whole family involved.
MaterialsSix to eight pallets Four 8-foot 4x4s or eight 8-foot 2x4s One 8x10-foot tarp One 5-pound box of exterior grade 3-inch screws Two 1-pound boxes of 5/8-inch or similar drywall screws
ToolsString trimmer to prep the site Drill Skill saw Sawzall Tape measure Hammer
Step 1: Gather Materials and Prep SitePallets abound in industrial parks, and it can be surprising what you can find in new subdivisions on construction sites. Always ask permission, but in my experience “no” isn’t very common.
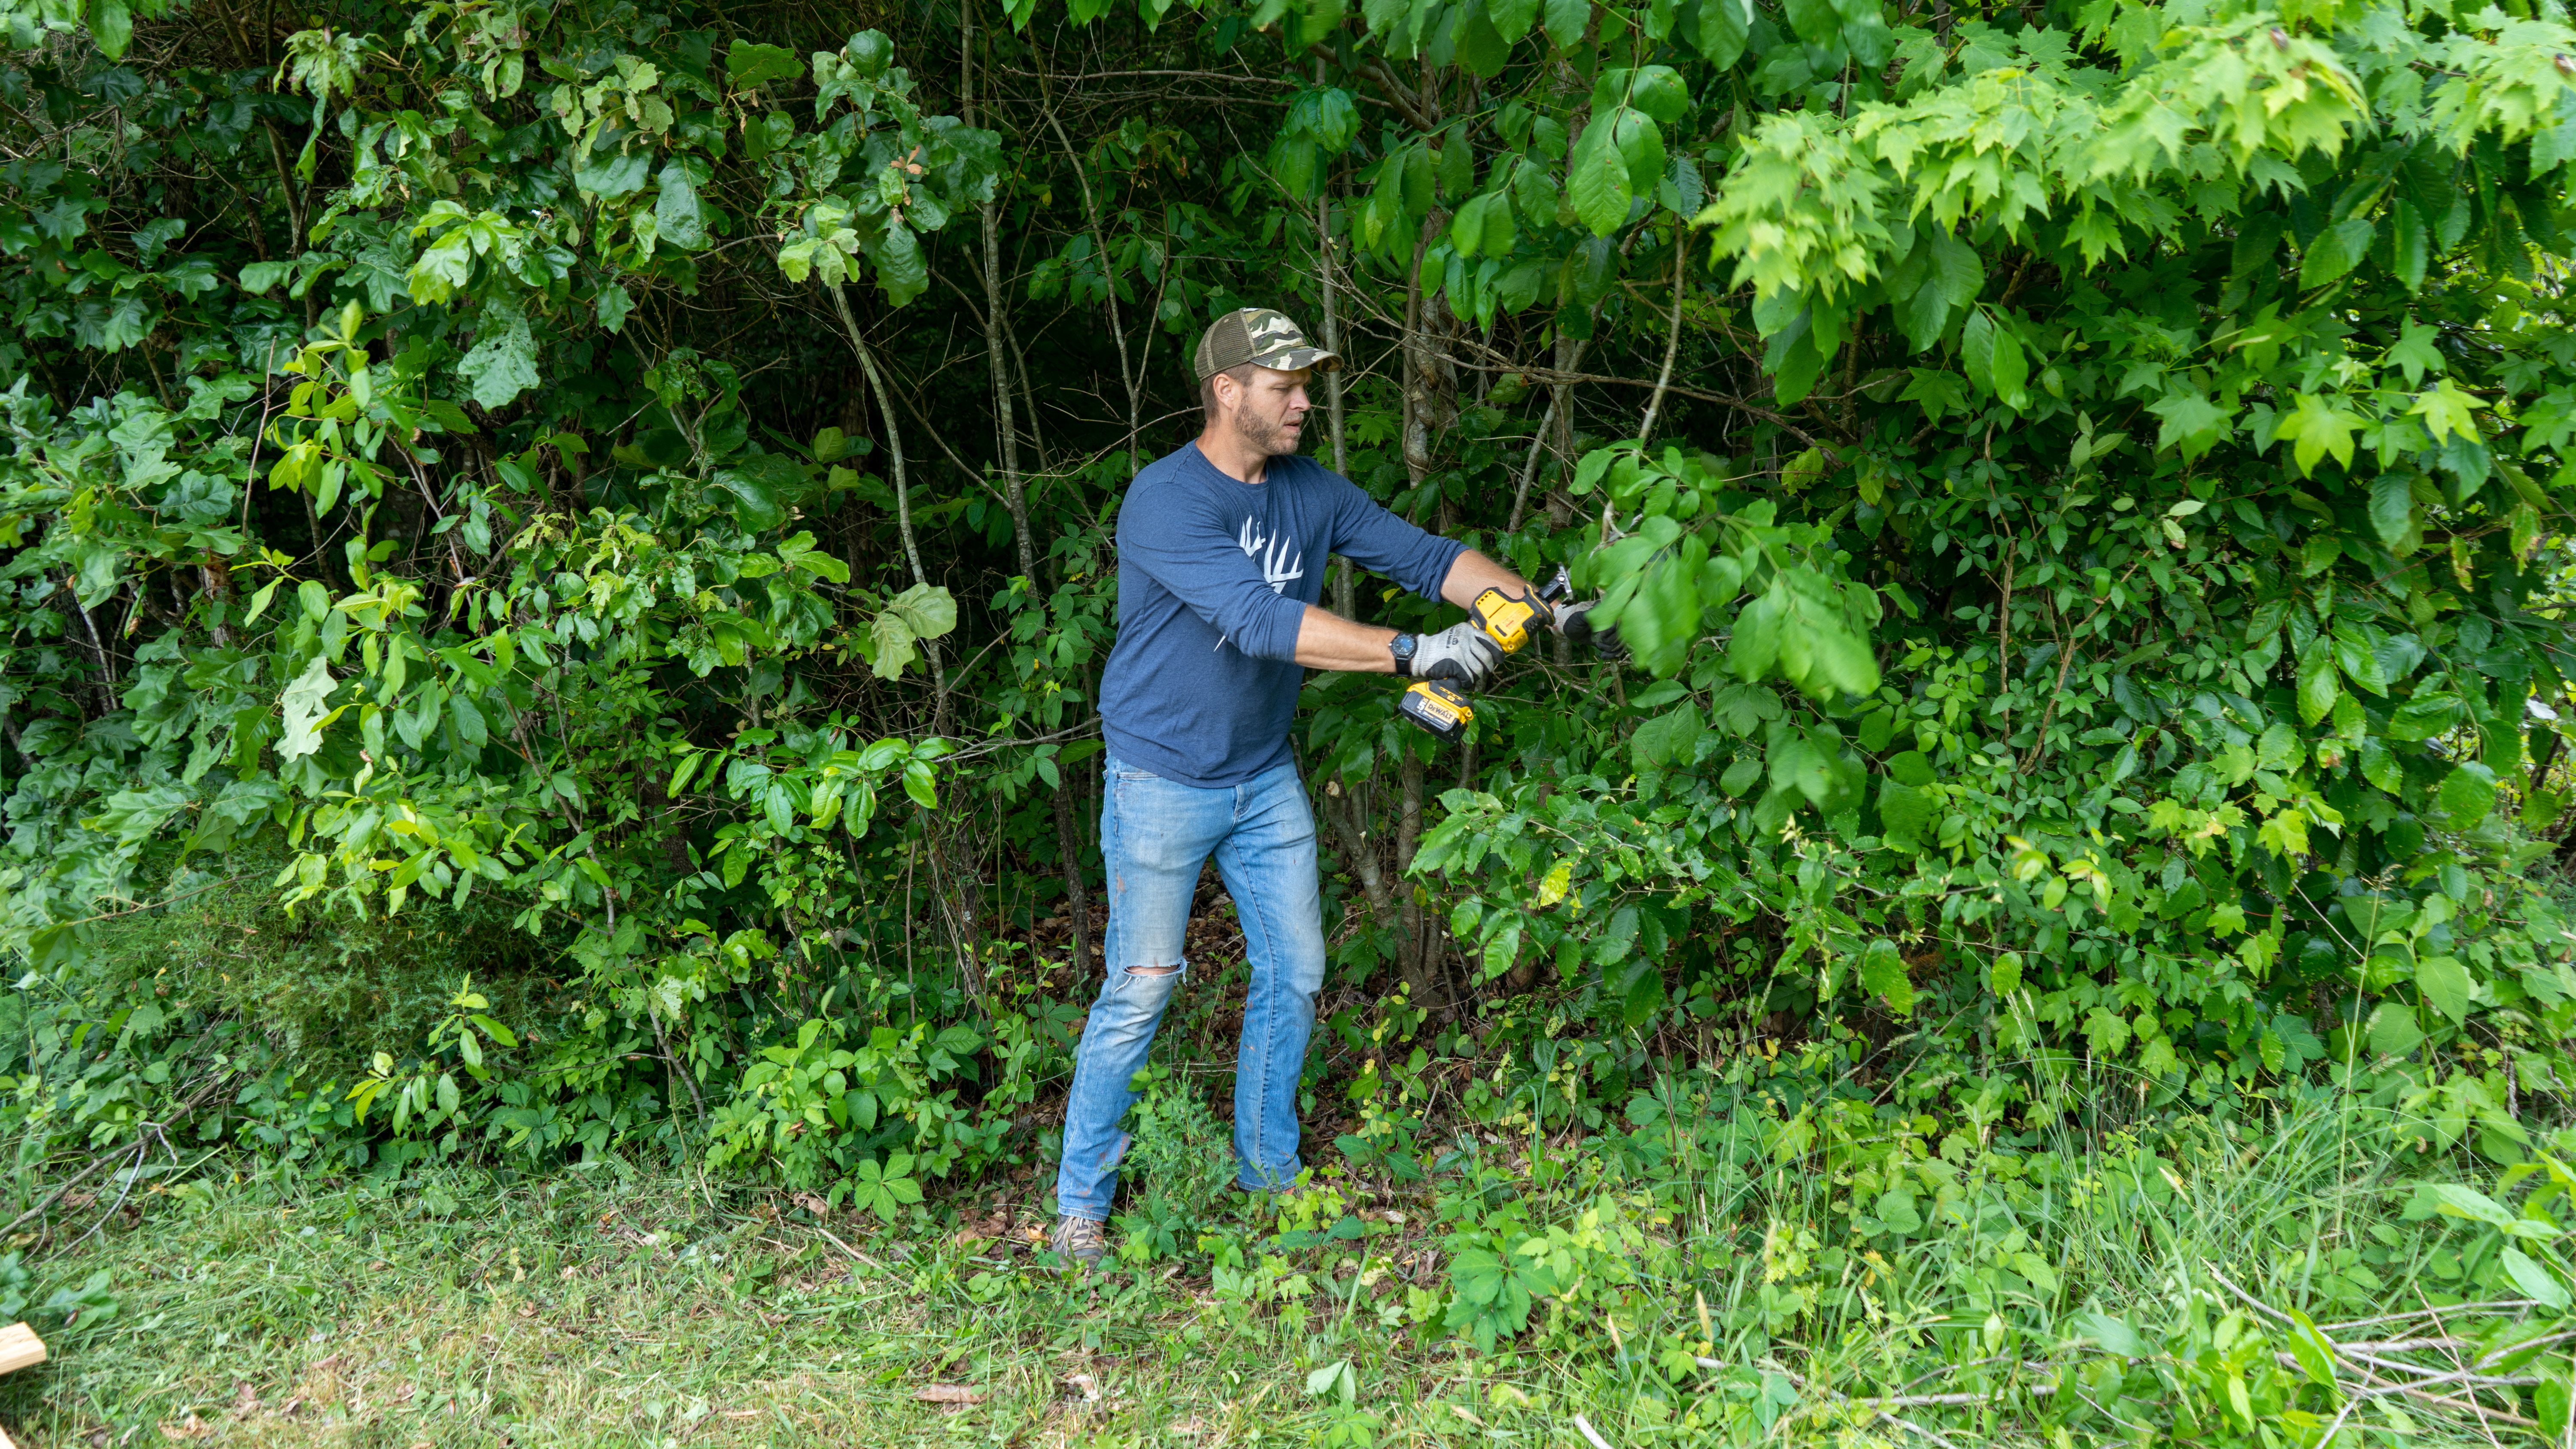
Haul your treasures home and prep your site for the build. I trimmed the grass and pruned back the trees and brush to set the blind back into the woods a bit for concealment.
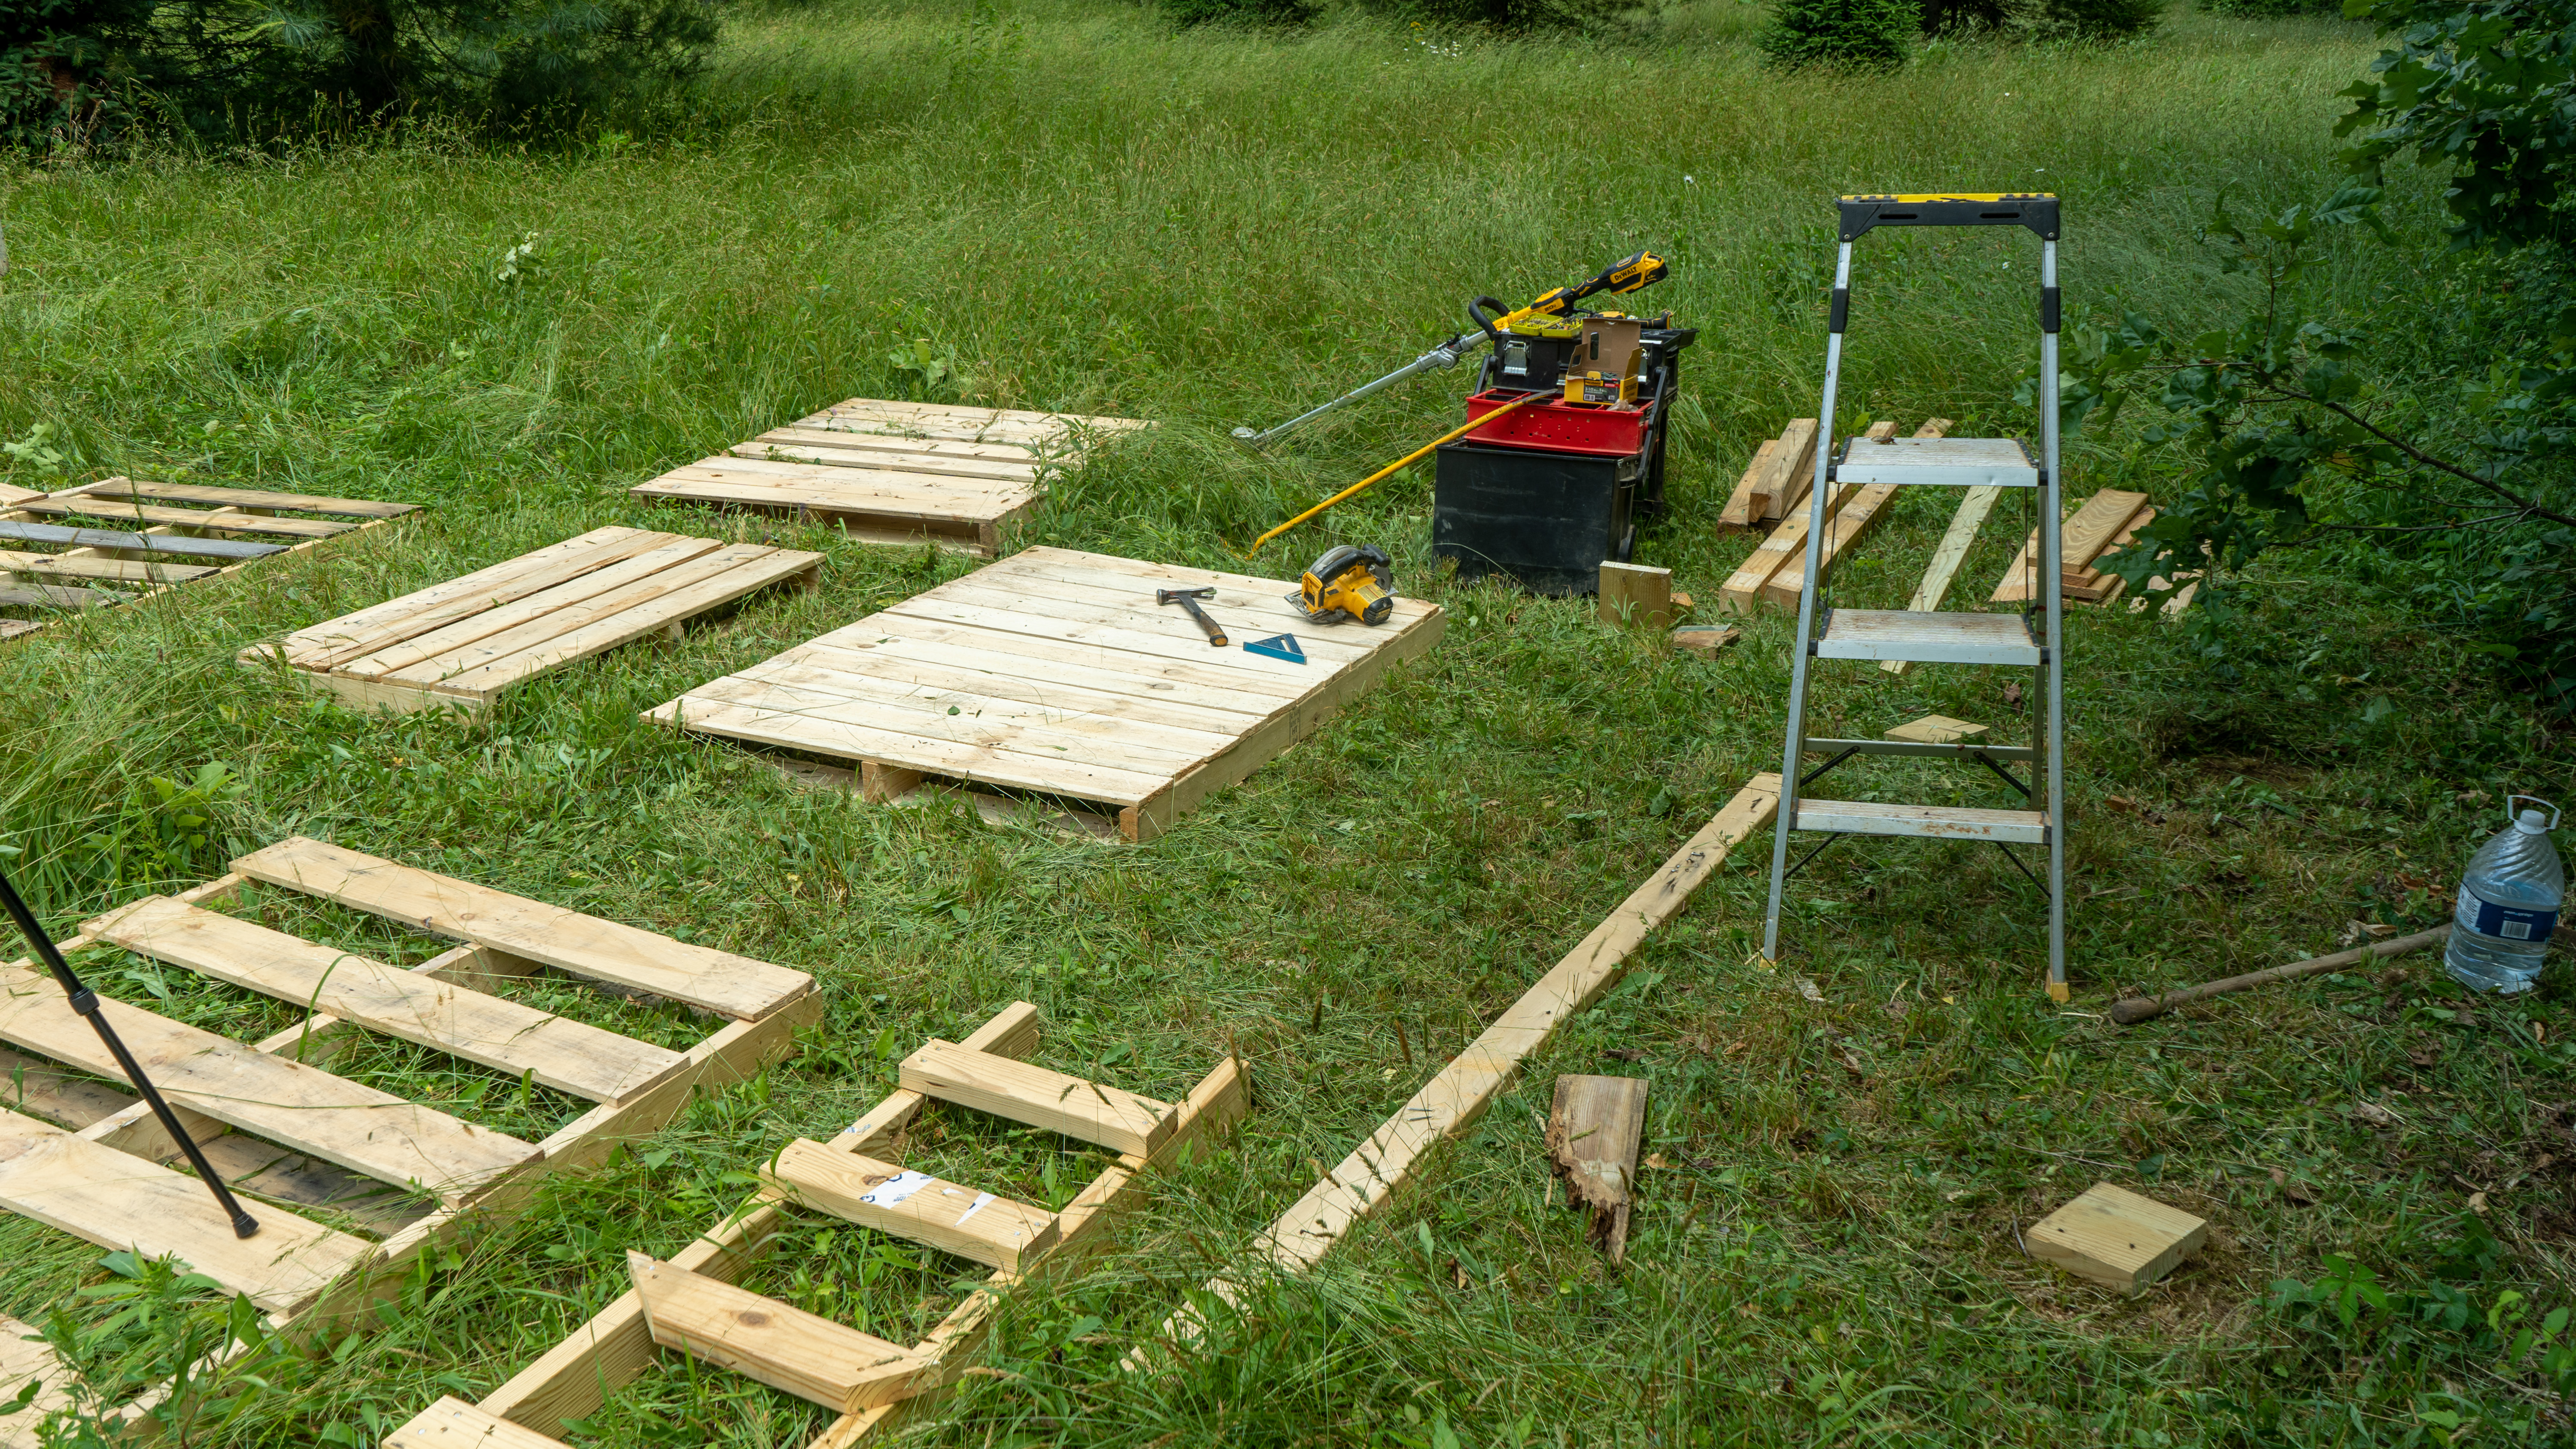
Step 2: Begin Pallet DisassemblyChoose your floor and wall pallets (five total). I wanted plenty of space for the family and I, so I used a 4x7-foot pallet for the floor. Once you’ve laid aside the floor and wall pallets, break down the others for blocking, bracing, posts, and flooring material. This is the most tedious part. The boards have a tendency to break if you aren’t careful, and pulling nails for an hour just plain sucks. Enlist a helper for the nail pulling to speed up the process.
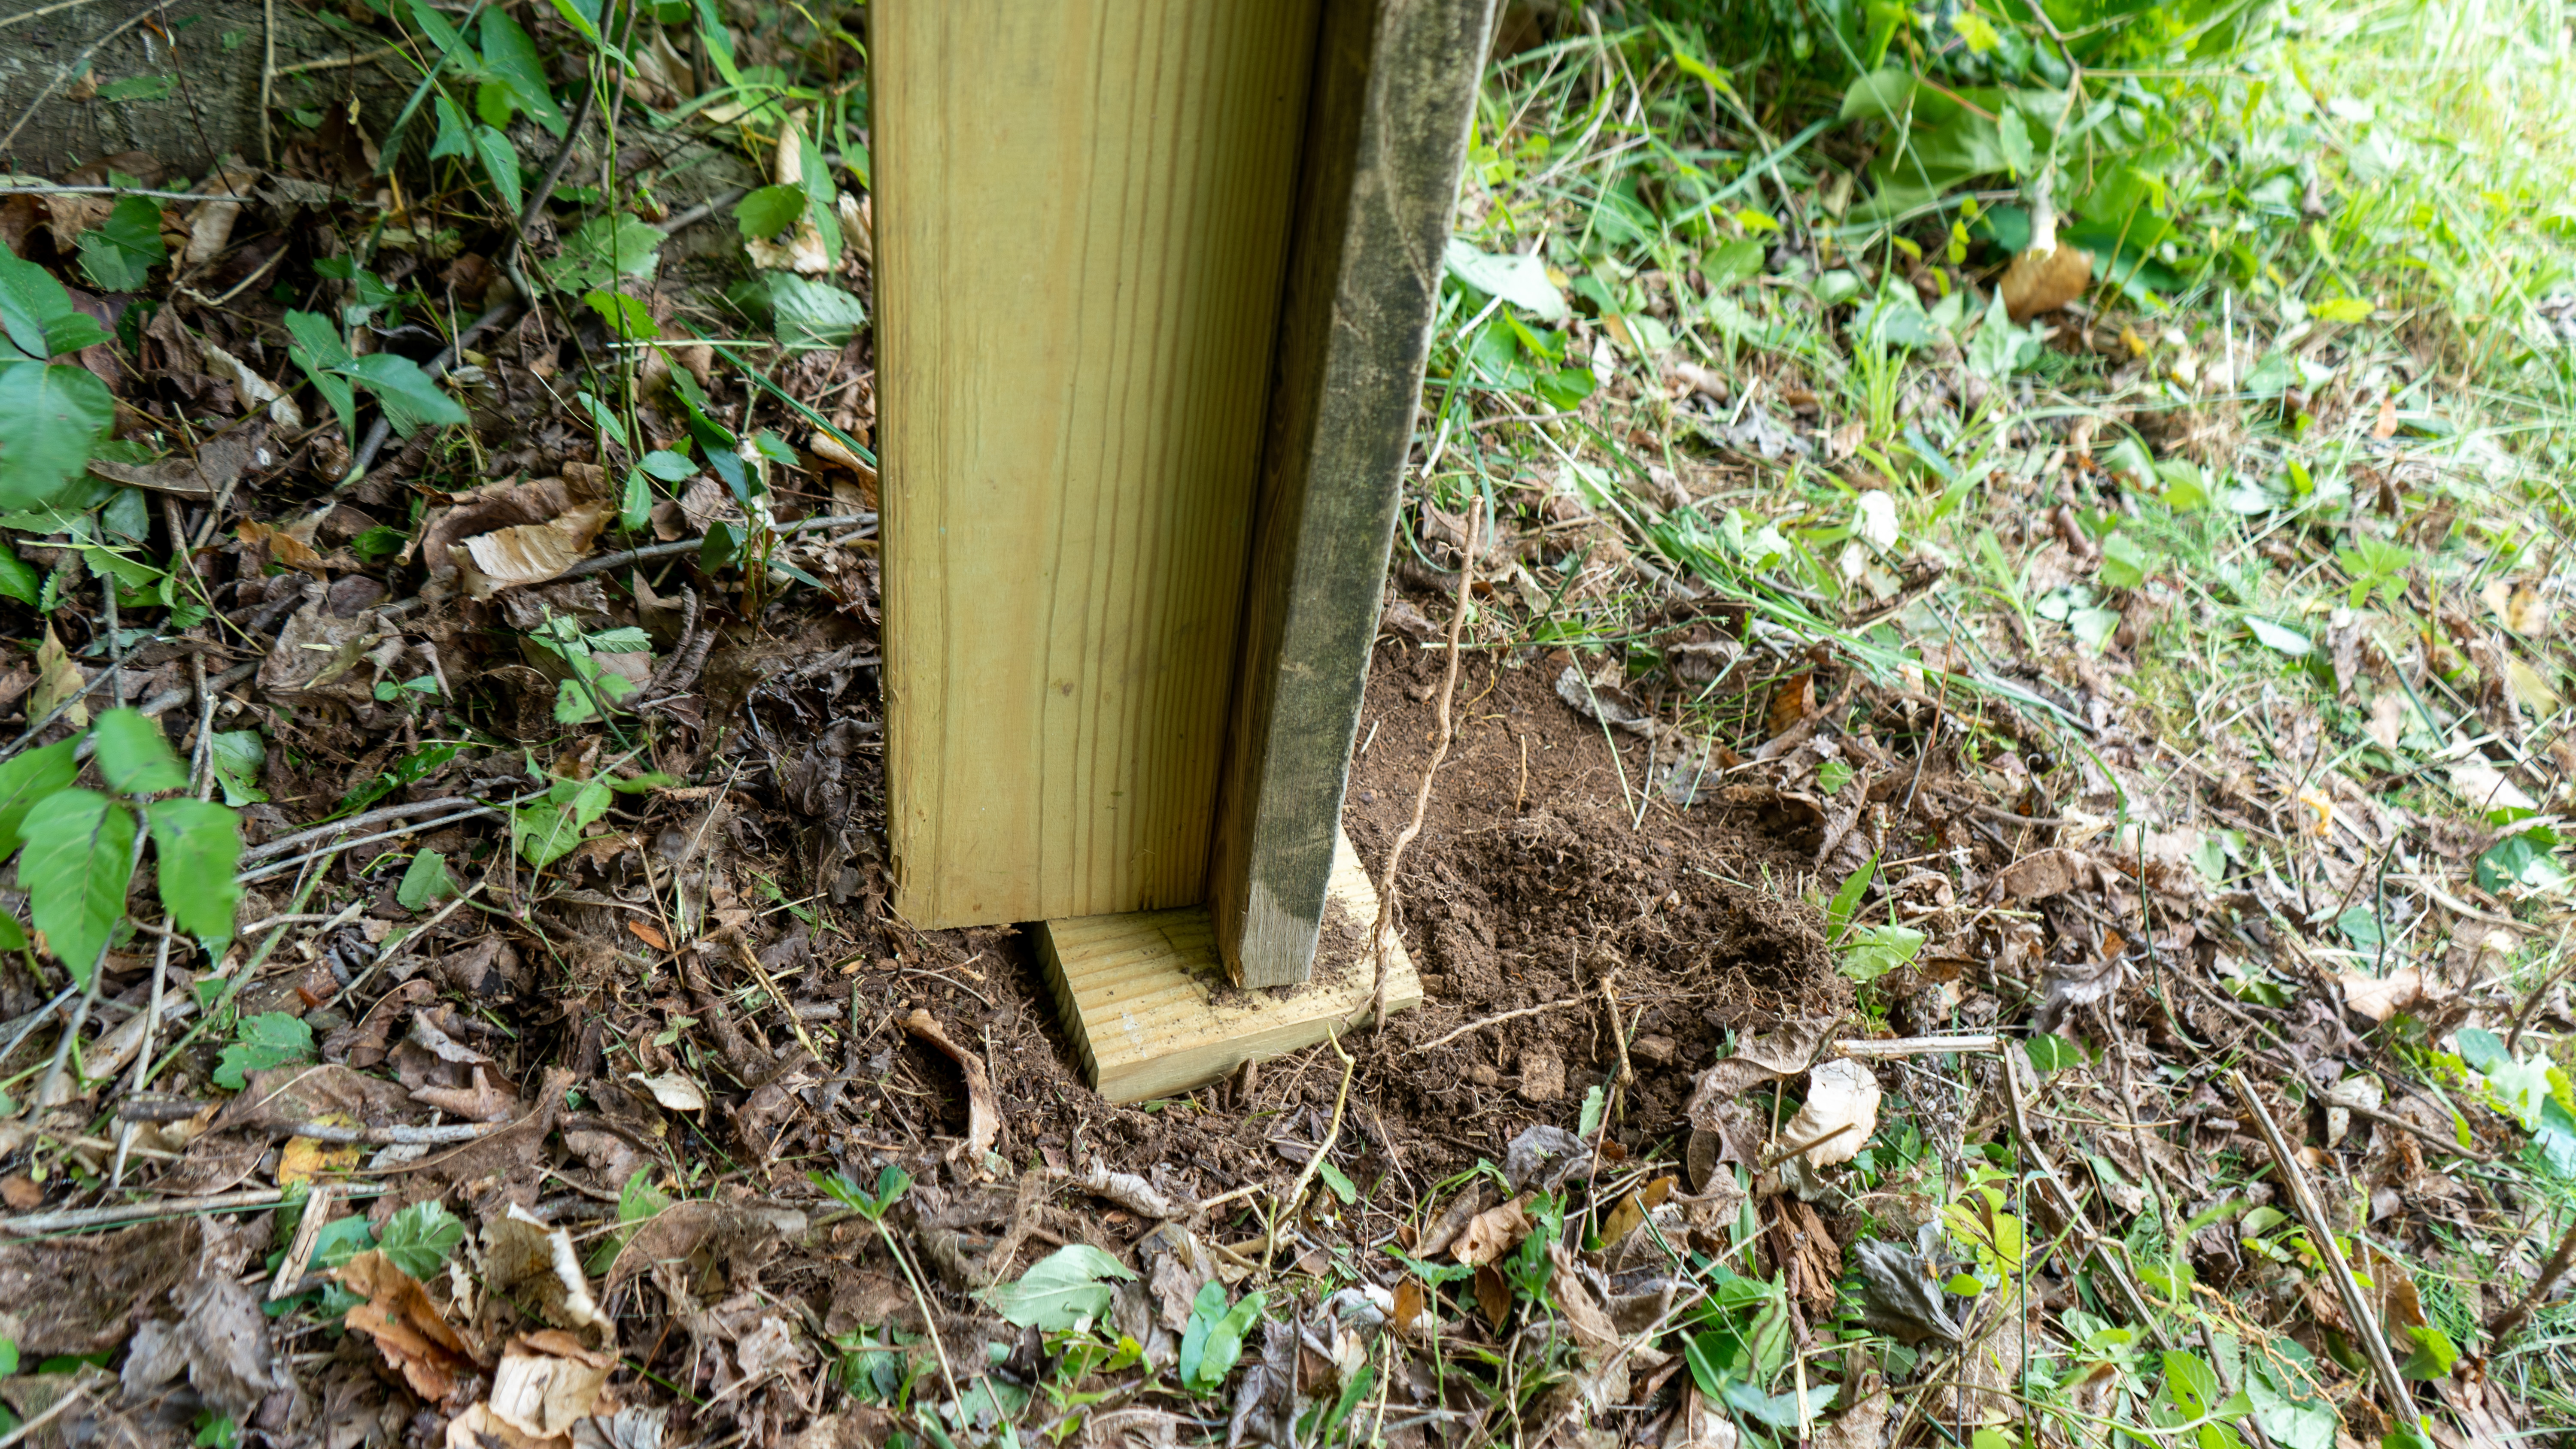
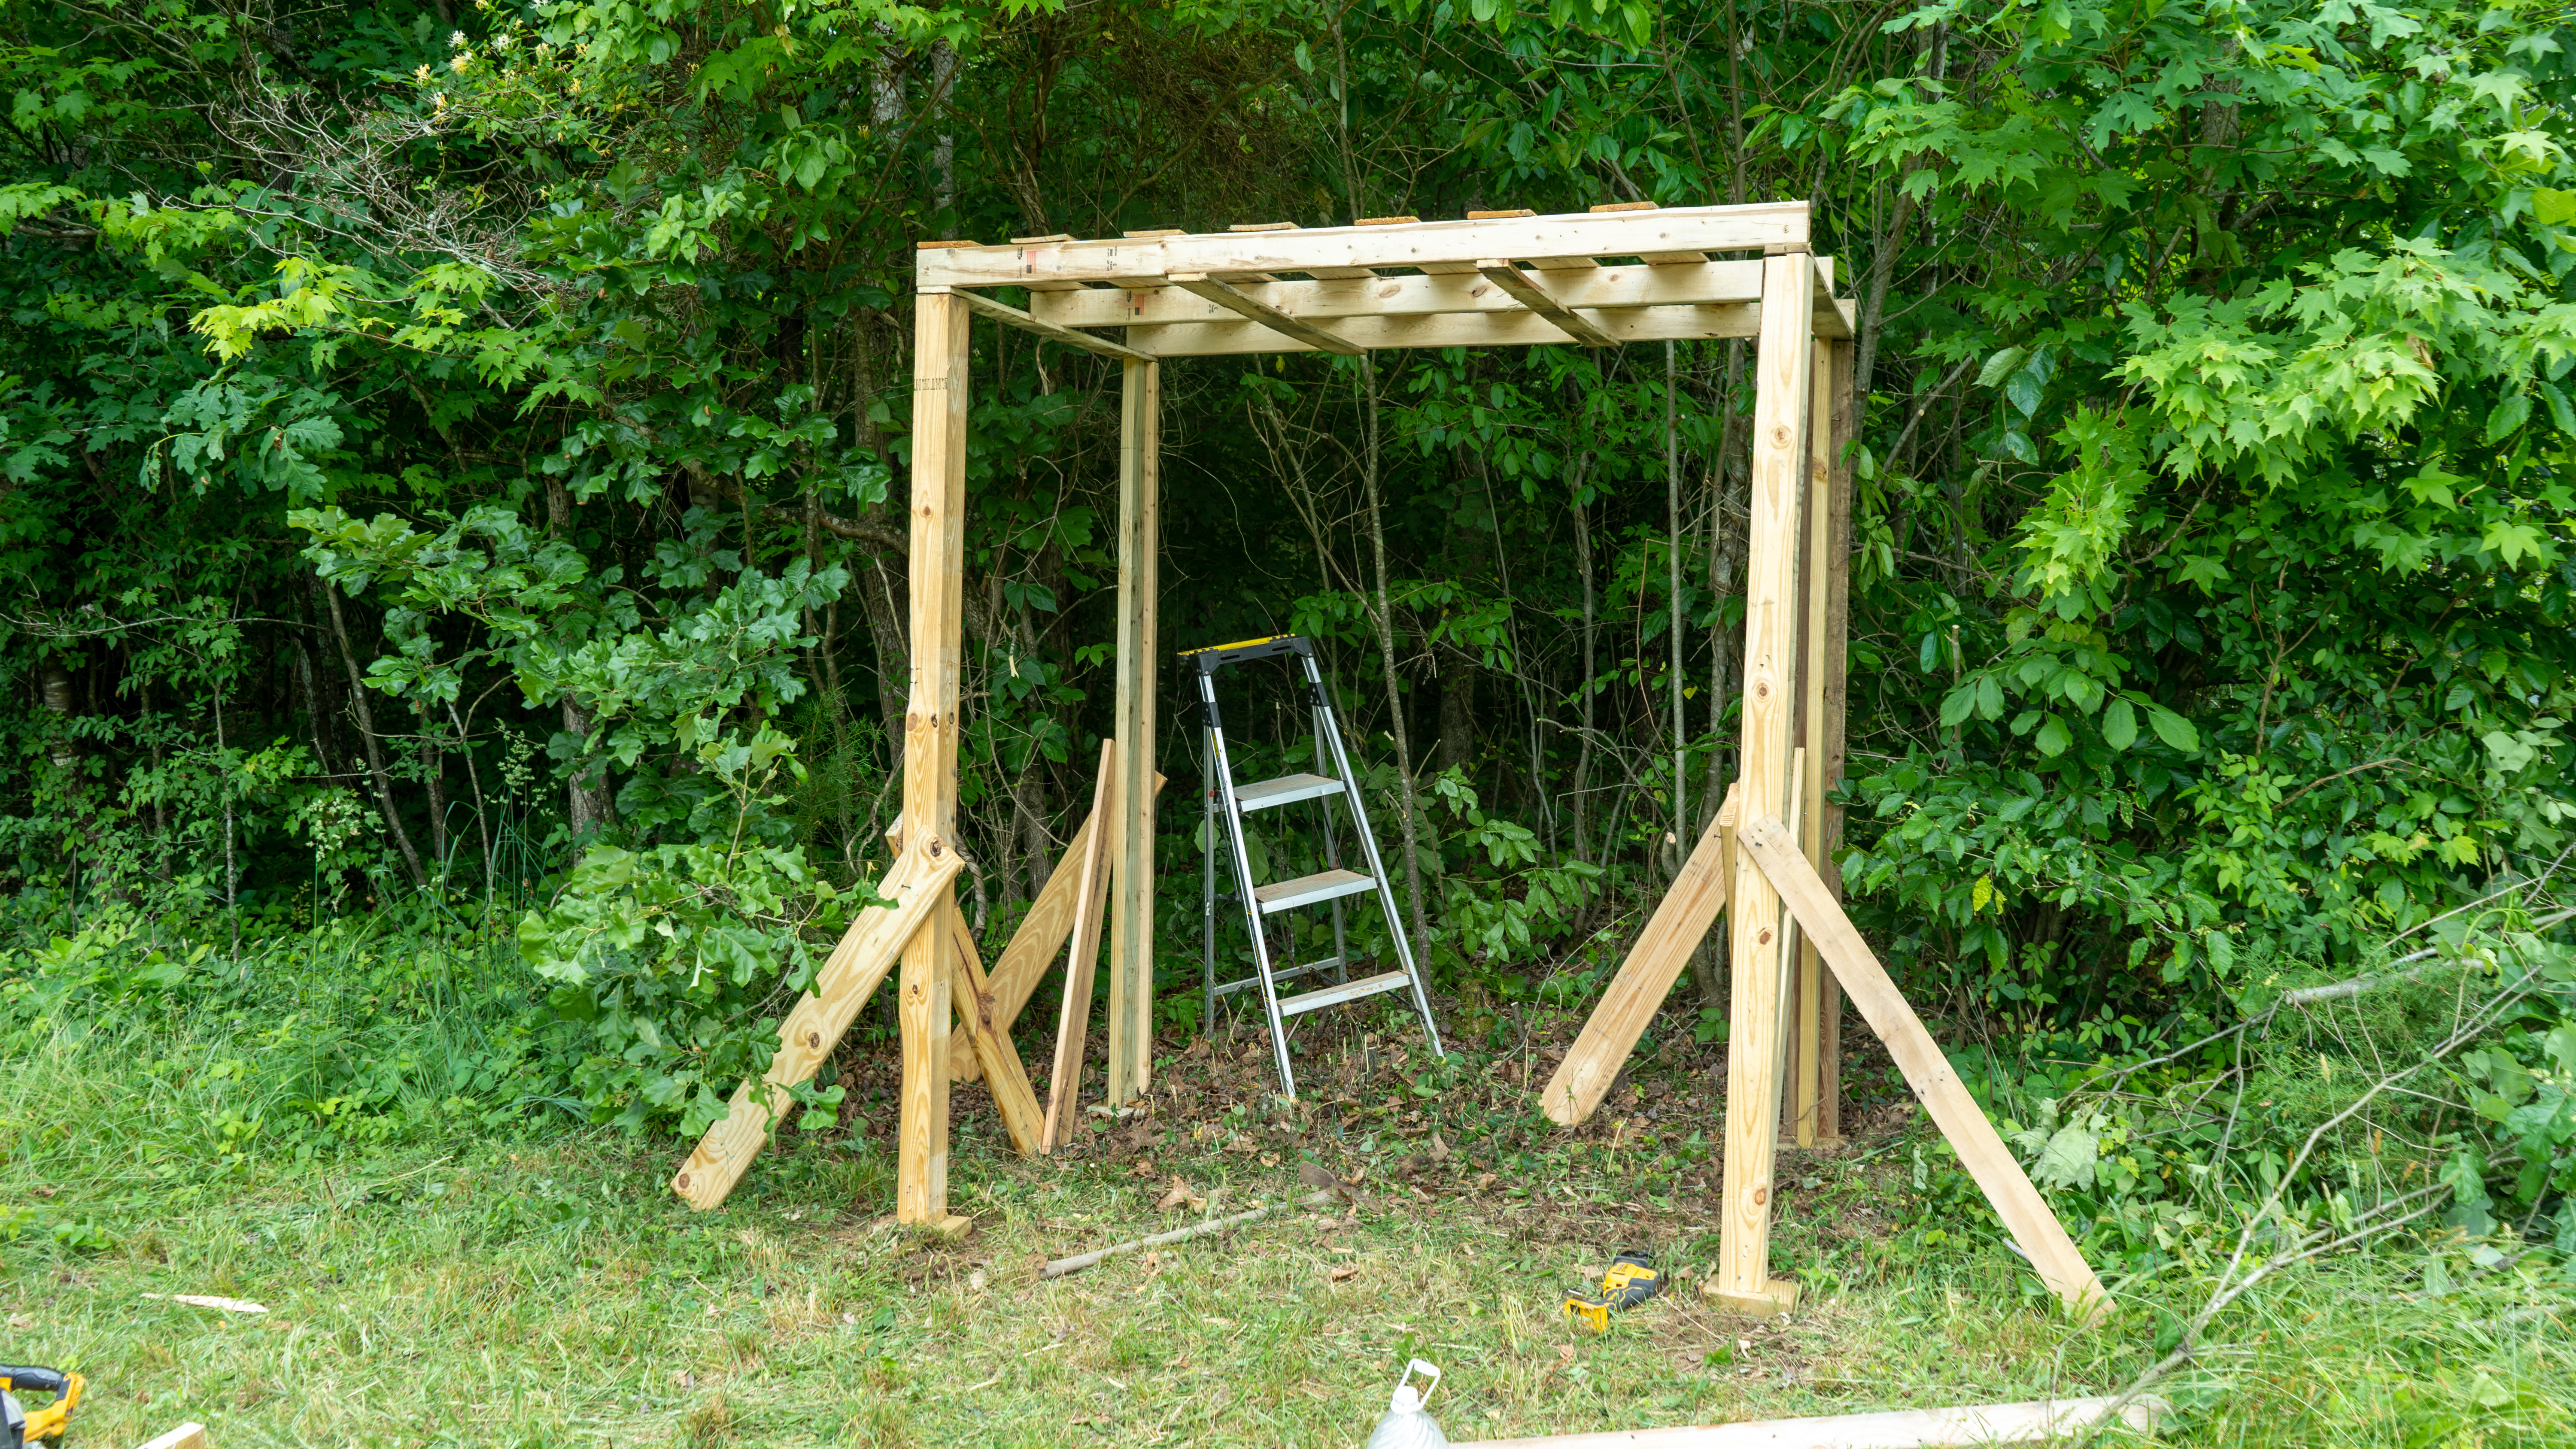
Step 3: Lay Out Structure and Set PostsLay out your soon-to-be structure on the ground, and place pads of pressure-treated lumber where your posts will sit. Next, set posts and tack on braces to hold them upright and plumb. While you can bury the posts for additional strength, you don’t have to so long as you install plenty of diagonal bracing for structural support. I wanted this blind to be modular so that I could potentially disassemble and move it to another location if I choose. This is also why I chose screws over a nail gun. You’ll see an example below of how to double the material to make a post if 4x4s are not an option.

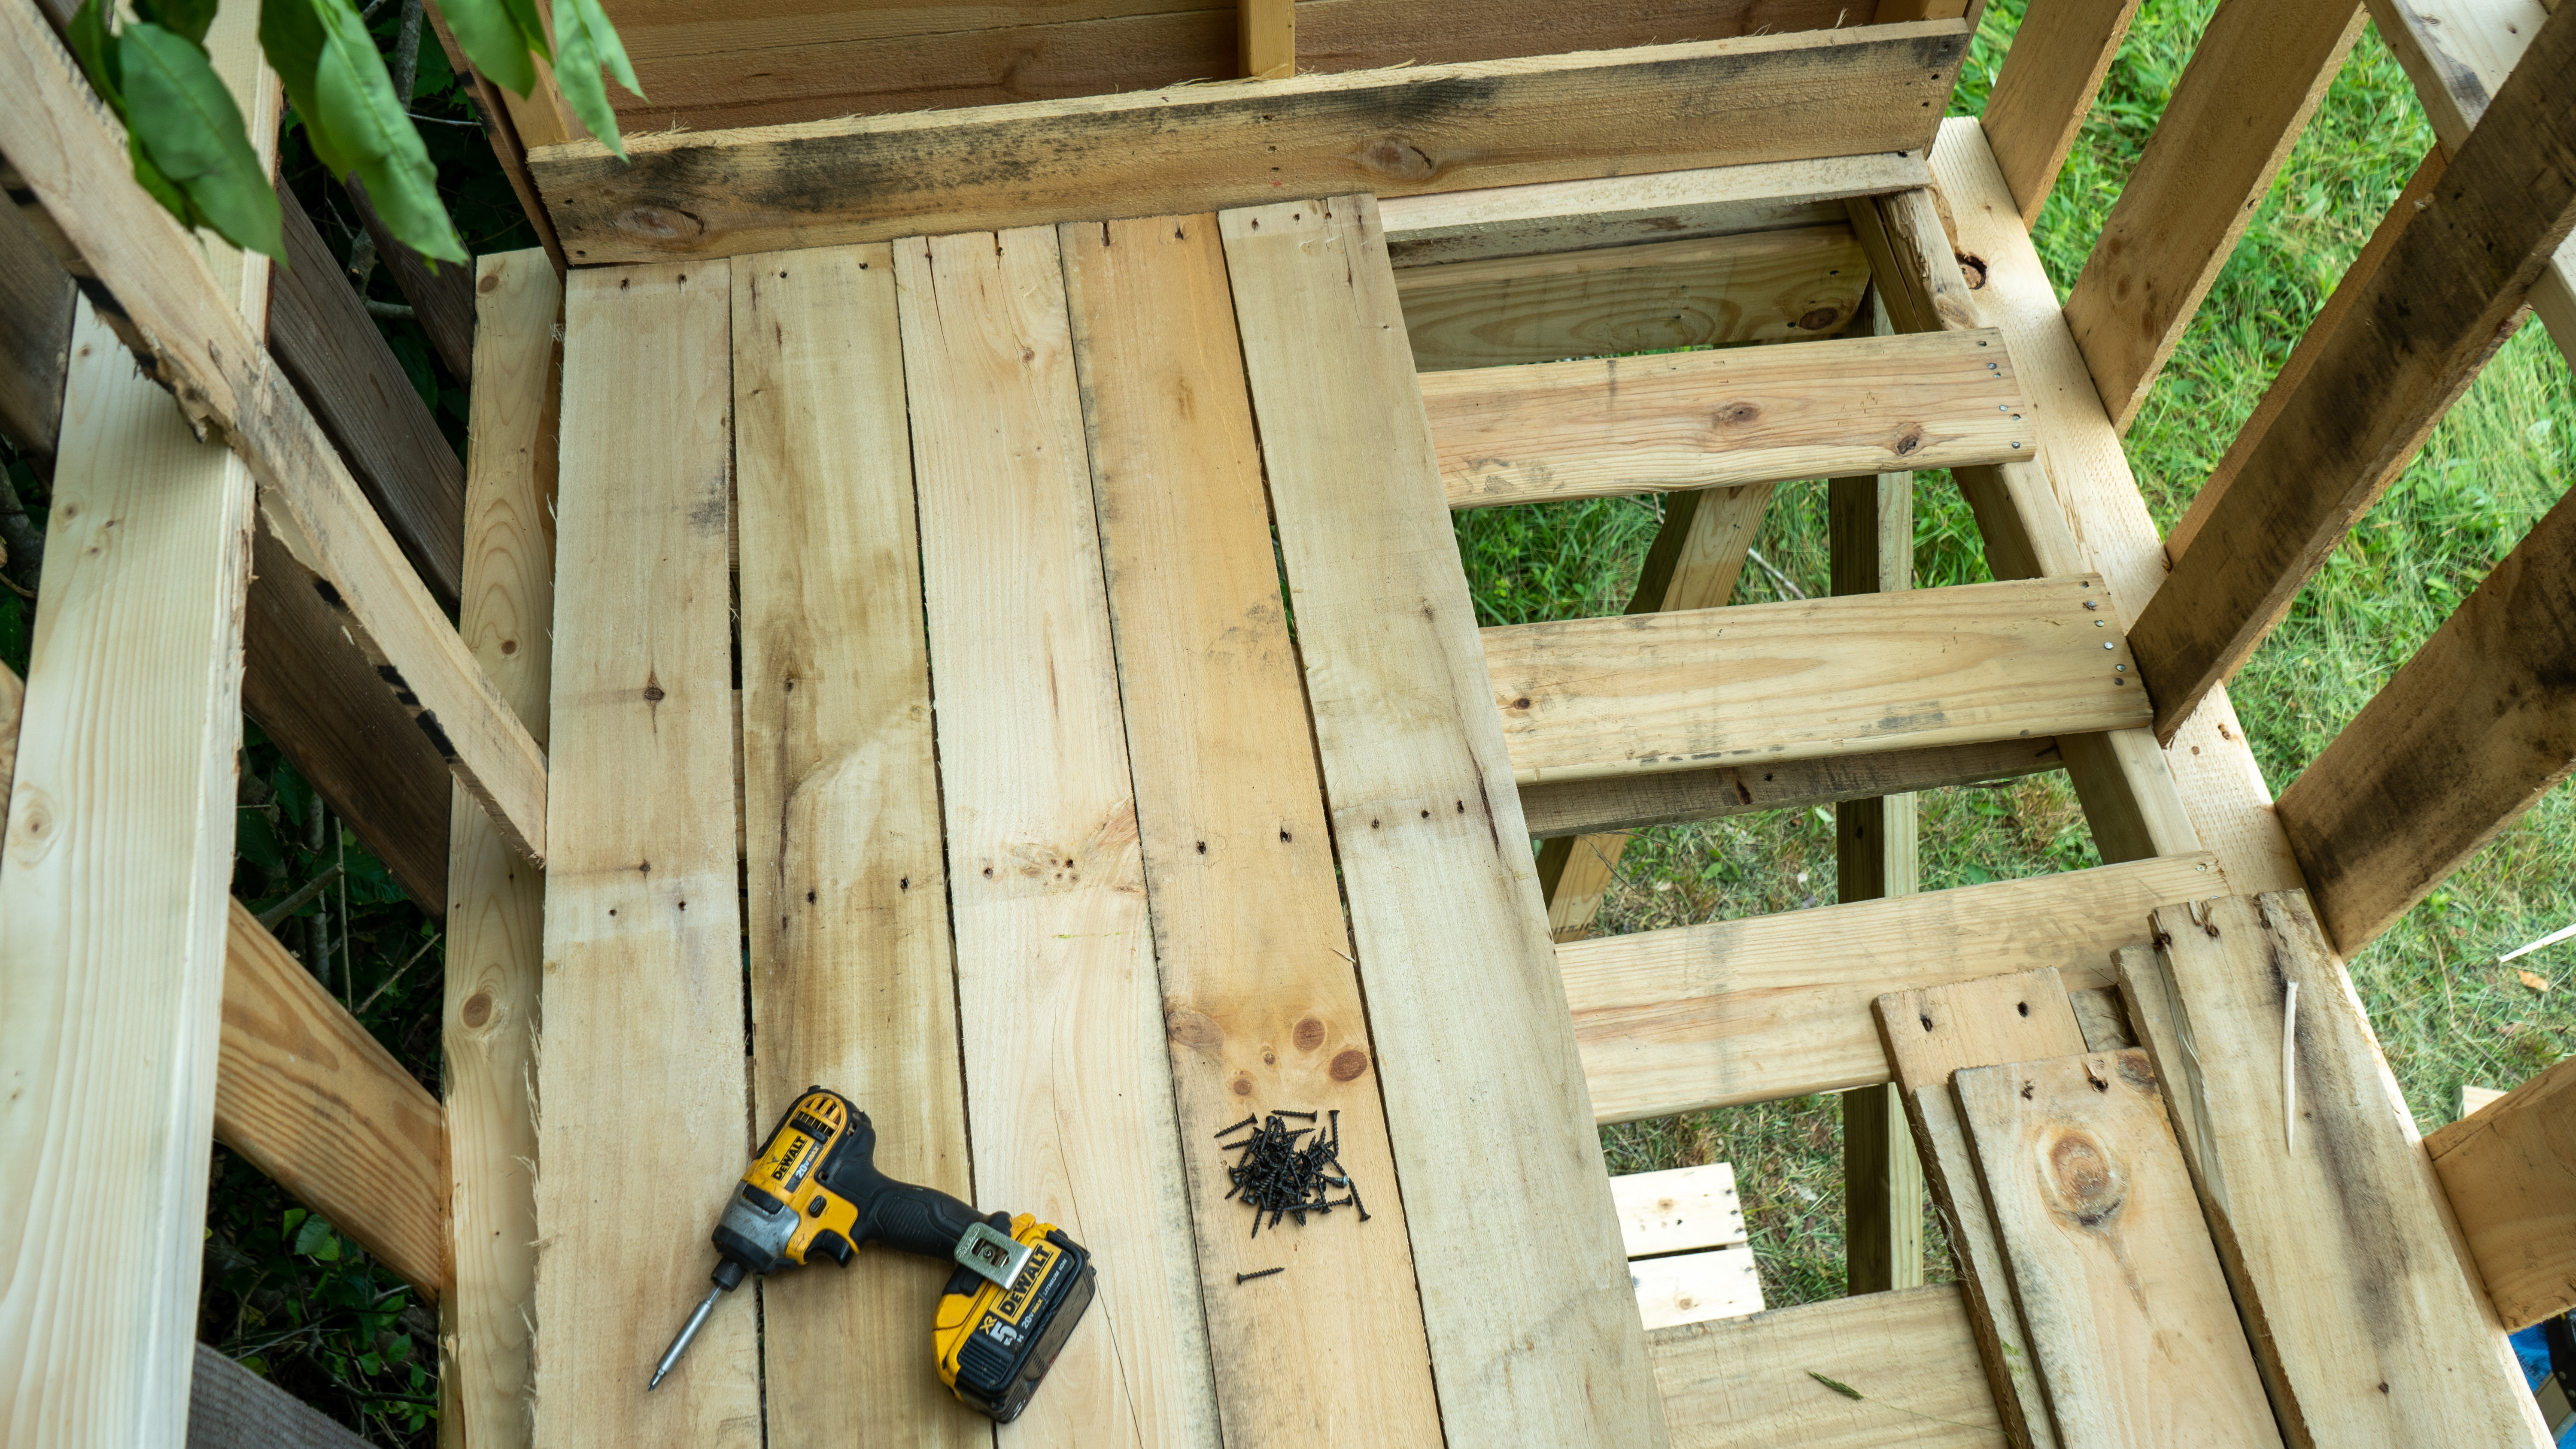
Step 4: Set the FloorOnce the floor is up, tack on blocks to the underside to help hold your wall pallets while you screw them on. Bear in mind throughout this process that pallets are rarely assembled squarely. While you need to do your best to keep your work true to square, we aren’t building fine furniture here so perfection should be reserved for another time. Get that pallet up there and tacked down.
Step 5: Set Wall PalletsRemember those little blocks we put on the bottom of our floor? This is their time to shine. These are the difference between requiring a second set of hands or not. I did this instead of setting the walls directly onto the floor to maximize floor space. This method essentially nets us an extra 8 inches of floor space.
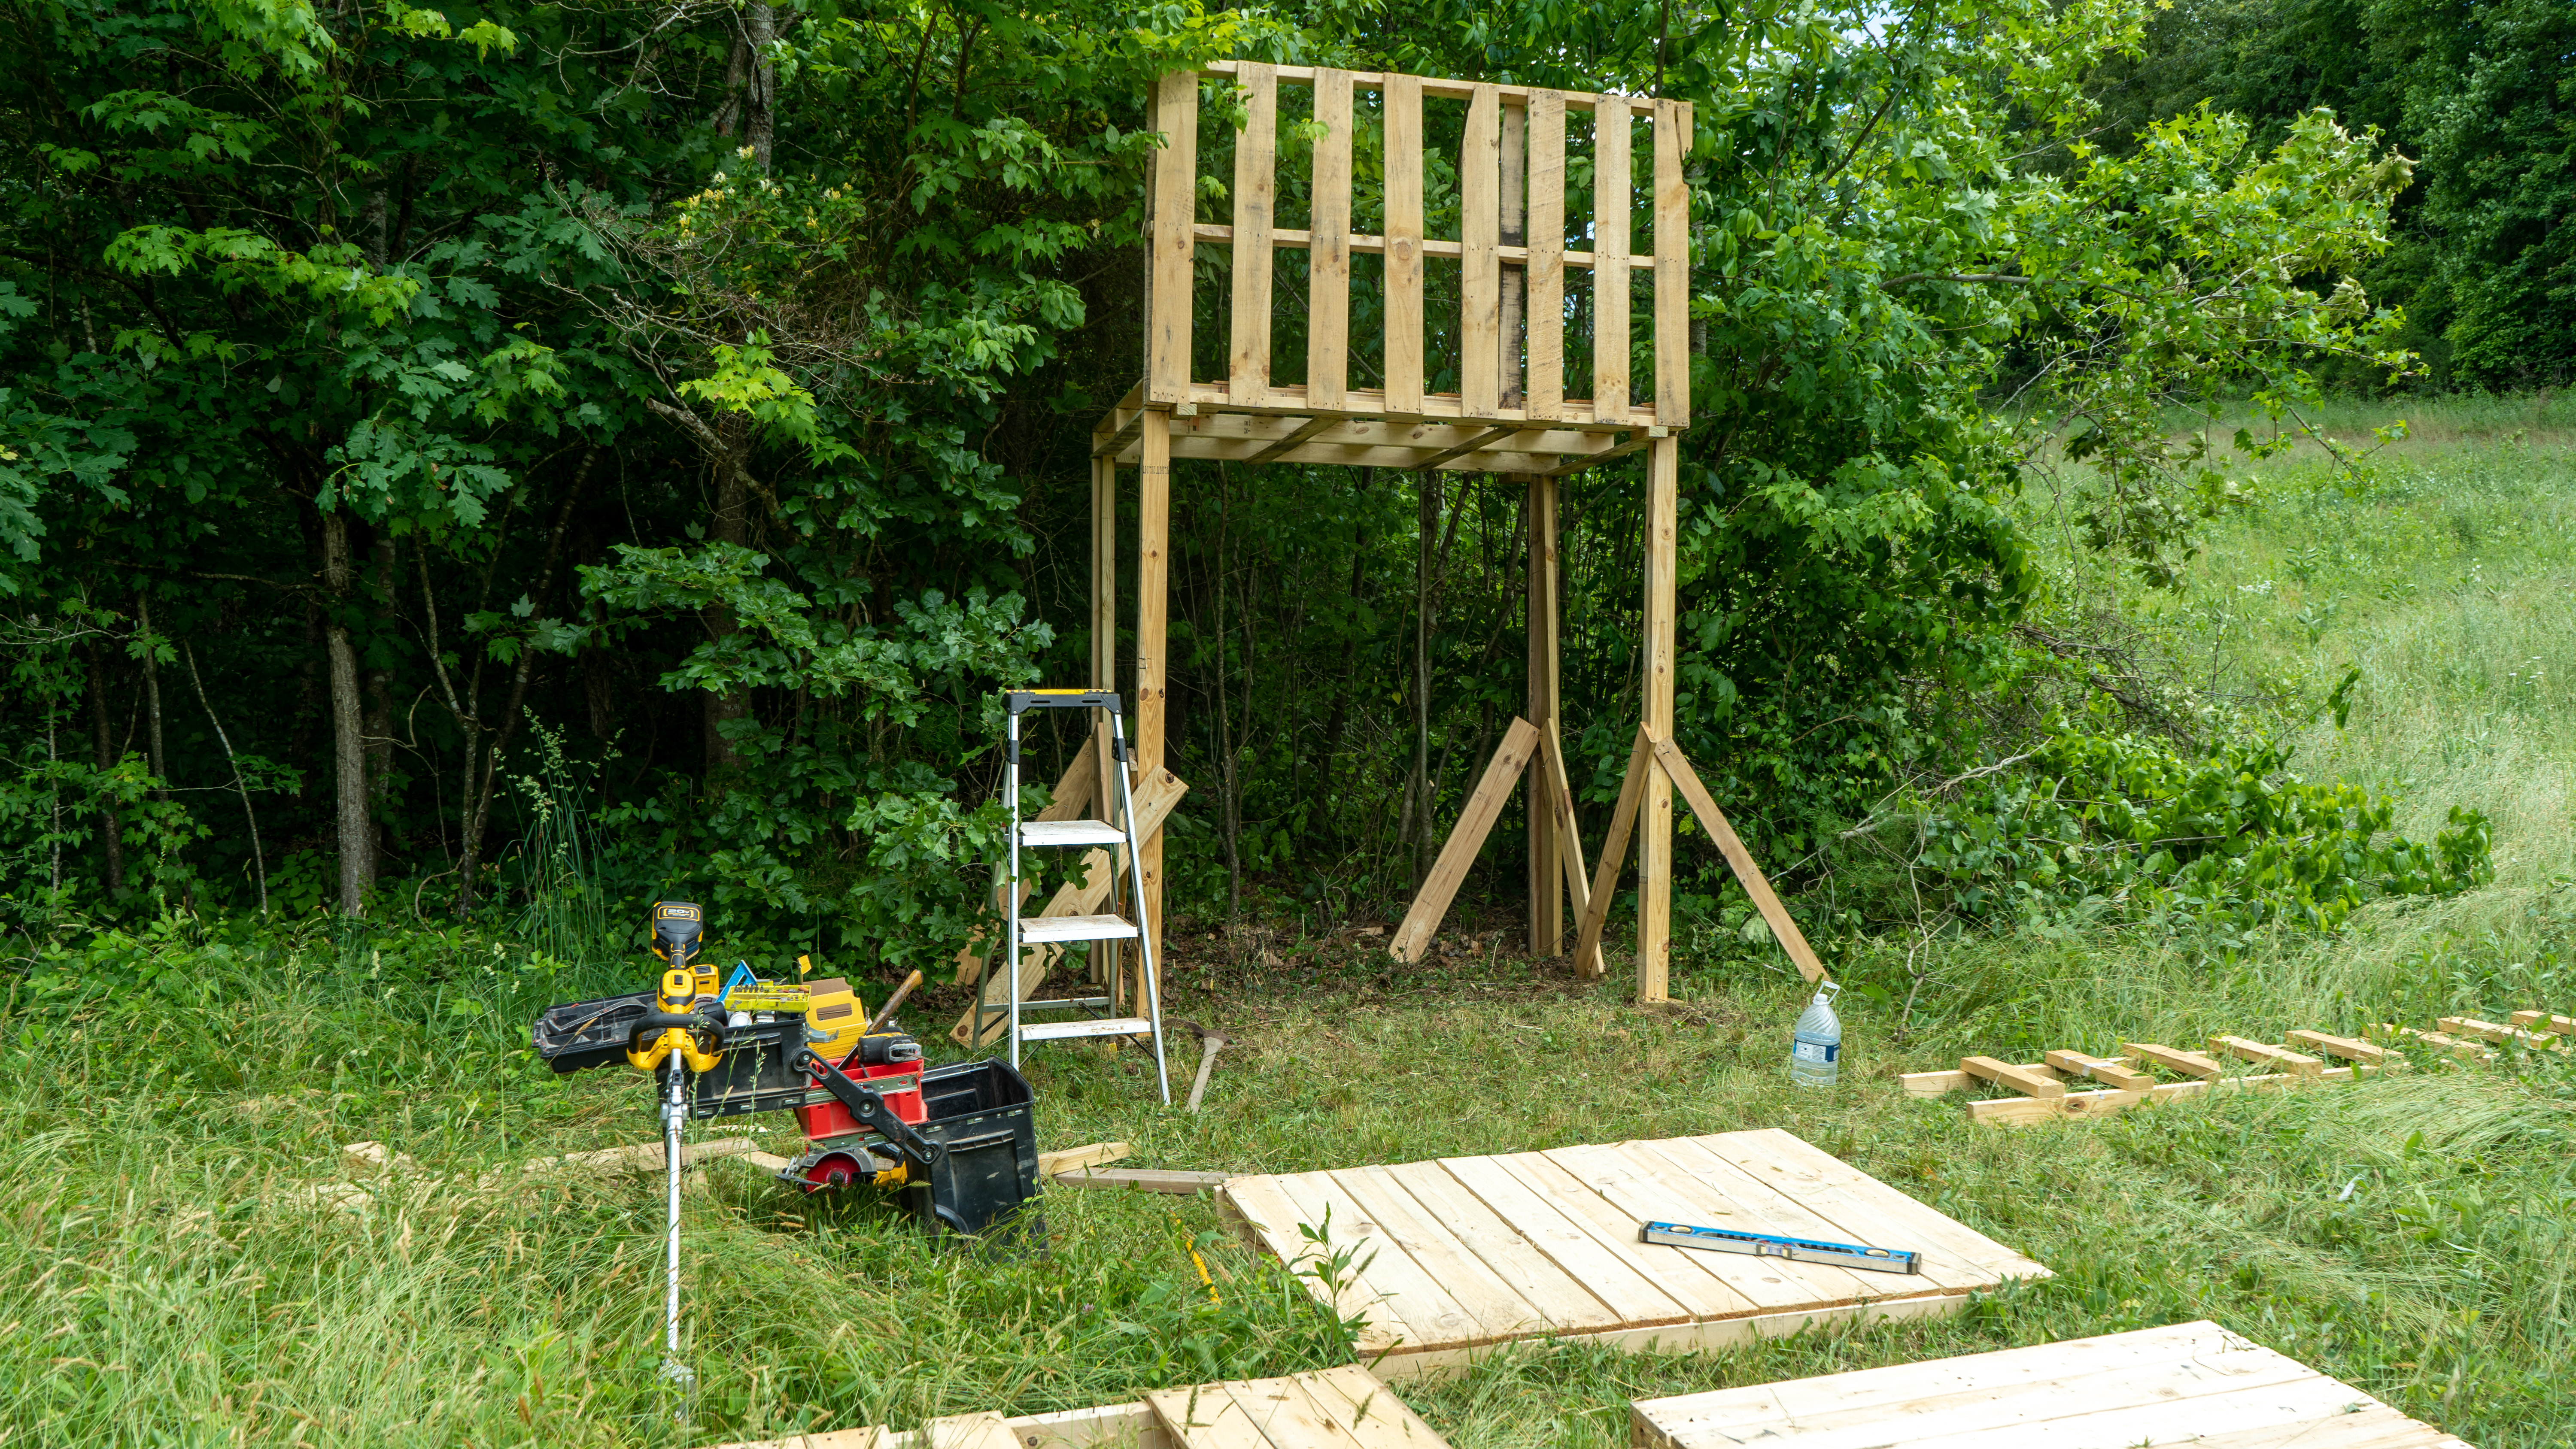
Step 6: Add Additional BracingNow you’ve got all four walls set (you left an opening for entry, right?). Before we get upstairs and start working, we need to add additional braces below our floor pallet. Without these, the structural strength of the floor is minimal. Now is also the time to throw on the diagonal braces on our posts. With the posts not being buried, the diagonals are mandatory.
The surface of our floor needs to be bolstered for strength, so grab some of the material you stripped from your spare pallets and lay it down on the floor perpendicular to the existing floor material. This is crucial to keeping both your legs above the floor as opposed to dangling below it. This is also the time to build your ladder (or, if you’re lucky like I was, you found a lumber ladder in a dumpster) and lean it up for access to the penthouse.
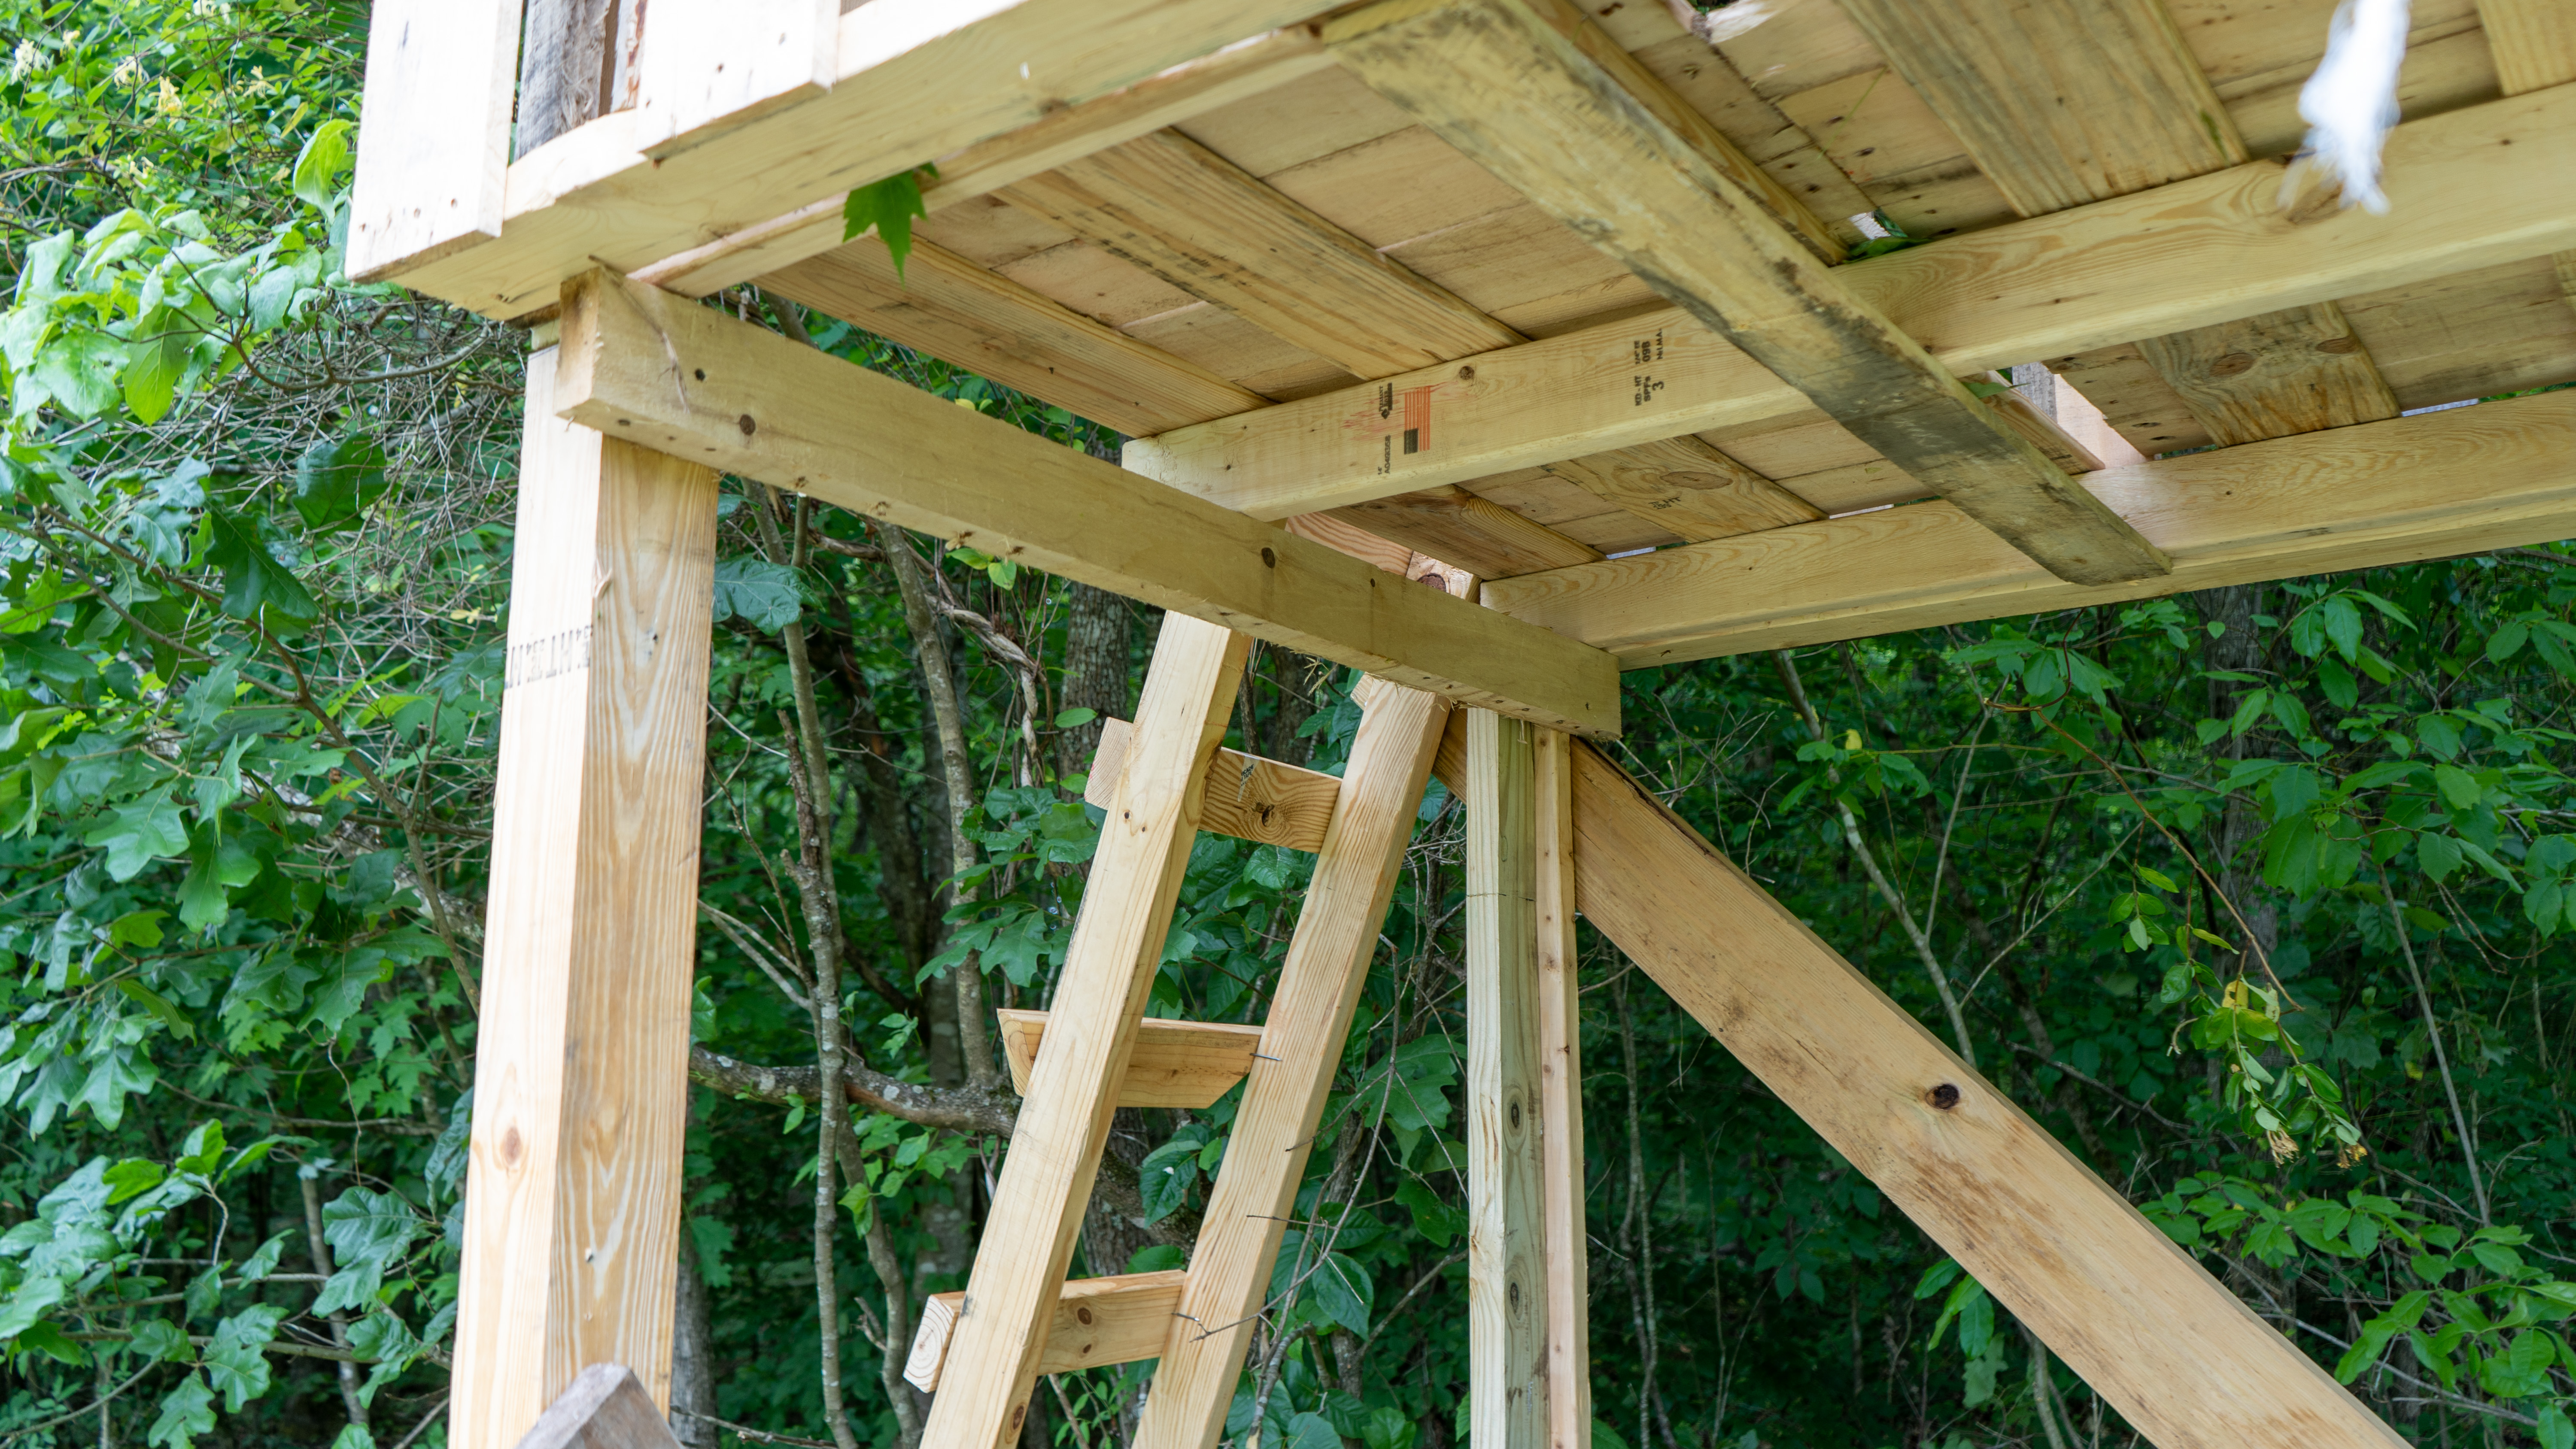
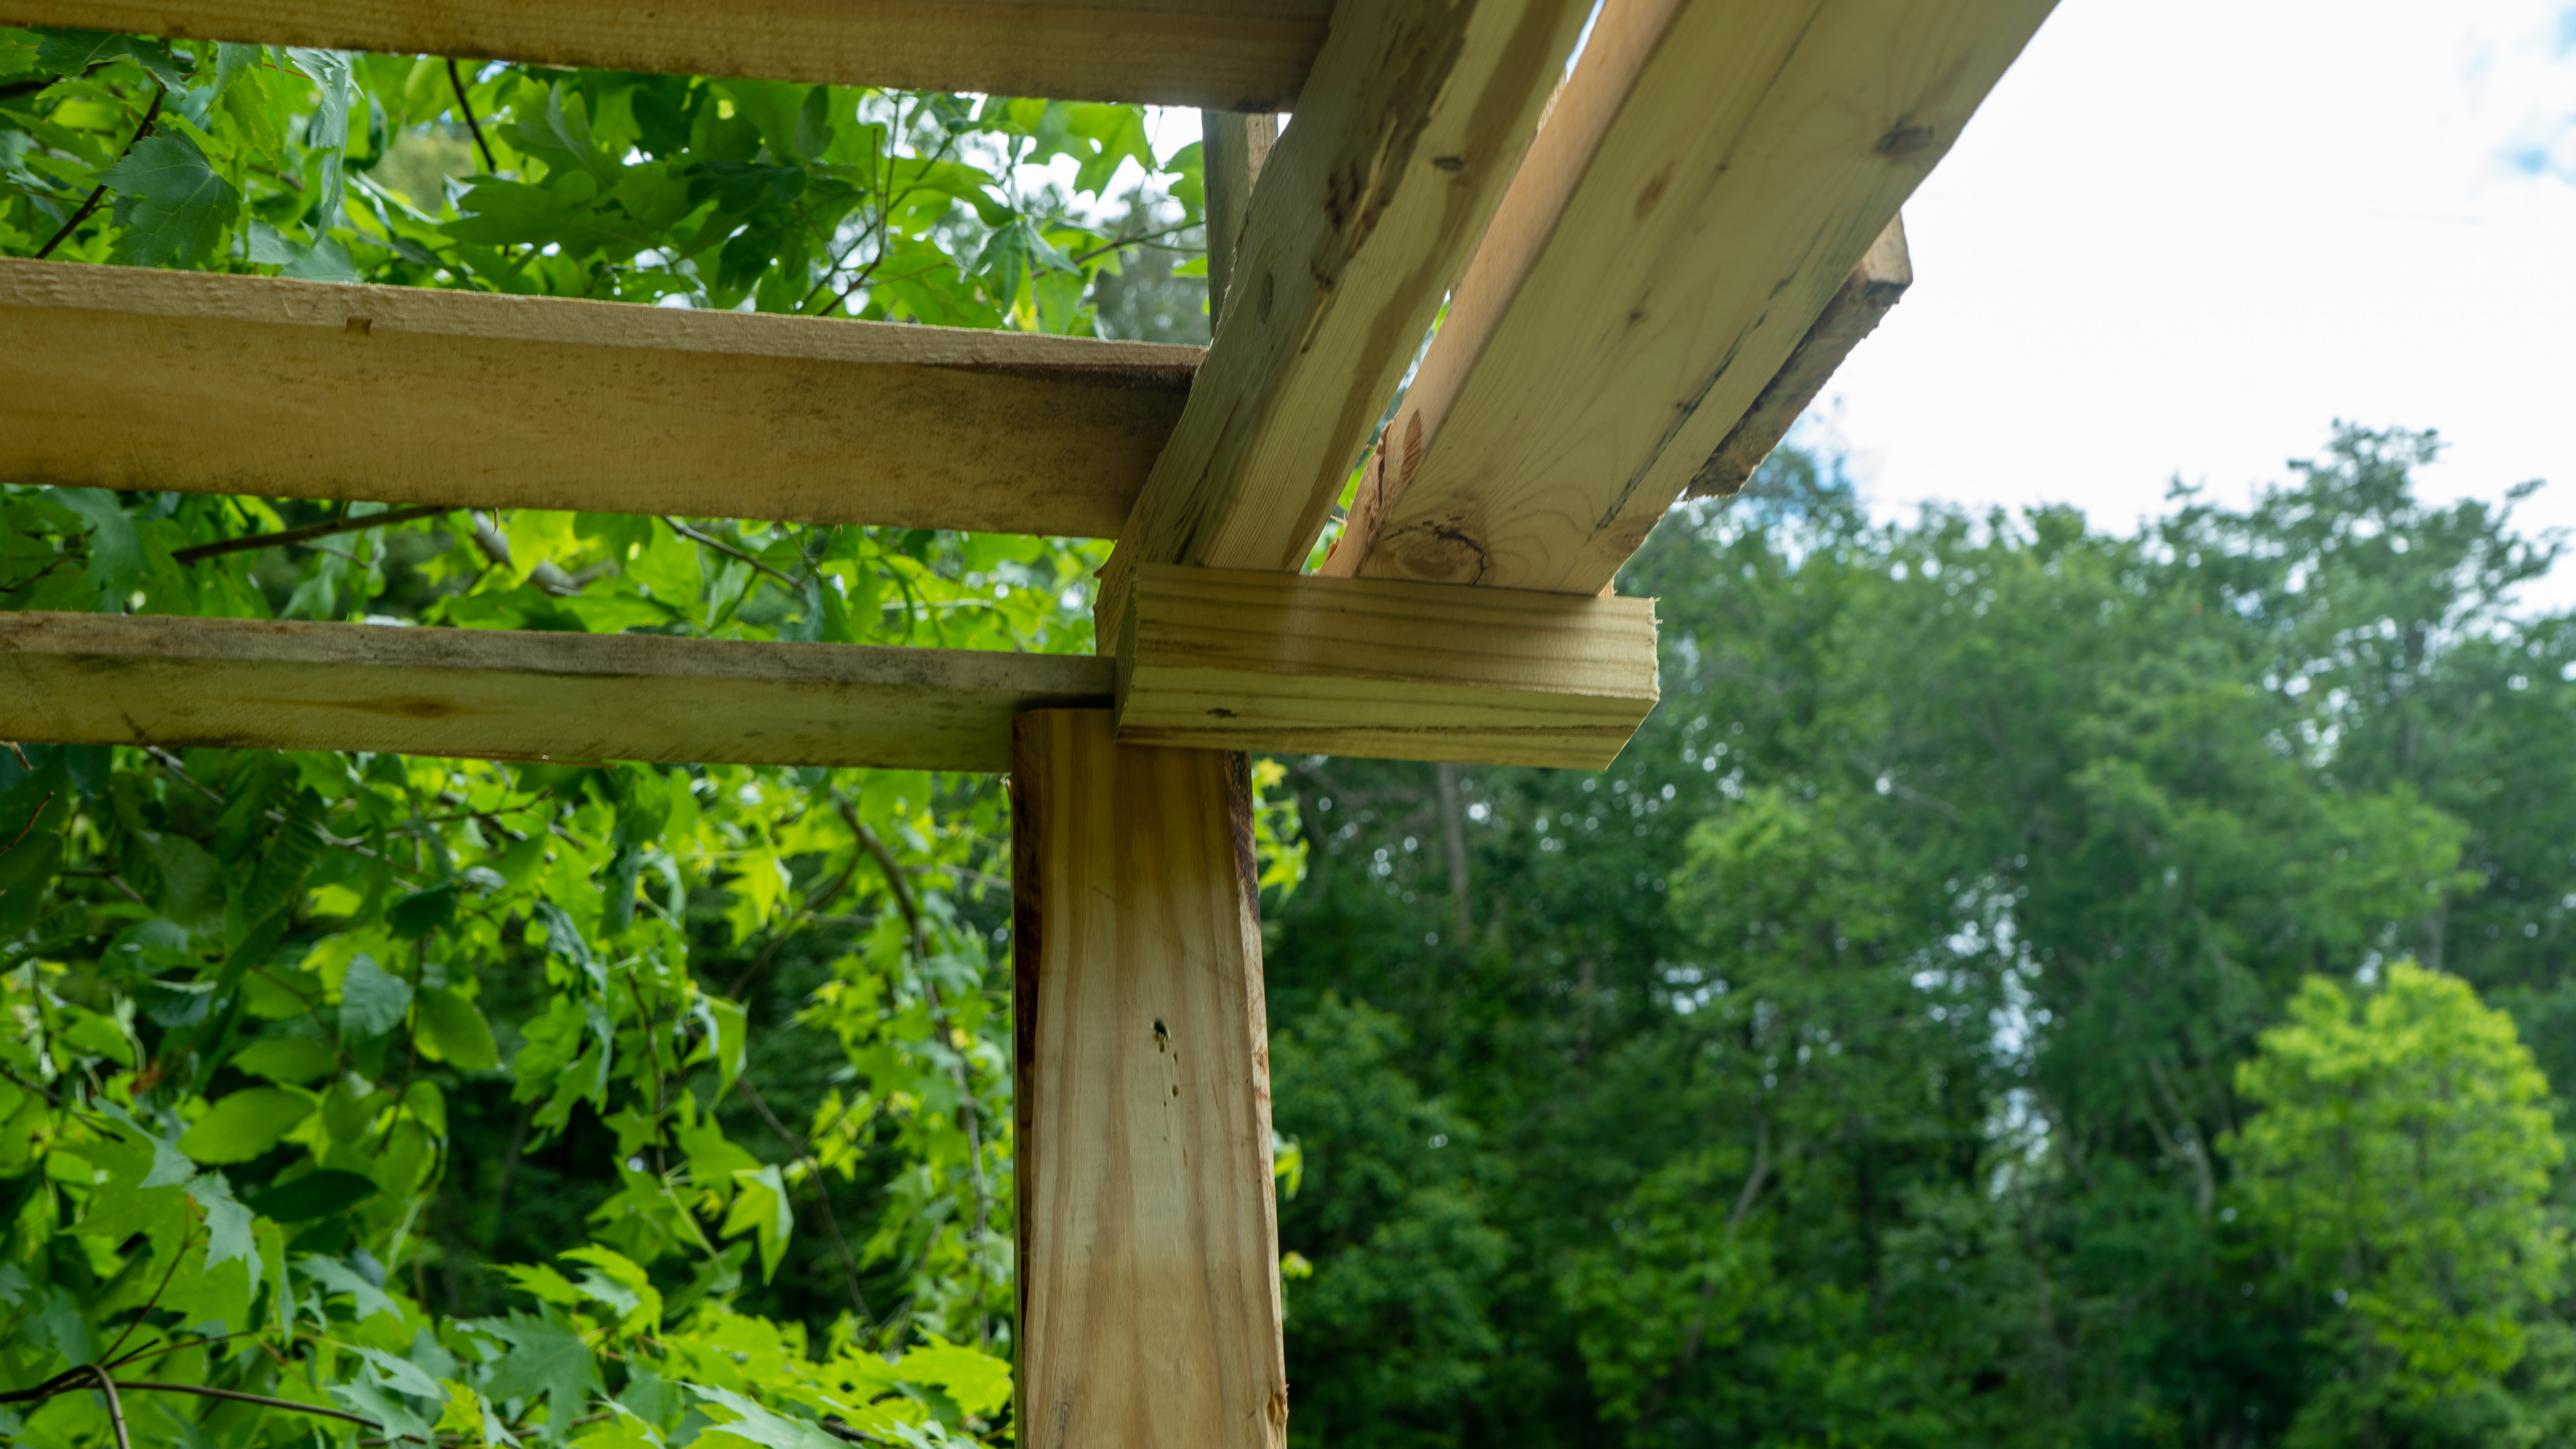
Step 7: Install RoofWith the floor secure, we can now safely work on our roof. Using 2x4 material from our stripped pallets, install two supports and the ridge “beam” for our roof, as well as a top plate across the entry to keep the walls secure on that end.
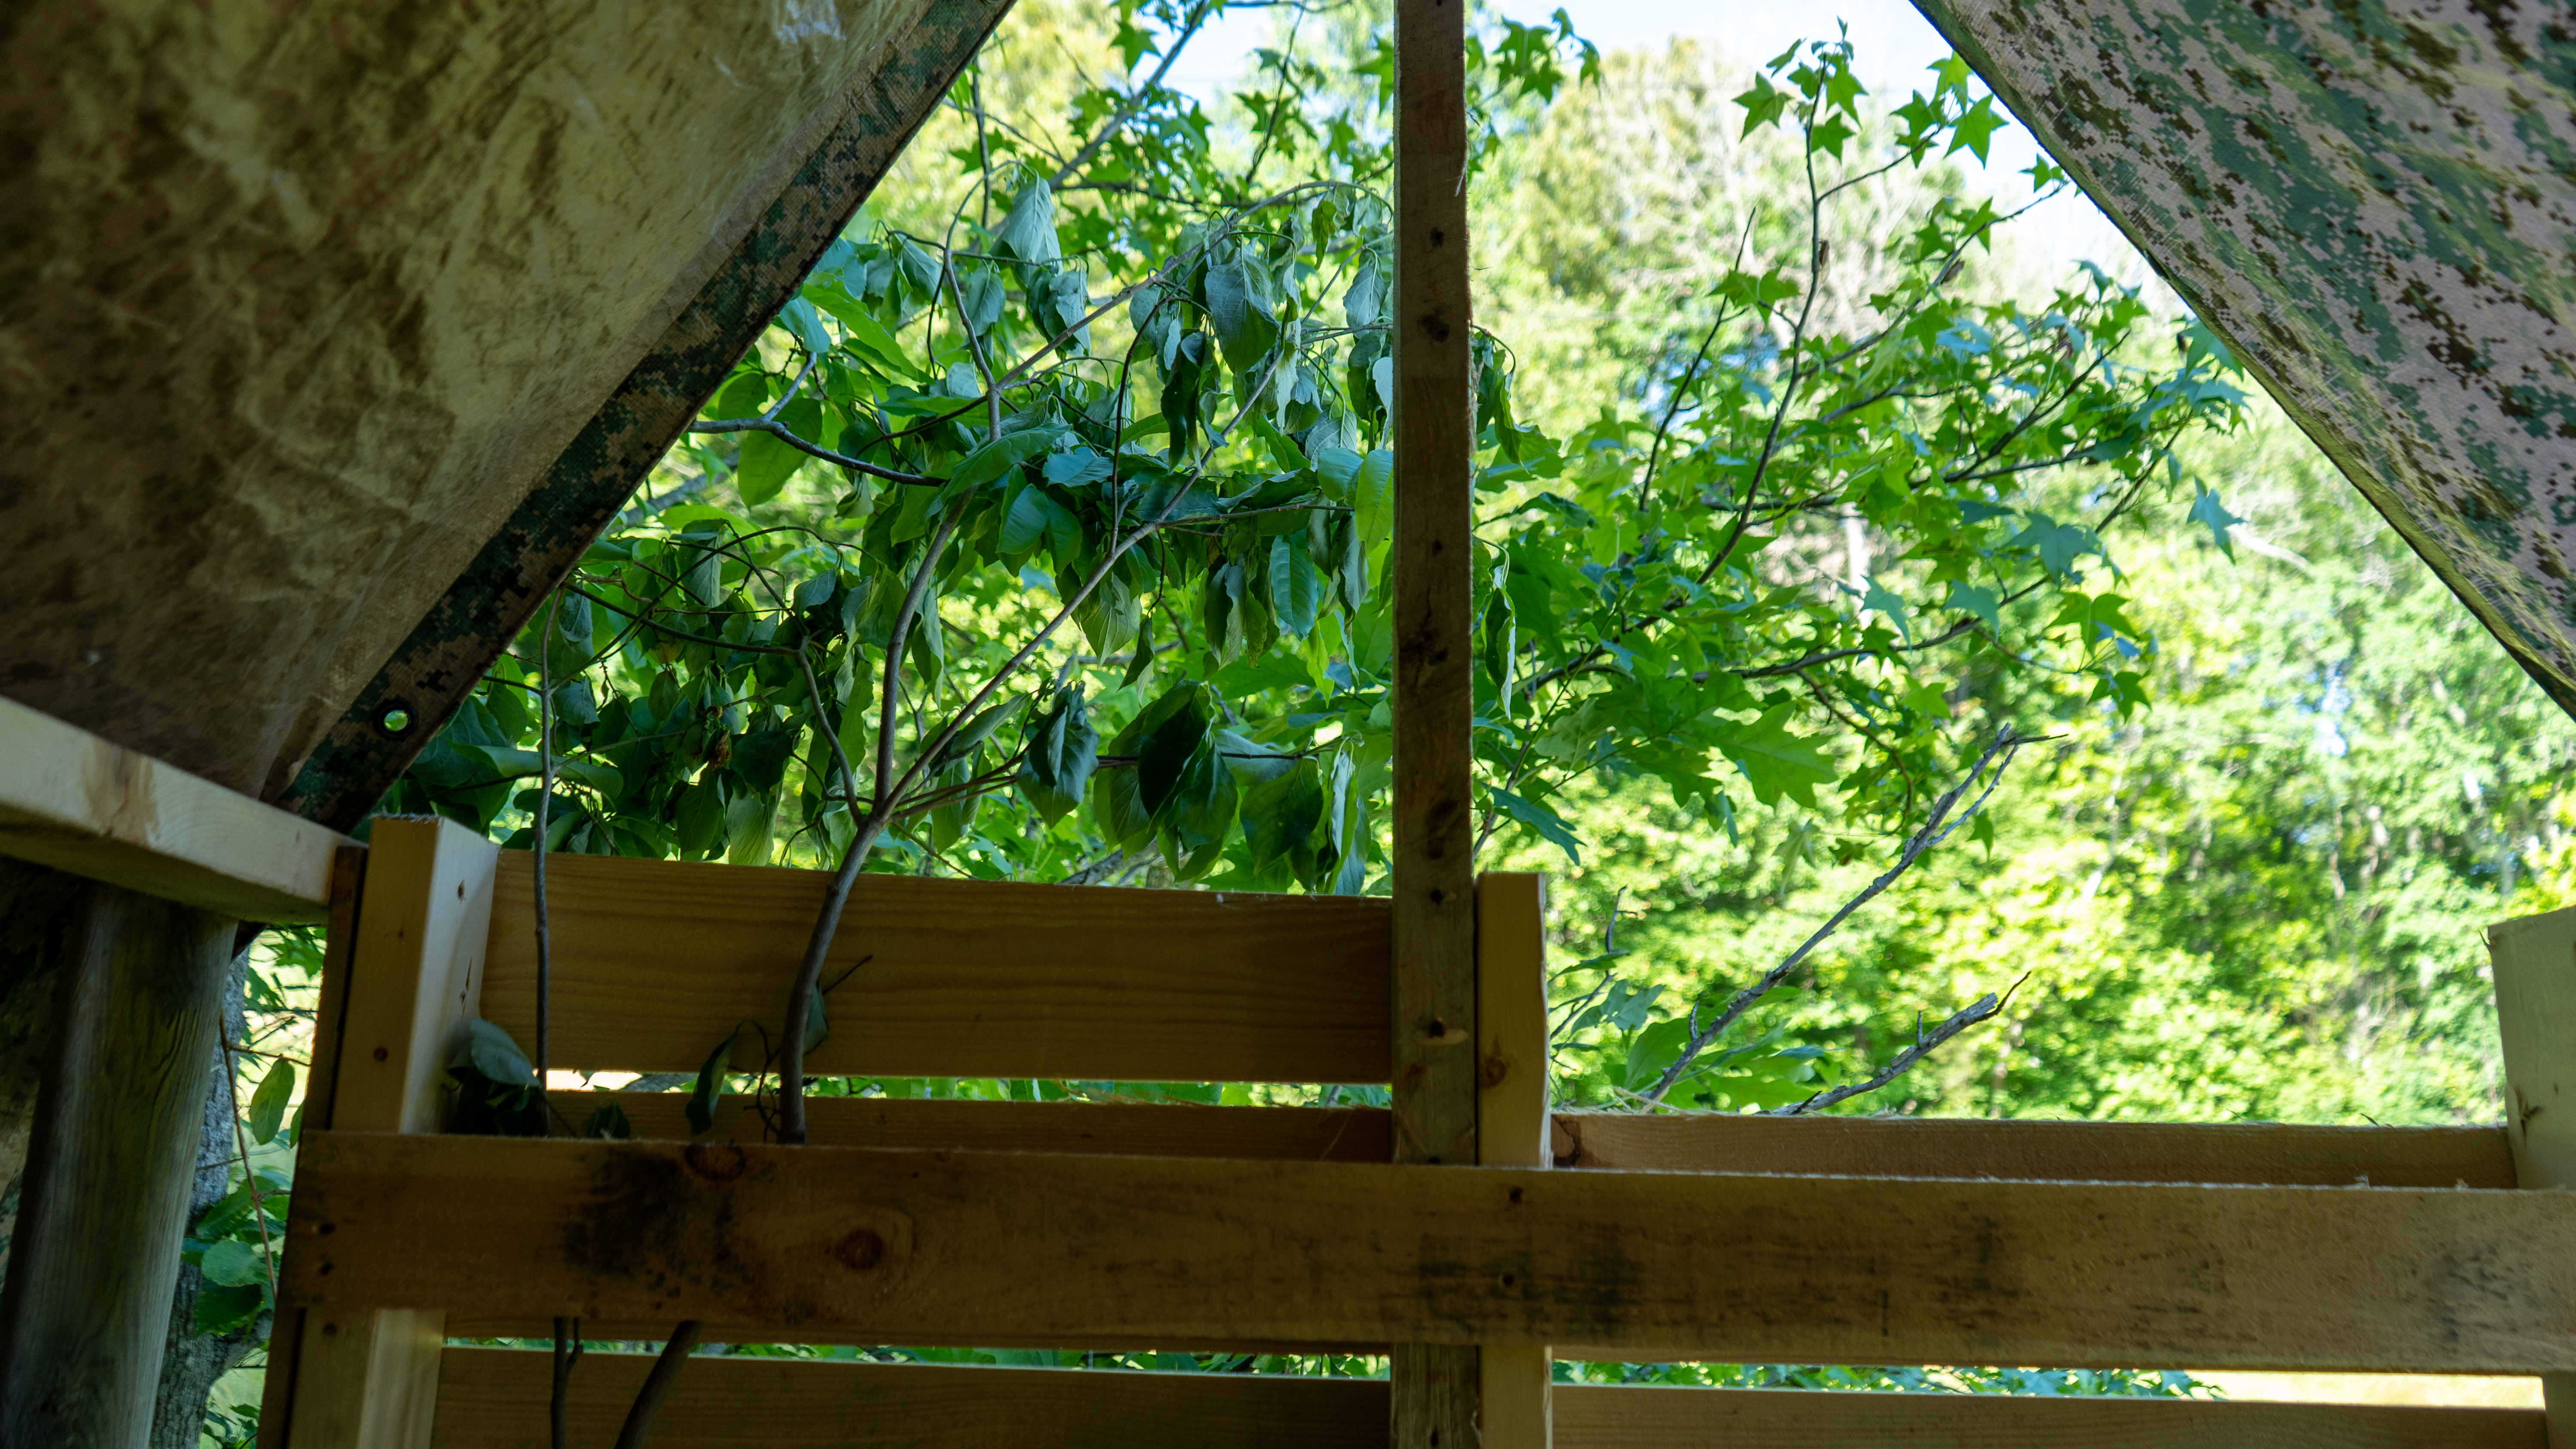
Step 8: Modify as NeededThe design of the pallets offers many shooting windows for firearms, but you will need to cut some material away if you intend to bow hunt from your new pallet blind. I intend to use ours for gun hunting with the kids and wife, so it wasn’t really necessary to cut more shooting windows. Modify to suit your needs as you see fit, and brush it in with some of the branches we pruned in previous steps.
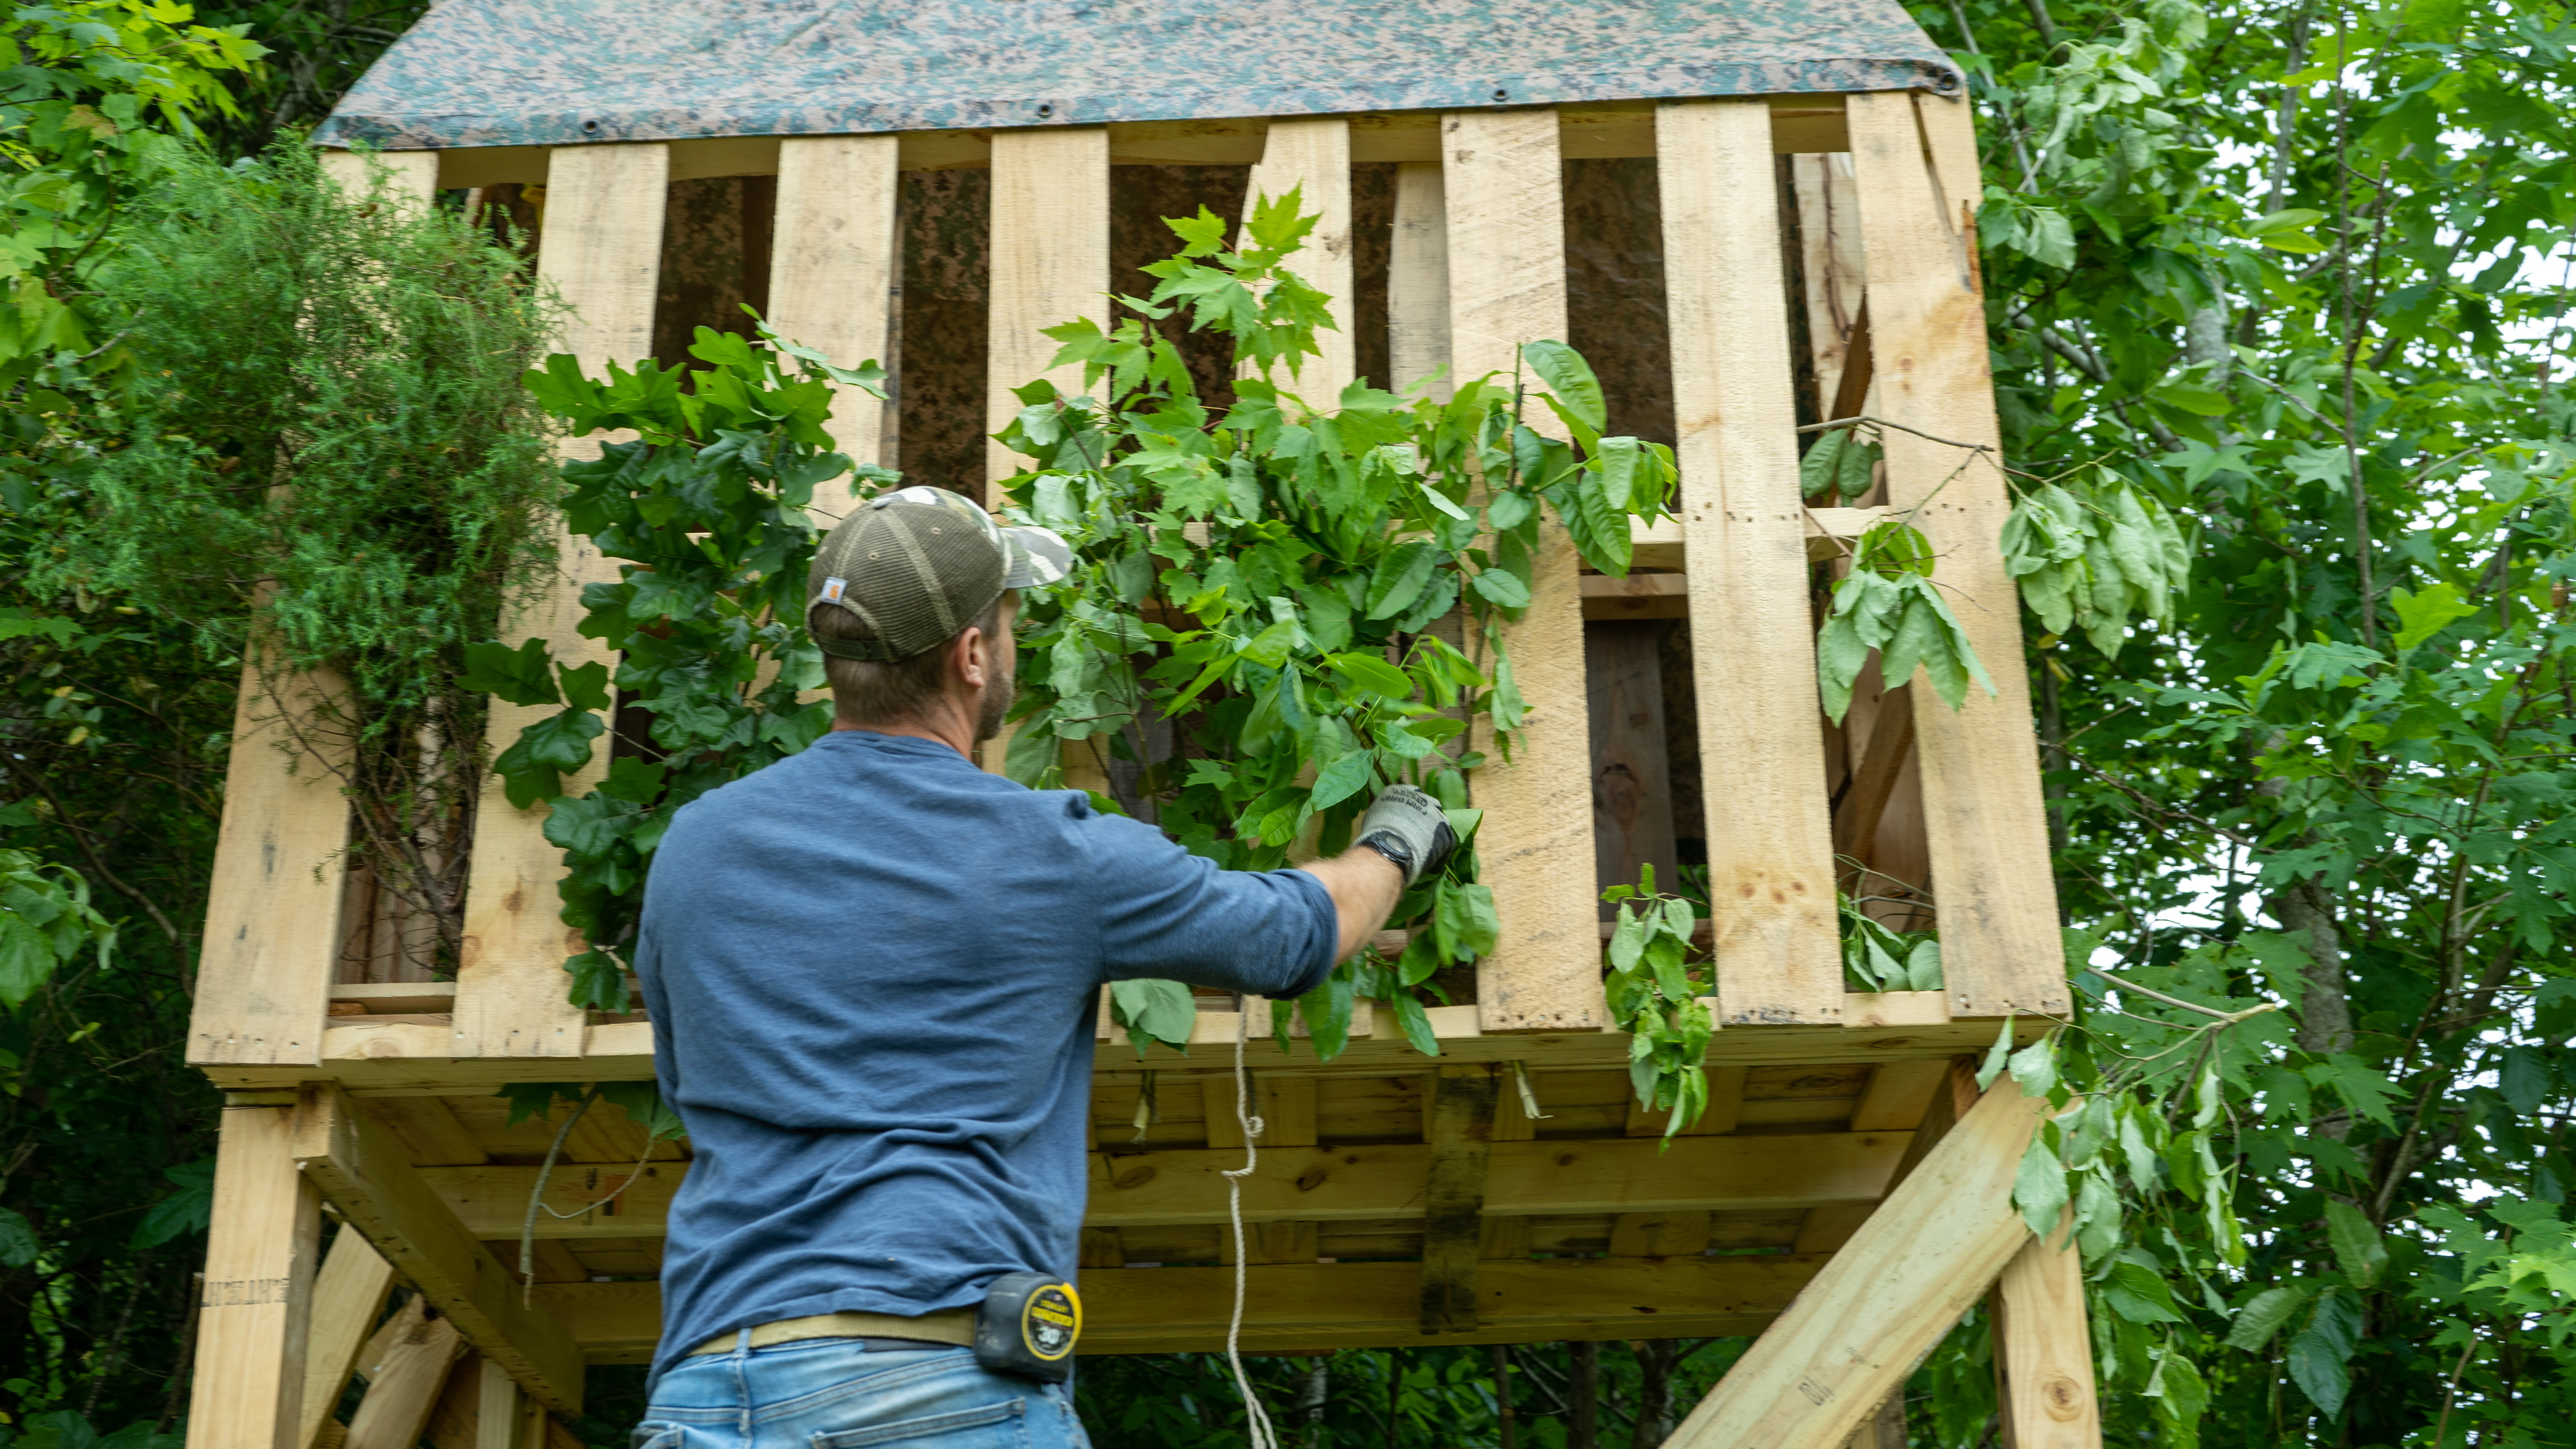
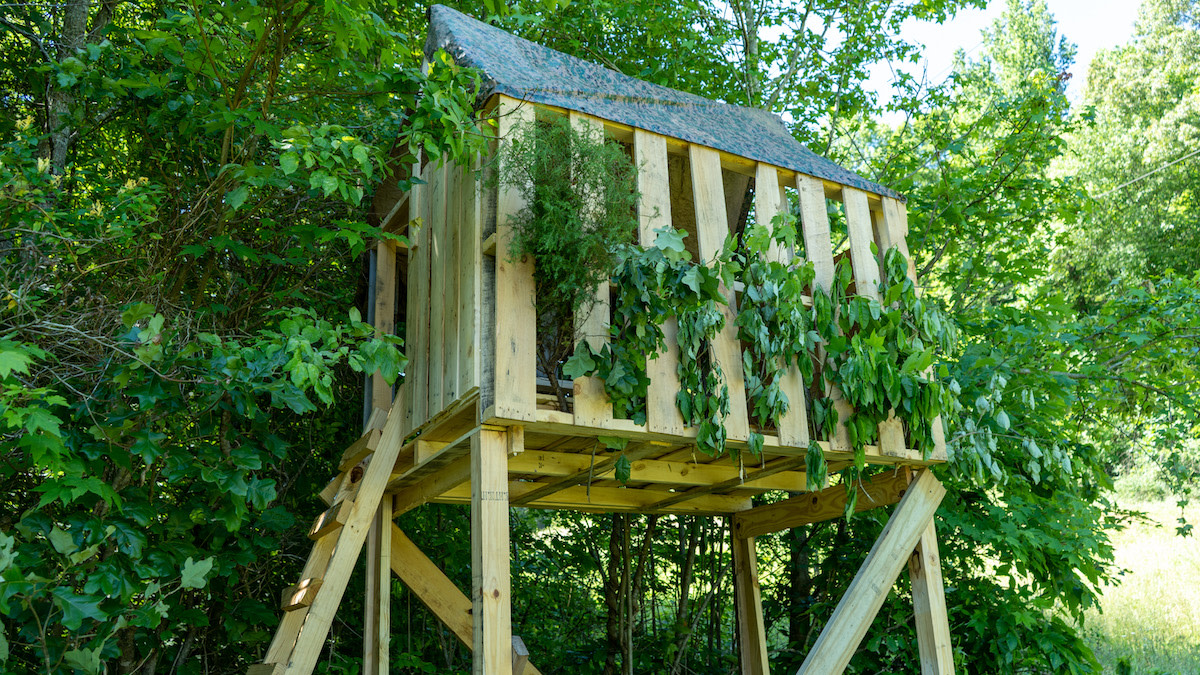
Step 9: AppreciateStep back and take in what your sweaty Saturday bought you. She’s a beaut, eh?
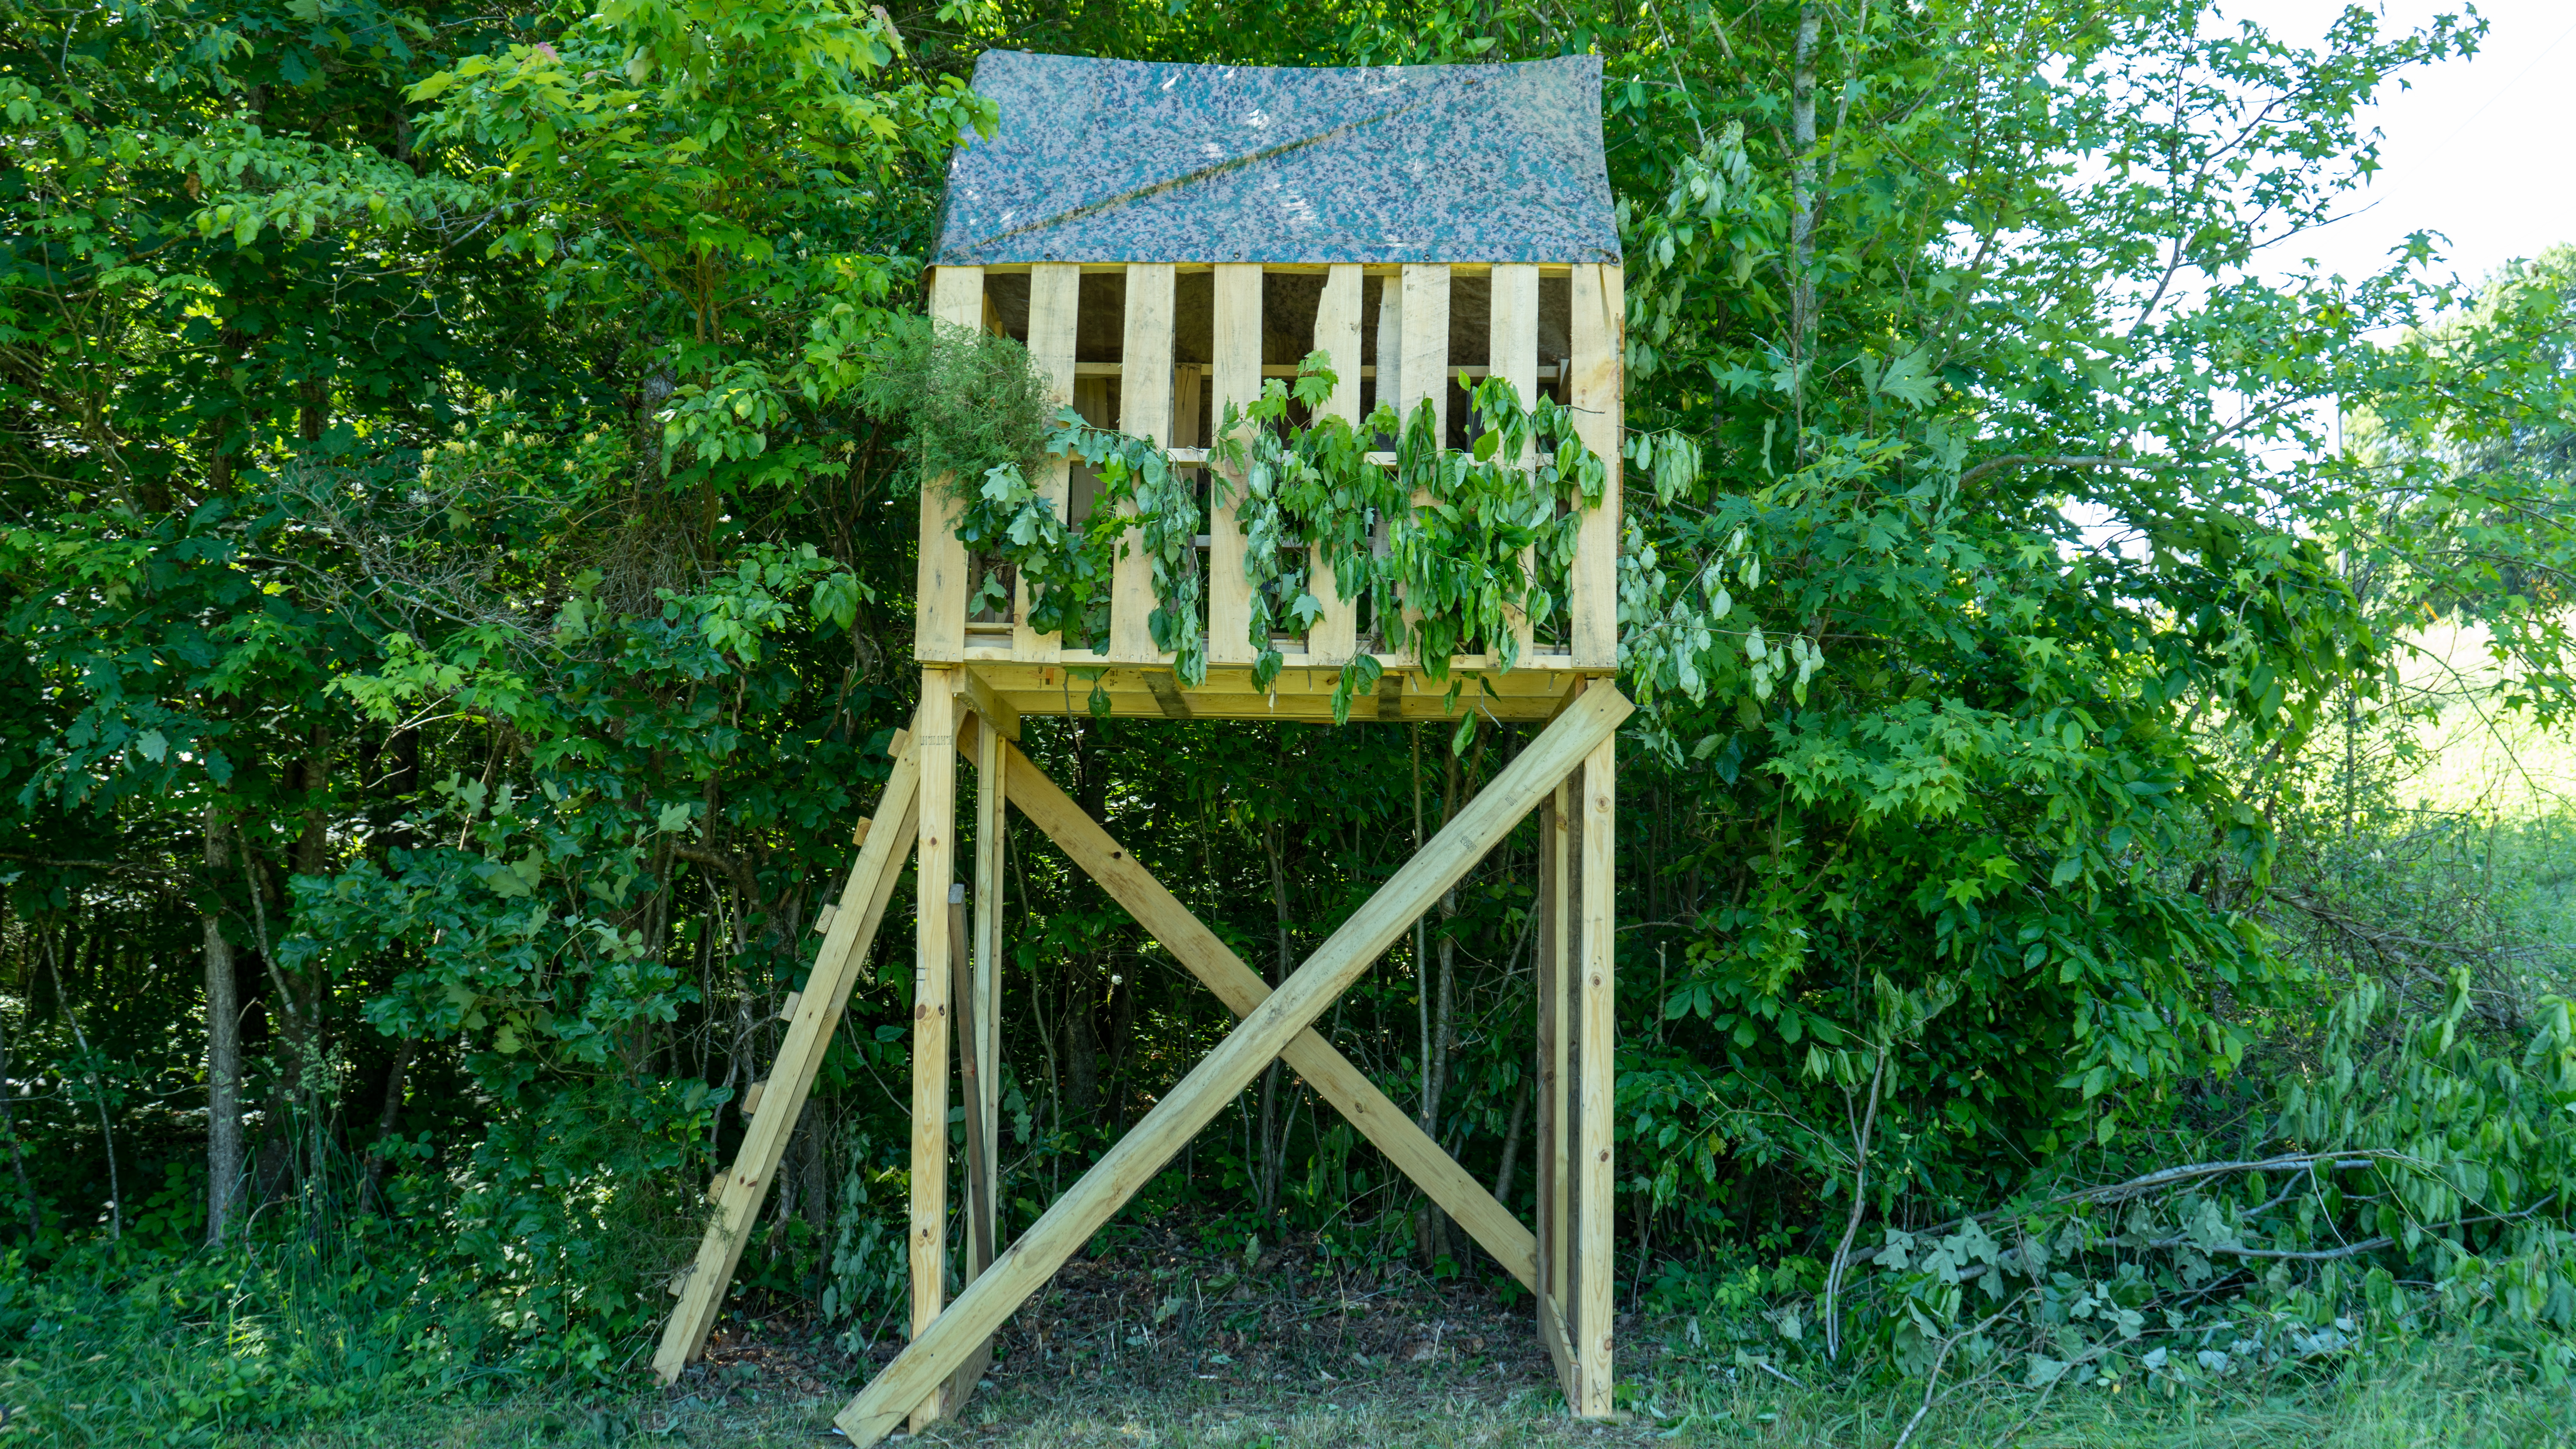
The total cost of the blind was $35 for screws and the gas burned to gather materials. This will serve the family well for many years to come, and saving the $2,500 it would cost to buy a prefabricated blind buys me a few extra days off work to spend in the woods.
Shop
Sign In or Create a Free Account
Related

Waterfowl
How to Build a Portable Duck Blind

Waterfowl
How to Build an Inexpensive A-Frame Duck Blind

