Protect Ya Rod! How to Build Bulletproof Fishing Rod Tubes for Under $20


We’ve all been there. You try to sneak in a couple hours of fishing after work, but in the rush to get to the water your rod gets slammed in the car door, a guide breaks from bouncing in the truck bed, or your reel picks up a few new dings. For less than $20 you can build a durable rod tube that will prevent this from happening and keep your rods in mint condition for years to come.
The most important material for making your own rod tube is ABS pipe. ABS (acrylonitrile butadiene styrene) is a common material used in plumbing, but it’s also used to make protective headgear, whitewater canoes, and Kevlar vests. Because of its durability and light weight, it’s perfect for a rod tube.
First, measure the length of your rod. Many rods break down, and I like to store my rods in sections so they take up less space. Keep in mind that a rod tube can hold more than one rod. A 2-inch-diameter pipe is perfect for a single rod, but my favorite homemade rod tube has a 4-inch diameter. It holds three fly rods in their rod socks, which is nice because it saves me from having to travel with a bunch of individual tubes.
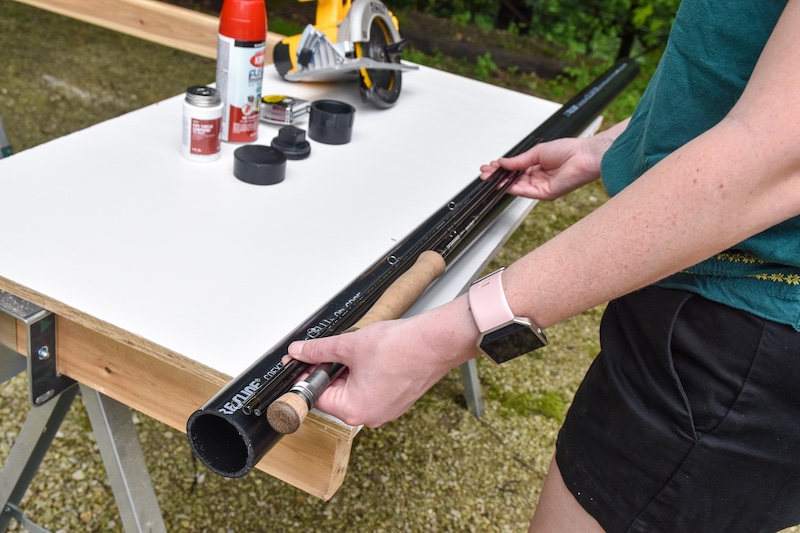
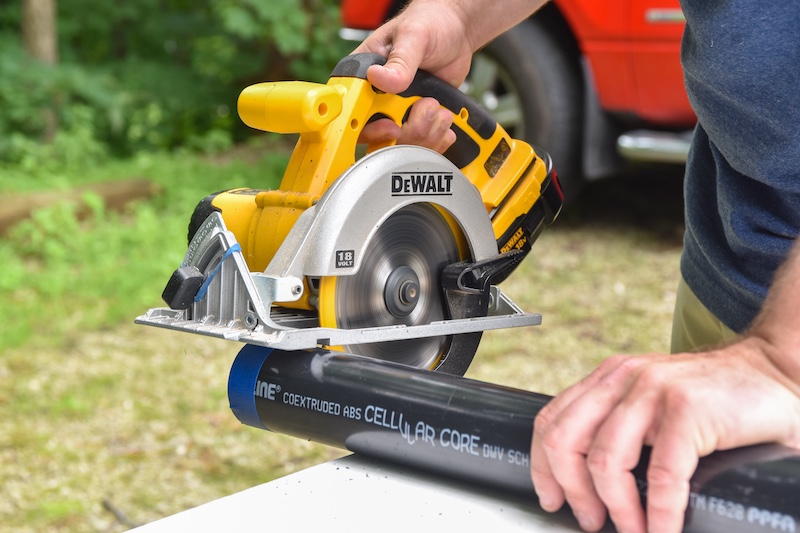
Once you’ve measured your rod, buy a piece of pipe that accommodates the length. Pretty much every hardware store sells ABS pipe. If the pipe is a bit long, cut the excess with a saw (a pipe cutting wrench is even better if you have one). The less wiggle room you have in there, the better. The best thing about making your own rod tubes is the low cost allows you to make multiple tubes for specific situations. Say you’re taking a trip to the saltwater flats fortarpon,bonefish, and permit. One fly rod isn’t going to handle all three species, so you can make a larger tube to take all the rods you need. If you wanted to bring a spinning rod for jacks or barracuda too, you could make the tube slightly longer to accommodate that two-piece as well.
I like to bring my rods as carry-ons when I travel, but on smaller planes I’ve had to check them. Once, I watched a baggage handler at a small regional airport throw my rod tube into the cargo hold like a javelin. When I got it back it was no worse for the wear.
The same goes for long, one-piece rods. Some of my favorite conventional rods are a single piece, but because they’re awkward to transport, they seem to be the ones I always break. With an ABS rod tube, I can literally throw them from the back of my truck into the boat and not worry about it.
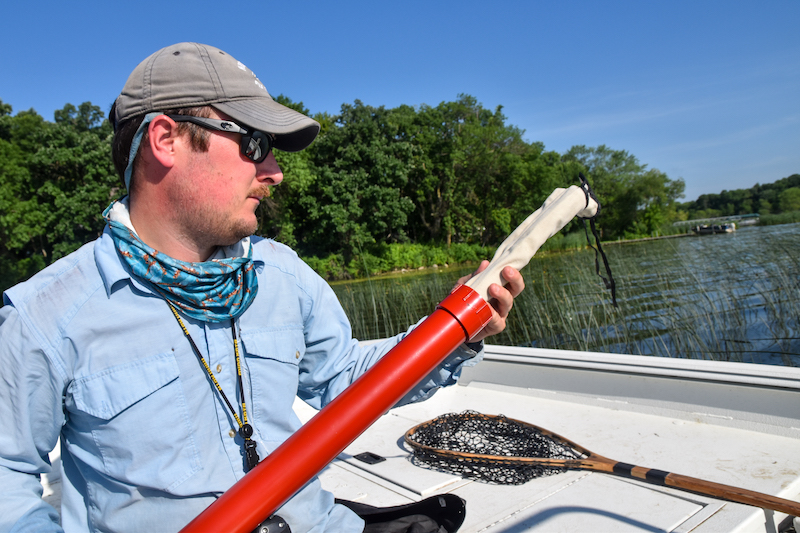
I spray paint all tubes for conventional rods black, fly rod tubes green, and spinning rod tubes red. So if I want my 6-weight fly rod, I look for the green tube with a big “6” on it. Since I started making my own rod tubes, I haven’t broken a rod during transport it in six years. Snags, trolling motor props, and drunken friends are another story.
Materials
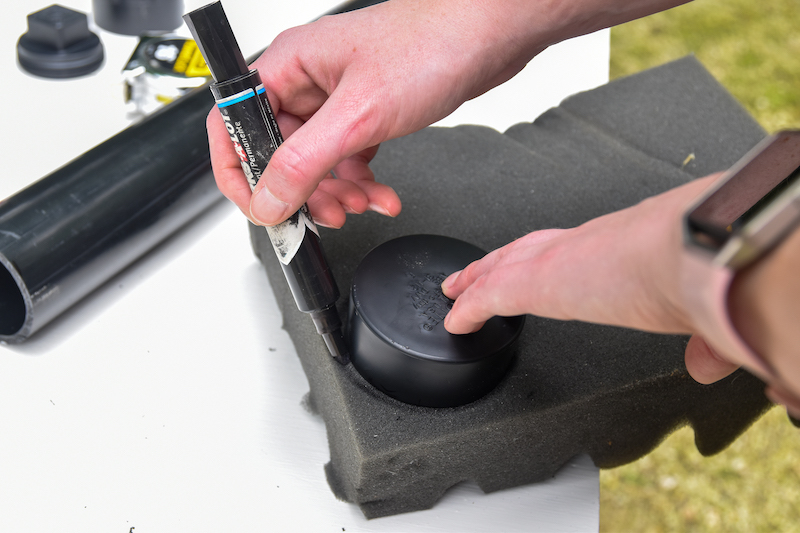
- Hack saw or pipe-cutting wrench
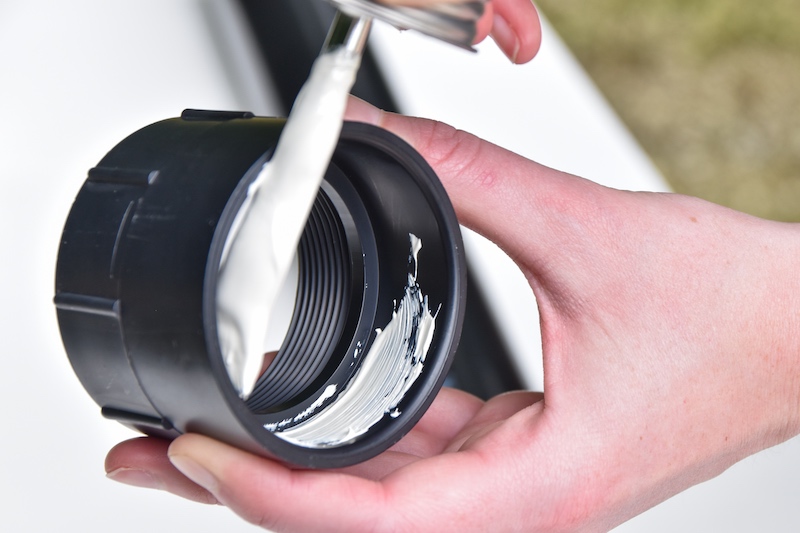
- ABS specific solvent-cement (glue) ($2-4)
- ABS pipe with a diameter that suits your needs ($5-15)
- 1 closed endcap ($2)
- 1 open female-threaded endcap ($2)
- 1 male-threaded end plug ($1)
- Foam
- Optional: Para-cord, silicone caulking, spray-paint
Shop
Sign In or Create a Free Account
Related
Fishing
Conventional Fishing Rod Action and Power Explained

Fishing Gear
Protect Ya Rod! How to Build Bulletproof Fishing Rod Tubes for Under $20