

Despite the best of intentions, your gear doesn’t always get the attention and respect it fully deserves. Sure, you cleaned your gun and sharpened your knife at the end of last season, but have you touched your decoys since that final hunt?
Despite the number of times it’s happened, I’m always a little surprised when someone pulls out a bag of dekes that appear to have ridden in the back of a manure truck for the last quarter-century. Half of the weights are missing, the cords are jumbled into a Gordian knot of epic proportion, and a chorus of #2 pellets jingle inside the plastic bodies.
The good news is that all of these problems can be fixed rather easily. You can bring your decoys back to life and even improve them with a couple hours and couple dollars. Here’s where to start.
Cleaning Decoys
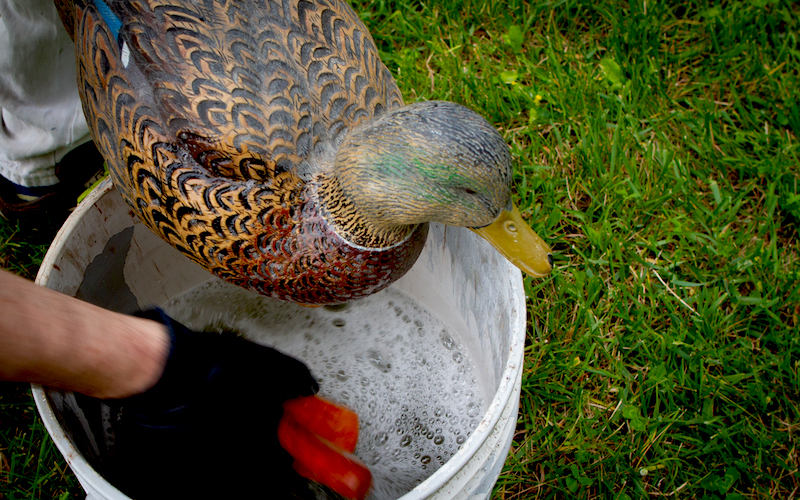
I hunt several regions in Montana known for muck. Alkaline, prairie-pothole regions often contain silty, fine-grained sediment that can wreak havoc on decoys. Unless you want coots and only coots in your spread (no offense to those of you who pursue these fine birds), removing heavy grime and build up will help fool wary ducks. If done regularly, it also helps mitigate the risk of transporting aquatic invasive species and improves the shelf life of those fancy, $100-per-dozen plastic fakes.
Armed with a bucket of mild, soapy water and a soft-bristled brush, this is the easiest improvement you can make. And if you have kids, it gets even easier (this is one of those rare tasks where they can actually contribute and potentially have some fun).
Should your dekes have flocking (those soft fibers on the heads and butts found on higher-end decoys), an air compressor makes quick work for damage-free cleaning.
Painting Decoys
No matter how expensive that decoy bag might be, your birds will get jostled, banged-up, and generally beaten into oblivion. The more you hunt, the faster it will happen. This is especially true for those who hunt out of boats but field decoys are no exception. A light touch-up on your decoy’s paint job will work wonders to bring back some realism. Silhouettes, shells, and full body Canadas are among the easiest to restore.
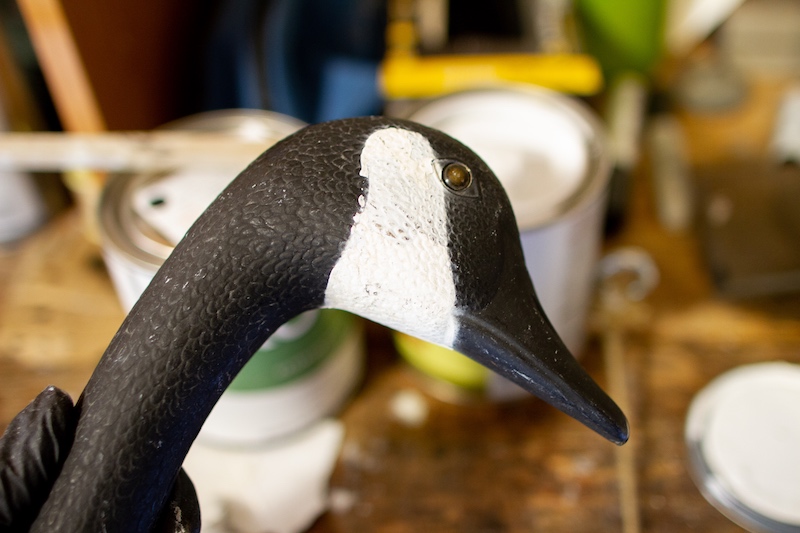
For Canada geese decoys, I like to use spray paints that bond well with plastic. Unless your dekes are in really bad shape, light coats are best. Focus on the areas with the most wear.
Touch up the chest/breast areas with a layer of tan or gray. For the rear of the bird, use flat, matte-black to spray the upper side of the tail feathers, and flat, matte-white to spray the area where the belly meets the flank and undertail coverts.
I prefer to paint the heads/necks/cheek patches with a brush, which can be a little more controllable. Most water-based, exterior latex paints will work fine for this approach. If you mess it up, a wet rag works wonders for the cleanup.
If you have only enough time to touch-up the black and white areas of those goose decoys, no problem. That’s often all it takes to make a substantial improvement in their contrast and visibility.
Repairing Decoys
Anyone who hunts diver ducks will know that it isn’tifyou’re going to shoot your decoys, butwhen. With divers’ low flight patterns and preternatural ability to bounce back to life after hitting the water, it’s no wonder that hunters tend to opt for foam-filled, Styrofoam, or wood decoys. These can be pricey, but there’s no reason to avoid the fast action of diver hunting because you’re afraid of shooting your fakes. Plus, whether you target puddlers or divers, at one point you’re going to shoot a decoy. And while I can’t help fix your ego, that sinking bird is easily repairable.
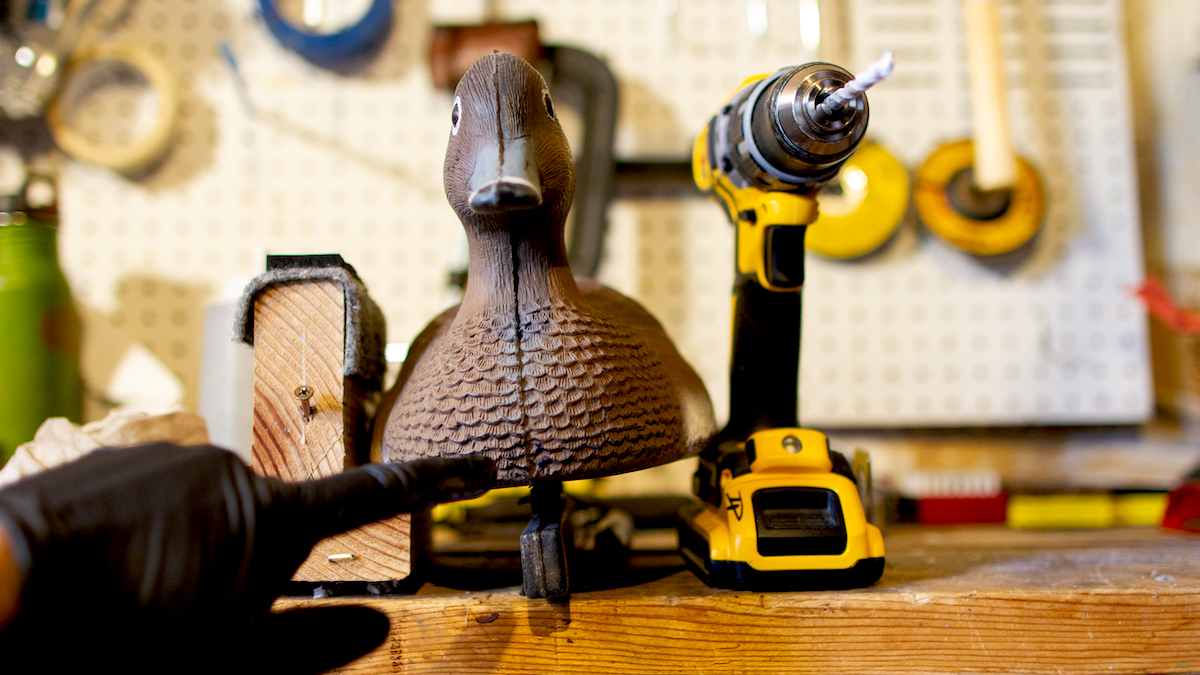
All you’ll need is a drill with at least ¼-inch drill bit, some kind of heavy-duty glue or epoxy, and a small piece of fabric or flex tape.
Mark the endpoint of the offending decoy’s tail with a pen then drill a small hole just big enough to allow water and/or pellets to exit. Allow any last drops of water to evaporate by placing the decoy in a sunny or well-ventilated space. Once the pellets are removed and the interior is relatively water-free (this may take a couple of days), cut a small piece of flex tape or fabric to cover the drill hole and seal it with epoxy or glue. If it’s a larger hole, this spot may require a bit of paint.

Flocking Decoys
If you have the desire to take your decoys to the next level, flocking is the ticket. Flocking simply refers to the addition of fabric textile particles to your decoys—which isn’t as complicated as it sounds. The material absorbs light similar to actual feathers and helps reduce glare on plastic decoys. If you hunt in high pressure areas, consider this a must-do.
Flocked heads on Canada geese and greenhead mallard decoys are some of the most common, but just about any decoy will gain value from the addition (I’ve even seen fully-flocked coot decoys).
Flocking material is cheap, available in an endless array of colors, andfound in numerous craft stores or online. To get started, find a material that matches your color scheme like deep black for a Canada goose head, for example.
Apply either a coat of paint in a similar color or a liquid adhesive on the area you intend to flock. Then, either dump the flocking onto the decoy with your hands (mask and nitrile gloves recommended) or use a squeeze bottle to blow it onto the wet surface.
Like the other projects, adding flocking is a cheap way to add an expensive touch to your dekes. With clean, pellet-free decoys that are freshly painted and freshly flocked, you’ll be on your way to success. Or at least you’ll look like it.
Shop
Sign In or Create a Free Account
Related

Waterfowl
4 Easy Ways to Improve Your Old Waterfowl Decoys
Waterfowl
Goose Hunting Tactics


