
Duration
4-12 hours
Stock is often referred to as the foundation of cooking because it is the basis of so many dishes. It is the backbone to many of my recipes as well.
When making stock, you are trying to extract the essence of bones by simmering them in water with aromatic vegetables and herbs. This flavorful liquid becomes a blank canvas for stews and braises. It can also be reduced into a full-bodied, viscous sauce.
Making stock is a fantastic way to utilize the entire animal and is easy to do at home. It involves some effort and time, but you’ll be rewarded with a much higher quality stock than the store-bought version.
You can apply the same principles below and use a pressure cooker to cut the time in half. However, I find this stock to be more difficult to clarify. A crockpot is another option; this works well with the carcass of one to two birds for a small batch of broth.
Below are some other helpful tips and guidelines for making stock at home using the stovetop method.
Ingredients
- 4-6 pounds of bones from any animal
- 2 tbsp. tomato paste
- 2 onions
- 2 carrots
- 2 celery ribs
- 1 tbsp. whole peppercorns
- A few sprigs of thyme and parsley
- 1 bay leaf
- Enough cold water to cover bones
- 2 tbsp. red wine vinegar/apple cider vinegar (optional)
Also works with
Special equipment
Preparation
Brown Stock
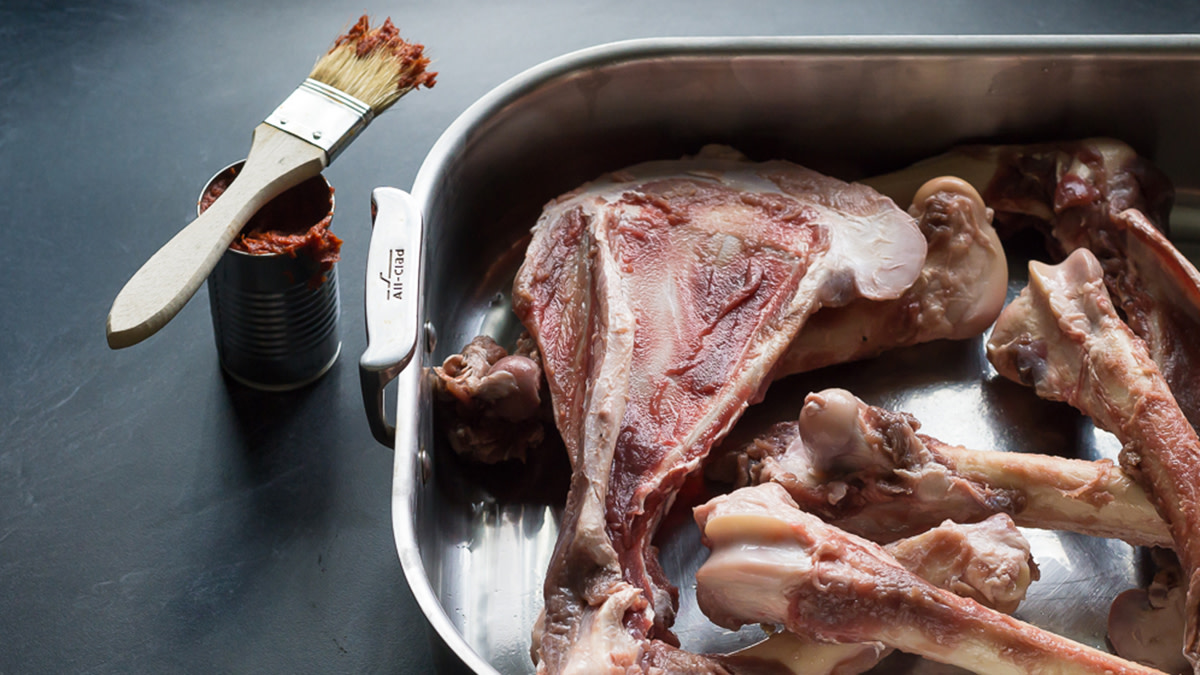
- Roasting the bones first adds depth and richness to any stock and is particularly good with venison bones. To do so, preheat an oven to 425 and lightly oil the bottom of a roasting pan. Brush the bones with a small amount of tomato paste and roast for 30-45 minutes, or until brown. Pour water into the roasting pan to deglaze. Pour this fond into the stockpot along with the vegetables.
- Fill the pot with enough cold water to cover bones and vegetables. Add a splash of vinegar if desired. The acid helps to break down the connective tissue and extract more gelatin.
- Turn heat to high and once it goes just above a simmer, reduce the heat and gently simmer the stock. Never bring it to a boil!
- Every 30-60 minutes, skim the surface of scum (loose bits, sediment, fat etc.)
- Let simmer for several hours. Poultry stock might take 4-8 hours while vension bones could take anywhere between 8-12 hours or longer. The timing depends on the size of the bones. Also, the bigger the pot and the bones are, the longer it will need. You can speed this process and cut down on the amount of water required by cutting bones crosswise into smaller pieces.
Straining
- I start removing the solids from the liquid by pulling the bones out of stock gently using tongs. You can save these bones and simmer yet again in water for what is called a second stock. It won’t be as flavorful as the first batch, but it is still more flavorful than plain water.
- After the bones are removed, slowly pour or ladle the stock through a fine mesh strainer into another large pot or container to remove the remaining solids.
- For a clear stock, you should line the mesh strainer with paper towels or cheesecloth and pour the stock back through one or two more times.
- It’s very important that the stock is cooled down rapidly to prevent bacterial growth. You can add ice cubes directly into the stock, but if you’re afraid of diluting it you can pour it into a bowl set inside an ice bath. My favorite option is to pour it into a much bigger, wider container such as the plastic tubs used for meat processing to help disperse liquid and cool down faster.
- Notice that I haven’t mentioned adding salt to the stock. You have the option to sprinkle some in now, but remember that the longer you reduce the liquid, the saltier it gets. I don’t add salt to my stock at all. I prefer to add it when I am finished preparing the dish it’s going in.
Storage
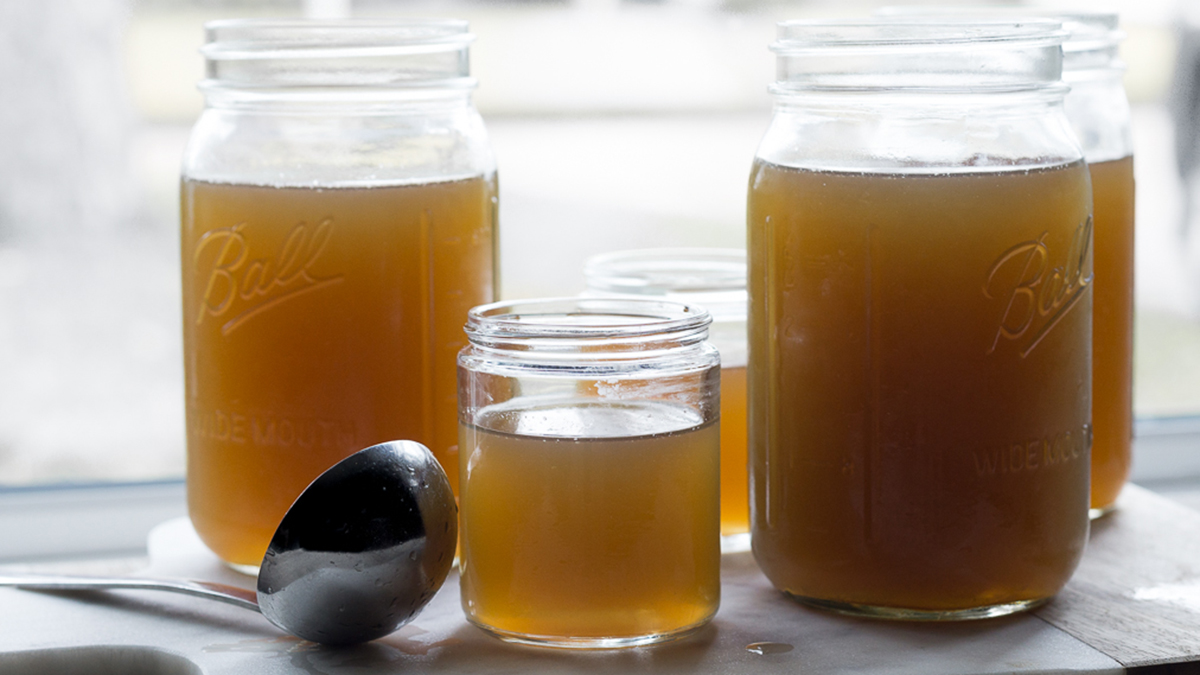
- At this point, you can chill the stock and store in the fridge for use within a few days, freeze for up to 6 months or pressure can it for long-term storage.
- I like to freeze the stock in a variety of sizes. I prefer 4 cup, 2 cup and 1 cup portions ready for use. If storage space is tight, you can reduce the strained stock down to 25 percent of its original volume. When ready to cook, add more water to reconstitute.
- If freezing, use freezer-safe containers, plastic bags (lay flat to save space) or silicone molds of various sizes.
- If using glass jars, it’s critical that you leave at least 2” space at the top for expansion and to cool the stock before freezing. If you have room to place upright, you can freeze the jar without the lid until it solidifies before twisting on the top as an extra precaution.
- If you lack freezer space or prefer to store your stock for the long term, a pressure canner is a great alternative.
- Before using, be sure to scrape or spoon off the layer of fat.
Shop
Sign In or Create a Free Account
Related
Recipes
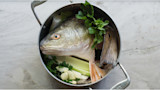
How To Make Fish Stock
(0)
Recipes
How to Make Venison Stock
(1)
Recipes
Wild Game Stock
(1)
Reviews
How to Make Wild Game Stock
Duration
4-12 hours
Stock is often referred to as the foundation of cooking because it is the basis of so many dishes. It is the backbone to many of my recipes as well.
When making stock, you are trying to extract the essence of bones by simmering them in water with aromatic vegetables and herbs. This flavorful liquid becomes a blank canvas for stews and braises. It can also be reduced into a full-bodied, viscous sauce.
Making stock is a fantastic way to utilize the entire animal and is easy to do at home. It involves some effort and time, but you’ll be rewarded with a much higher quality stock than the store-bought version.
You can apply the same principles below and use a pressure cooker to cut the time in half. However, I find this stock to be more difficult to clarify. A crockpot is another option; this works well with the carcass of one to two birds for a small batch of broth.
Below are some other helpful tips and guidelines for making stock at home using the stovetop method.
Ingredients
- 4-6 pounds of bones from any animal
- 2 tbsp. tomato paste
- 2 onions
- 2 carrots
- 2 celery ribs
- 1 tbsp. whole peppercorns
- A few sprigs of thyme and parsley
- 1 bay leaf
- Enough cold water to cover bones
- 2 tbsp. red wine vinegar/apple cider vinegar (optional)
Also works with
Special equipment
Preparation
Brown Stock
- Roasting the bones first adds depth and richness to any stock and is particularly good with venison bones. To do so, preheat an oven to 425 and lightly oil the bottom of a roasting pan. Brush the bones with a small amount of tomato paste and roast for 30-45 minutes, or until brown. Pour water into the roasting pan to deglaze. Pour this fond into the stockpot along with the vegetables.
- Fill the pot with enough cold water to cover bones and vegetables. Add a splash of vinegar if desired. The acid helps to break down the connective tissue and extract more gelatin.
- Turn heat to high and once it goes just above a simmer, reduce the heat and gently simmer the stock. Never bring it to a boil!
- Every 30-60 minutes, skim the surface of scum (loose bits, sediment, fat etc.)
- Let simmer for several hours. Poultry stock might take 4-8 hours while vension bones could take anywhere between 8-12 hours or longer. The timing depends on the size of the bones. Also, the bigger the pot and the bones are, the longer it will need. You can speed this process and cut down on the amount of water required by cutting bones crosswise into smaller pieces.
Straining
- I start removing the solids from the liquid by pulling the bones out of stock gently using tongs. You can save these bones and simmer yet again in water for what is called a second stock. It won’t be as flavorful as the first batch, but it is still more flavorful than plain water.
- After the bones are removed, slowly pour or ladle the stock through a fine mesh strainer into another large pot or container to remove the remaining solids.
- For a clear stock, you should line the mesh strainer with paper towels or cheesecloth and pour the stock back through one or two more times.
- It’s very important that the stock is cooled down rapidly to prevent bacterial growth. You can add ice cubes directly into the stock, but if you’re afraid of diluting it you can pour it into a bowl set inside an ice bath. My favorite option is to pour it into a much bigger, wider container such as the plastic tubs used for meat processing to help disperse liquid and cool down faster.
- Notice that I haven’t mentioned adding salt to the stock. You have the option to sprinkle some in now, but remember that the longer you reduce the liquid, the saltier it gets. I don’t add salt to my stock at all. I prefer to add it when I am finished preparing the dish it’s going in.
Storage
- At this point, you can chill the stock and store in the fridge for use within a few days, freeze for up to 6 months or pressure can it for long-term storage.
- I like to freeze the stock in a variety of sizes. I prefer 4 cup, 2 cup and 1 cup portions ready for use. If storage space is tight, you can reduce the strained stock down to 25 percent of its original volume. When ready to cook, add more water to reconstitute.
- If freezing, use freezer-safe containers, plastic bags (lay flat to save space) or silicone molds of various sizes.
- If using glass jars, it’s critical that you leave at least 2” space at the top for expansion and to cool the stock before freezing. If you have room to place upright, you can freeze the jar without the lid until it solidifies before twisting on the top as an extra precaution.
- If you lack freezer space or prefer to store your stock for the long term, a pressure canner is a great alternative.
- Before using, be sure to scrape or spoon off the layer of fat.