7 Reasons Your Trail Cam Pictures Suck


I’m all too familiar with frustrating trail camera experiences. Ending up with poor-quality images or no pictures at all feels like a waste of time. If you're new to using trail cameras, you can avoid this mistake and learn from my experience.
You could be happy just to know there are deer in the area. Or you may be frustrated with camera performance and want to learn more about capturing usable trail cam pictures. However, a blurry image of a deer will not help narrow your efforts of getting a whitetail inside bow range.
Running cameras teaches a few lessons. Most importantly, it teaches you to recognize that trail camerasaren't a replacement for poor scouting. They are a tool. When used correctly, they can enhance your scouting and make you more successful.
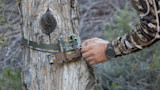
Hung too High
Ahigh camera hangis a popular tactic for setting trail cams on public land. It avoids detection by deer and discourages theft. But, if you plan to hang your camera too high, you might as well leave it in your backpack. Camera sensors miss much of what happens below them with a steep angle, which means there will be fewer pictures than there would be with a lower camera placement.
If you insist on hanging your camera high, hang it downhill from the targeted zone. This way, the camera will maintain a better window to capture movement. Deer will be unable to detect the camera, thieves will still have to climb to steal it, and the images on the card will be what you're hoping for.
I prefer a height of around six feet. You may lose a few cameras to scumbags that have nothing better to do, but you will avoid detection by deer. Side note: if a thief is determined to steal a camera, they will steal it, regardless of whether it's ten feet up in a tree or not.
Over Exposure
Overexposure kills great photos. Maybe you pointed a camera east, straight down a tractor lane or powerline cut. A big-bodied deer walked in front of your camera right after the sun rose, but when you pulled the camera, all you could see were deer legs and a glare. Annoying, right?
Field edges and "wildlife openings" can be great setups for trail cam photos. A barrier to sunlight or pointing the camera away from the rising or setting sun is a better way to correct exposure. An example of a barrier would be to point a camera across the corner of a field at the adjacent woodline. A backdrop like that will help clear up your images.
Incorrect Background
Night photoscome out best with a good background. This helps the trail cam flash to better illuminate the foreground and capture more defined images. It also offers more clarity when trying to identify deer activity. This way, you can easily spot new bucks that appear during the rut without struggling to figure out what you're looking at.
In the past, I believed that taking photos at night held little value, but they can actually be useful in forming a successful hunting strategy. Think about a buck that is mainly nocturnal during early fall. As time passes, his activity shifts towards daylight. If you follow the trend and are one step ahead, it could be what you need to put a buck in your shooting lane.
Bad Batteries
There's a little Pennsylvania Dutch running in my blood. I don't like to admit it, but sometimes I can be cheap. The cheapness doesn't compare to the rest of my family, but biting the bullet forgood batteriesis tough to swallow in today's economy.
Lithium batteries are downright expensive. On average, it costs about $27 to buy batteries for a single camera. If you're wondering if lithium batteries are necessary, they are not. However, lithium batteries have benefits. Their output exceeds alkaline batteries, resulting in crisper images. They also have a much longer battery life. One set of lithium batteries could last an entire year, depending on your camera settings (less in video mode).
Alkaline batteries are fine, but you should know a few things before using them in your cameras. They may only last three or four months. If it gets cold enough, freezing can occur and cause the batteries to burst. If batteries are leaking and causing corrosion, you must clean your camera. And if you’re running a high-burst count or in video mode, expect a short battery life.
Unmatched Settings
Fly fishermen know how to "match the hatch" better than any other outdoorsmen. Likewise, trail cam users must learn tomatch their settingsto the sign or surroundings. Running photo mode on a scrape with a short delay (ten to fifteen seconds) will fill an SD card quickly. In that case, shooting a ten-second video to capture the action or increase the delay would be better.
Settings are all experimental. As a rule of thumb, lengthen delays for features where a deer will spend more time on, and shorten them for features in areas where deer are moving through.
Not Enough Angle
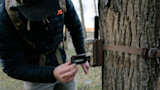
We discussed hanging height earlier, and I mentioned that six feet is a good height. Even at six feet, you might need to use a shim behind the camera for the optimal angle. Failing to shim the camera will result in pictures showing only the back, ears, and racks. You'll still have some intel but won't have ideal photos.
You can fix this by using a laser pointer or placing your phone over the lens in selfie mode. Be careful with the selfie mode trick because a camera's layout may differ from your phone's. You couldalso walk in front of the cameraand check the photo, which can be cumbersome. For the best and easiest result, use a camera with an onboard screen to direct the aim.
Follow-up Failure
Follow-up failure can happen from either direction. Checking cameras too often increases pressure and causes deer to change their behavior. On the other hand, not checking them at all could waste all your efforts.
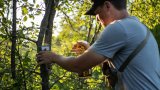
A camera hung inearly summermight have new vegetation blocking the view. It's a real downer to check a camera after a year to find a frame full of tall grass or a downed tree limb. One check could have saved your fall photos.
Other things, like rodents or bears moving your camera, a spider web on the lens, or ants in the camera housing, will ruin your photos. One pre-fall check and a single check during the season are all that's needed. Save in-season checks for when you pass a camera on a hunt.
Shop
Sign In or Create a Free Account
Related
Scout
7 Reasons Your Trail Cam Pictures Suck
Gear
The Single Best Way to Get Bucks on Trail Cam (Without Bait)