5 Mistakes Deer Hunters Make with Trail Cameras


Setting up a trail camera tocapture quality images and videosisn’t rocket science. It’s also, strangely, not an exact science either. The very nature of nature means that all of the settings available on your chosen cam, coupled with your exact desired location, require more thought than a quick set-it-and-forget-it mission.
Indeed, the trail camera devil is in the details.
Get one of those details wrong and your recon will suffer, resulting in some level of wasted effort and batteries. While everyoneeventually screws up with trail cameras, the best way to hedge your bets is to understand the most common mistakes. This will help you avoid them and gather the intel you really need to be successful come fall.
Checking Too OftenIf you do a quick internet search about human attention spans, you’ll see plenty of articles and studies discussing how much shorter they are today than a few decades ago. You’ll probably also see an oft-cited but now debunked 2015 Microsoft study that claimed our average attention span is now one full second shorter than the average goldfish.
Even if we couldn’t focus as well as the inhabitants of our aquariums, a good test of our long-term planning abilities would be the amount of time we let trail cameras sit. PennsylvanianBeau Martonikthinks this is one thing that really hinders hunters who want to capture quality intel—particularly those of us who mostly tread public dirt.
“I learn the most by leaving my cameras up for months and months,” Martonik said. “A lot of hunters just don’t leave their cameras up long enough because they get discouraged after a week of not seeing the deer they want.”
Not leaving cameras out for at least a few weeks, if not months, is a problem. But so is checking them too quickly, or too frequently. Forsummer scouting recon, place your cameras in spots where you have high confidence of seeing animals. Do your damndest to avoid the temptation to check them too quickly.
Penny PinchingI almost hate to write this. I know that there will be some folks who will immediately become offended by the suggestion that spending more for trail cams is really an effort by me to line my pockets promoting some camera conglomerate that secretly sends outdoor writers huge checks. It’s not, and they don’t.
The simple reality with trail cameras is that quality does matter. And quality doesn’t come in really inexpensive packages.
The gap between cheap junk and reliable functionality has squeezed much tighter in recent years, but there is a still a difference between a no-name $40 camera and a well-known brand that carries a price tag in the $100 to $200-plus range. Throughout my life I’ve gone through dozens of cameras, and the worst performers have always been the cheapest options. Often they don’t make it through a single season, and if they do, the image quality almost always makes the average flip phone picture of a supposedBigfootor UFO look like a museum-quality work.
You don’t have to go broke to support your digital recon habit, but understand that you’re buying a piece of technology that is designed to function for months, and years, out in the elements.
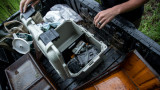
Blinded by the LightK.C. Smithspends much of his fall months hunting public land whitetails from his home state of Texas all throughout the West and the Midwest. He recently pulled some cameras that had been soaking in Oklahoma since last fall and realized right away that he’d made a common gaff when setting them.
“Both of the cameras we just checked were angled toward the evening sun. We made the mistake of hanging them on the perfect tree, but not considering where they were facing all fall.”
If you haven’t made this mistake yet, you probably haven’t used trail cameras a whole lot. It’s extremely common, and it sucks because the time when the deer are moving is also the time when you’re likely to get blown out images from the rising and setting sun.
No matter where you set your cameras, take a long hard look at the horizon and think about morning and evening sunlight to position them accordingly.
Upset the SettingsLast year I interviewed Tom Rainey of Browning’s trail camera department. During our conversation he made me realize something: We should view our trail cameras as real cameras.
Not the earth-shattering revelation you were expecting? It was to me, because I’m a photographer by trade. But I had never viewed my trail cameras the way I view my DSLRs. Instead of learning a trail camera’s various functions and applying them situationally like I do with my Nikons, I’d pick an easy setting on my trail cams and just let them soak.
Now I choosevideoor stills based on a variety of factors like whether I’m monitoring a single trail or a food plot. I think about whether I need a 9-shot burst to capture rut activity or a 30-second delay between images because I’m taking inventory on a mineral lick. Think about what your camera offers in trigger speed, burst modes, video clip length, and a host of other factors, and use them to maximize each individual setup.
Imperfect PositioningHunters like K.C. Smith often choose to hang their cameras as high as they can reach, which might be 7 or 8 feet off the ground. Others opt for the deer’s eye-level strategy, which is probably not the best for public land—unless you want to spook every deer that comes through and have your cameras stolen.
No matter how high you position them or what angle they’re aimed, never walk back to your truck without ensuring that your camera will actually capture images of the deer that walk past. I love cameras with built-in LCD screens for this reason, because I can almost instantly review images of myself standing right on in the spot I expect the deer to be. If your camera doesn’t offer that, it probably has a test mode that will light up when you walk past. If you’reusing a cellular cam, make sure you’re getting the pictures you want before bailing.
This is maybe the most important step because it lets you know a couple things for certain. The first is that your camera is on and that it’s working correctly. The second is that it’s aimed to capture the movement you hope to photograph. Don’t settle for good-enough on camera positioning, because you’ll regret it every time.
Shop
Sign In or Create a Free Account
Related
Gear
7 Most Common Trail Camera Mistakes


Gear
Why Trail Cameras Don’t Always Tell the Truth