How to Make a Horizontal Rub


The saying “there’s nothing new under the sun” sometimes seems doubly true in the whitetail hunting world. We see the same types of products, ideas, and hunting storylines trotted out year after year. But about a decade ago something truly original did arrive on the scene: horizontal rubs.
These horizontal, man-made rubbing posts, purposely placed to attract deer into range to shoot, film, or photograph, were first created and popularized by Iowa hunter Ted Miller. Decades ago, Ted noticedelkpreferentially rubbing on horizontal evergreen trees in the wilderness of Yellowstone National Park and decided to test if something similar would attract whitetails in the Midwest. It worked, and his idea has since traveled across the country and shown up in an ever-increasing number of YouTube videos and trailcam photos.
But for some reason—stubbornness, ignorance, sloth—I’ve resisted trying it for myself.
I’m finally changing that this year. To prepare myself for this inaugural horizontal rub, I decided to go straight to the source, the OG himself, Ted Miller. Here’s the game plan he helped me put together for my very first horizontal rub.
Why?One of the greatest misconceptions around horizontal rubs seems to be around their purpose. “People get the wrong idea that I put them out there to draw bucks a long distance, but that’s not what their original intent was,” Miller said.
Rather than long-range attractants, horizontal rub sites are intended to encourage a buck alreadymoving through the areato come in your direction and stop where you want him, similar to how many hunters usefake scrape treesin food plots.
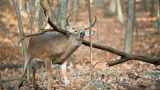
Once the buck comes over to the site, the real magic happens. When a deer investigates and works this super signpost, he’ll be extremely vulnerable and distracted. “It gives him something to do. If he’s standing there working that rub, you can basically do anything you want up in the tree,” explains Miller. “He’s concentrated on the rub and not on you, so that’s a big advantage.”
It’s much easier to observe a buck and decide you want to take him, then range, draw back, and aim at him when he’s stationary and occupied. This perfect shot opportunity is by far the most significant benefit of these set-ups. But if that’s not enough to convince you, they also serve as greatlocations for trailcamphotos and videos.
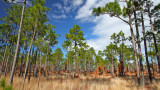
Where?To create a horizontal rub site, choose the right location first. Miller said his best rubs are those placed in good cover, ideally adjacent to bedding areas, and along corridors that bucks naturally want to travel when heading towards food or other destinations. These are not meant to be placed in the middle of a food plot, at least if daylight activity is the highest priority.
That said, I’m still curious to see how bucks would react to a horizontal rub in a food plot compared to how I’ve seen them relate to mock scrape trees. If you have a small isolatedfood plot, where bucks have demonstrated willingness to visit in the day, I think a horizontal rub could hypothetically serve a similar purpose.
Prepping the LocationRegardless of the location, the next step is placing your vertical poles that will hold the horizontal rubbing post. These should be solid wood posts or cut tree trunks, approximately five feet long. Using post hole diggers, dig two holes spaced about four feet apart and then sink each post at least two and a half feet deep. Finally, fill in the hole around each post and tamp the soil firmly into place.
Miller often places these locations next to previously-used natural scrapes. In areas without preexisting scrapes, sometimes he’ll add alicking branchabove one of the vertical posts. This should coincide with where one end of the horizontal rub terminates. Underneath this licking branch, at the far end of the horizontal rub, he likes to rip up any grass and open a large dirt oval of ground. If the soil is particularly dry or hard, he recommends bringing in softer dirt from elsewhere. You can take these first steps in the spring or summer, but it’s crucial to add the horizontal rub later.
Adding the Horizontal LimbHere is where Miller sees most hunters go astray. They either use the wrong kind of limb for the rub or they place the limb too early. Both mistakes can lead to a dry and undesirable piece of wood that bucks won’t want to rub against.
Ted’s tree limb of choice for horizontal rubs is scotch pine because of its strong smell and long-lasting sap, but he’s had success with other evergreens as well. If scotch pines aren't available in your area, he recommends finding another tree species that has a strong scent, stays green and sappy long after being cut, and that you’ve seen natural rubs on in the past.
There is one species Miller doesn't like that might surprise you. “I’d say one of the most common mistakes is using cedar trees. They think those and scotch pine are the same, but they’re not,” he says. “Yes, bucks will rub cedars, but I’m trying to give them an ideal situation, something better than cedars. In a couple weeks or less they’re dried up.”
This brings us to the topic of when to place these limbs. If you place your rub post too early, it will dry out and become undesirable before bucks ever start using it. “Once they’re dried out, it’s just like a buck rubbing a dead tree. They don’t like to do that. They like fresh, green sap,” explains Miller.
For this reason, the ideal time to place the horizontal post itself is in late September or early October. This should give local deer several weeks to get used to the site before rubbing activity accelerates in the middle of the month and, with the right limb, they should stay attractive into mid-November.
Once the time has arrived and you're ready to attach the horizontal limb, you’ll want to cut your scotch pine or similar tree to about six feet long. Miller likes to have approximately four feet of length between his two vertical posts and two more feet sticking out underneath the licking branch. The next step is to attach this horizontal limb to the vertical posts using bailing wire or something similar, ideally at around knee height. And finally, scrape up the limb with a saw orknifeto replicate the beginnings of a rub and to get those smelly saps running and attracting deer.
And with that, you have a horizontal rub.
Observe and LearnMy conversation with Ted closed with him reminding me that any horizontal rub is an experiment and that anyone trying one should observe and adjust accordingly. Study your trail cam photos, the rub location itself, and any deer you watch while hunting. If they don’t like your rub, try different limbs, heights, locations, and any other variable you can think of.
“All deer are different,” Miller said. “Some bucks just don’t work these rubs, but some do.”
From everything I’ve seen and been told, when they do like your rub, you’re in for a show. and often times, a better hunt.
Feature image via Matt Hansen.
Shop

Sign In or Create a Free Account
Related
Manage
How to Plant a Late-Season Food Plot

Scout
How to Kill a Buck Hunting Rubs