Ask Wired To Hunt: Where Should I Place Trail Cams?

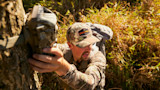
It’s obvious to anyone paying attention thattrail camerashave led to a lot of whitetail bucks ending up in freezers. But the inverse is true too: Cameras have saved a lot of deer lives as well. Mostly this is because well-intentioned hunters place their cameras in the wrong locations and check them at inappropriate times and frequencies.
I made these same mistakes early in my deer hunting career, but learned through experience and from interviewing hundreds of expert deer hunters on the Wired To Hunt podcast how to do things differently. The key to avoiding this trap is efficiency in placement, meaning locating your cameras in such a way as to get the most relevant information possible, without educating deer along the way. Here’s how I do that each month of the year, without the aid of bait or minerals—which have become illegal in many states because ofdisease concerns.
June-August
Summer trail camera work is all about identifying the quality of bucks in the area and what deer might be around to hunt in the fall.
Deer live a relatively routine life during the summer, moving from bed to feed and back again, day after day. To get quality summer pictures, the key is to place your cameras somewhere along this route. The safest option is focusing on an attractive summerfood source such as soybean, clover, alfalfa or native weeds. By focusing on the food source you can capture pictures of deer at their end destination, without needing to penetrate deep into their sanctuary cover where you’re likely to educate those deer.
Ideally, I like a food source trail cam to be aimed at a heavily-used entrance point into the field (based off tracks and trails), while also showing a wide view of the food source in the background. Inside corners of fields are often likely locations. I also try to position these cameras with a licking branch in the frame, that being a small branch hanging at deer eye level. While bucks aren’t actively working scrapes at this time, they will stop to scent check licking branches year round, leading to slightly better odds for a quality picture.
Another option is to place cameras over water sources. I prefer small ponds over moving rivers or creeks, but work with what you’ve got. If the only water on your property is a river or creek, placing your camera over the most highly used crossing is a good option.
September-October
At the end of the summer, I reposition my cameras to coincide with the shift in buck behavior to fall ranges and patterns. My primary goal now is to see which deer are living on my property during hunting season and to determine when bucks are moving in daylight.
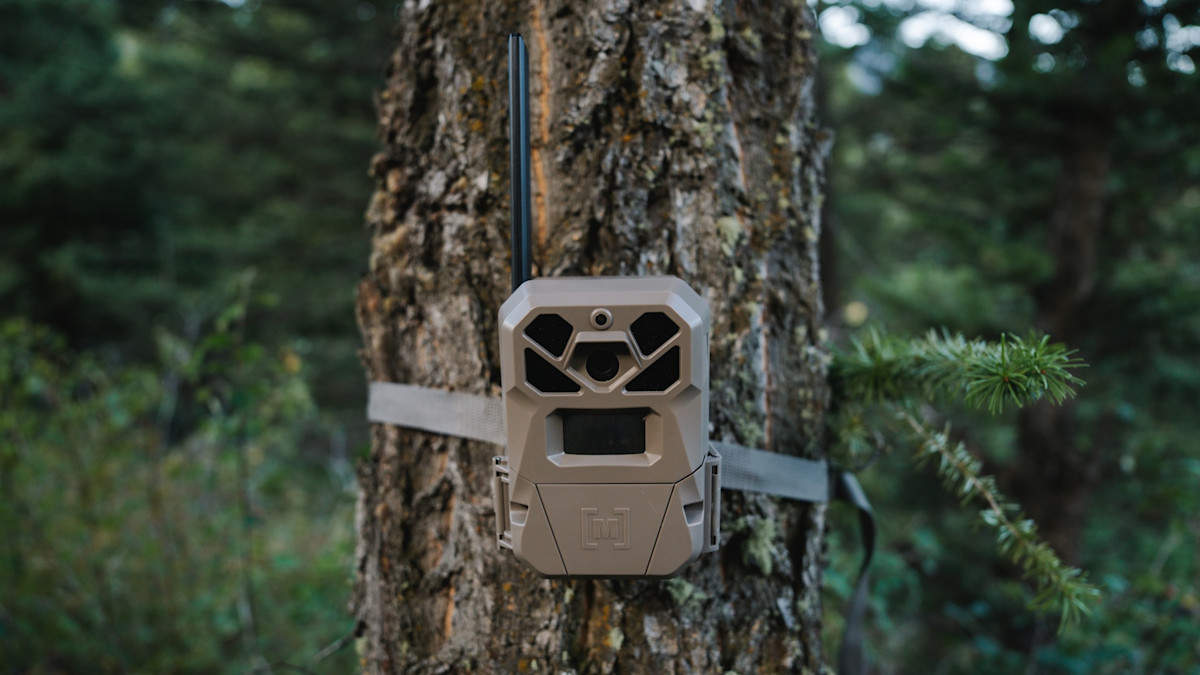
Because I don’t want to bump deer off my property or turn them nocturnal I prefer an especially low-impact camera strategy in-season, which means I place the majority of my cameras in easy-to-access locations. I do this by placing almost all of my cameras near edges. This might be the edge of a food source, the edge of a logging road, or maybe the edge of two different cover types. The most important factor is that I must be able to access these edges without my wind blowing into bedding areas and without bedded deer hearing or seeing me.
Similar to the summer, again I’ll have some cameras located on food sources, but those preferred foods now include corn fields, apple trees, oak flats loaded with acorns or food plots planted with oats, rye and even certain leafy brassicas. Another quality camera location is just inside from these food source edges, where you’ll often findrubs and scrapesstrewn across what many hunters refer to as a “transition area.”
Regardless of the edge type, at this time of year I’m almost always trying to take advantage of how scrapes can focus deer activity in front of cameras. I’ll point my cameras at active scrapes when available, or create my own “mock scrapes” under overhanging branches if there isn’t already one present. Another option is to “plant” a mock scrape tree in the middle of an opening. This can be done by digging a hole then burying a branch or small tree into the dirt until its overhanging branches stand about 3.5 to 4 feet above ground, making it a perfect height for a deer to naturally use as a licking branch. Kick up a patch of dirt underneath and then place your camera nearby, facing this new tree. These set-ups are some of my very best for in-season pictures, as deer naturally gravitate to structures such as this in the middle of openings.
November
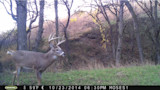
I continue running cameras on scrapes in November, but also reposition a few to focus on travel areas that become more active during the rut. These locations come in the form of pinch points or terrain features that funnel bucks traveling in between doe bedding areas or between bedding and feeding as they seek out breeding opportunities. As soon as bucks start showing up in daylight at these camera locations, I know it’s time to focus on my rut set-ups. A funnel might come in the form of a low spot in a ridge that bucks can easily cross through, a narrow strip of timber between two open fields, or a river bottom where multiple points taper down together.
These types of locations often go against my low-impact rule, so I try to either use cell cameras or only check them when I’m passing by to or from a hunting location. Another idea for high-impact funnels or bedding area locations is to place cameras in the late summer and then not check them until after the season. These cameras won’t help you this year, but the photos and intel can help in future years, as bucks often repeat certain behaviors year after year.
December
Deer behavior shifts again in December, leading to a shift in my camera locations back to food sources. Now is the time to focus on corn or bean fields with standing crops or leftover waste grain, turnips, sugar beets, grape and in certain other locales, even clover, wheat and other cereal grains. Similar to the summer strategy, I’d recommend placing cameras in the most popular entrance points to these fields as evidenced by tracks, browse lines or trails. Licking branches can still work at this time, but action is reduced compared to September through November.
Even more than at any time, in December I try to position my cameras in locations I can easily drive up to in a truck or ATV. With deer already high strung after two to four months of hunting pressure, anything I can do to reduce my human scent and overall presence is beneficial.
January-March
In thepost-seasonI keep my cameras in similar locations as they were in December, only shifting if there’s an obvious change in the preferred food sources. I run cameras at this time to determine what bucks made it through the hunting season and then to tell when antlers are being shed. This is mostly going to occur by monitoring food sources closely, keeping an eye out for where deer are feeding in the snow or by observing from a distance, and then repositioning cameras accordingly.
April-May
If there’s ever a time to take your cameras out of the field, this is it. Bucks aren’t typically identifiable without their antlers and there’s little information to learn at this time that can help during hunting season. Take advantage of this lull to bring your cameras inside, check them for issues, clean them up, and top them off with fresh batteries before summer.
The one exception to this would be if you are a turkey hunting nut, in which case you might want to keep those cameras running to see what your local gobblers are up to. Green fields and other strutting zones are some of my favorite spots for spring thunder chicken photos.
Shop
Sign In or Create a Free Account
Related
Gear
Ask Wired To Hunt: Are Wireless Trail Cameras Fair Chase?
Gear
Ask Wired To Hunt: Where Should I Place Trail Cams?