
One of the best things about hunting is that it’s never over–there’s always another season, another species, and another way to take your skills to the next level.
This offseason, consider adding rifle training to your summer program. Archery hunters knowthe importance of practice, and while modern optics make rifle hunting a little more forgiving, complacency never bagged any Booners.
Practice Like You Play
The rifle drills below will make you a better marksman, but you might find that variations of these drills are more helpful for your specific situation. However you choose to practice, always incorporate two key principles into your routine: pressure and realism.
Only the coolest customers can down a big buck or bull with a resting heart rate. When you shoulder your rifle, you need to be prepared to handle the pressure. So, do whatever you can to increase your heart rate while you train.
Adding a timed element is an easy way to do that. Give yourself less time than you think you need and see what happens. Even if you don’t make it in before the buzzer, you’ll have increased your heart rate and force yourself to perform under pressure.
Physical exertion is another great way to up the ante. Not every gun range will allow you to sprint to your car and back before you shoot, but if you can raise your heart rate with a few push-ups or jumping jacks, you’ll better simulate your physiological state with your target buck in the crosshairs.
Speaking of simulation, try to replicate the kinds ofshots you’re likely to take in the field. Hunting is unpredictable (another reason we like it), so sometimes it’s impossible to guess this final puzzle piece of a successful hunt. But there are some things you probably do know. If you’re whitetail hunting from a tree stand or in the big woods, don’t take hundreds of shots from the prone. If you’re hunting antelope in open country, a freehand shot probably won’t be necessary.
Another way to add realism to your training is to use your sling for each shot. If youcarry your rifle in a sling, you can practice moving the rifle from a carrying position to a shooting position. Making this motion smooth and confident will let you get on target faster and increase your odds of making a good, clean shot.
The point is, feel free to adapt any of the drills below to add pressure and realism. That will make your practice sessions more efficient and help you be more successful once fall rolls around.
Drill #1: Three-Position Tripod Drill
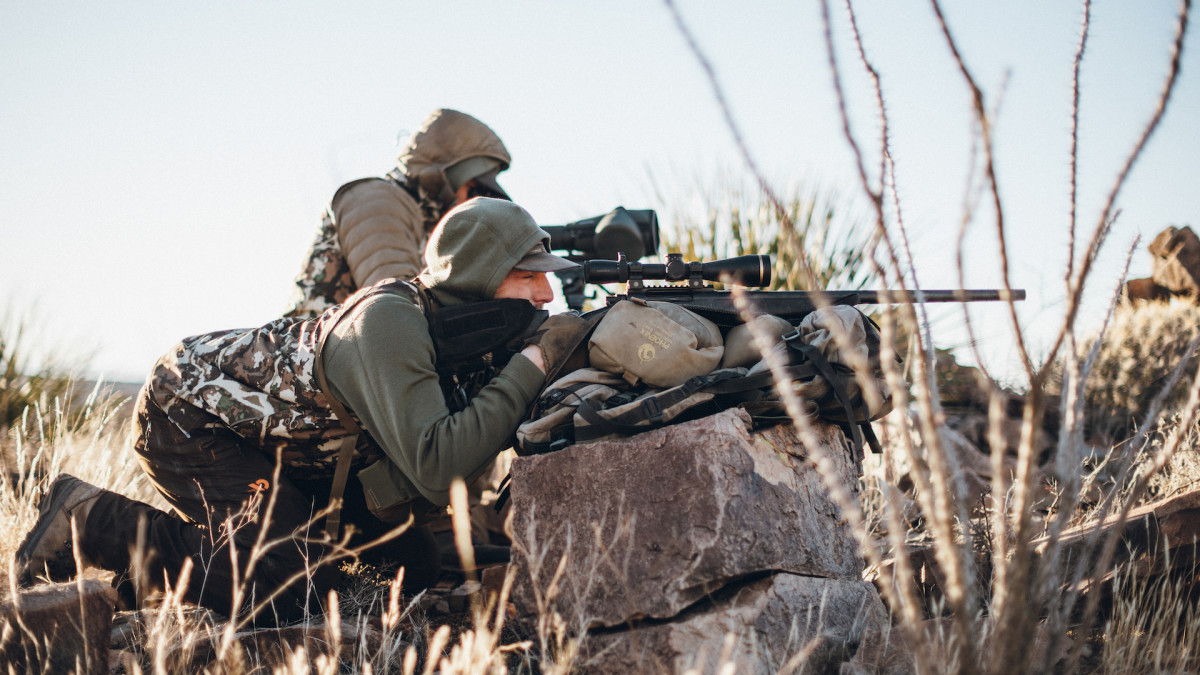
You may or may not carry a tripod into the field, but it’s still a great tool to simulate tree branches, fence posts, and other impromptu rifle rests.
Start with the tripod in its lowest position. Place asandbagon top of the tripod to give your rifle a place to rest. Approach the tripod with your rifle, unsling the gun, and get into a stable kneeling position. The height of your tripod will dictate the kind of position, but if you can rest your strong arm elbow on your knee, a reverse kneeling position will be your most stable option.
At this point, you can decide the distance and how many shots you want to take. I like to take a single shot between 100 and 200 yards and focus on slowing my breathing, following through on my trigger press, and keeping my head down on the scope after I break the shot. I’ll do that three more times, and each time I’ll get up and approach the tripod again with the rifle slung.
For my final two shots, I’ll take a single shot like before and then take a follow-up shot to simulate that scenario.
Repeat that same six-shot process, but raise the tripod to a medium height for your next six shots and a standing height for your final six shots. You can adjust the difficulty by setting the tripod to more or less awkward heights. Build as stable a shooting position as you can at each height, and you’ll be better prepared to use whatever rest the field presents.
To check out this drill for yourself, watchthis videofrom professional shooter Josh Froelich.
Drill #2: Call Your (Friend’s) Offhand Shot
Whether you call it “offhand,” “freehand,” or just “standing,” shooting without a rest while standing is the most difficult shot you’ll ever take. But sometimes that’s what hunting requires, so you better be ready.
To increase your odds of success, find a friend who also wants to improve their offhand shooting skills. Visit a range with targets at several different distances within 100 yards. Stand at the firing line with your gun in the low-ready position, as if you’re stalking through a field that likely contains your target animal.
Your friend’s job is to call out the target distance, and your job is to take an offhand shot at that distance within a certain amount of time. You can calibrate the difficulty by adjusting the time, target distance, and target size, but this drill will simulate a quick, offhand, short-range shot.
And, of course, competition is highly encouraged. See how many out of five shots you can hit, then see if your friend can do any better.
Drill #3: Know Your Limits
There are fourbasic shooting positions: prone, sitting, kneeling, and standing. Before you go out into the field, it’s important to know your maximum range with each.
Find your baseline by taking three shots in each position at comfortable distances and at targets that simulate the vital area of your target animal (deer are about 18 inches, elk are 24 inches, etc.). If you make all three shots, move the target farther away. If you miss one, move the target closer.
Once you have this baseline, you can work to extend your range. Taking three shots in each position will use less than a single box of ammo, but it will provide invaluable information about which shots you can take–and which you can’t. Plus, being forced to hit three shots in a row will add pressure to each shot and better simulate a real-world hunting scenario.
Last Shot
With any of these drills, you can make your ammo stretch farther by incorporating dry-fire rounds into each set. You can also save money by using a .223 Rem. or a .22 LR instead of your hunting rig. You should still spend time behind the trigger of your deer rifle, but trigger time on any rifle will help you become a more proficient shooter.
During each drill, focus on the fundamentals. Build a stable shooting position, control your breathing, and focus on pulling the trigger smoothly without disturbing the sights.
Practicing these fundamentals within these three drills will make you a more accurate, confident rifle hunter, and as long as you can get within range, help you bemore successful next year.
Shop
Sign In or Create a Free Account
Related

Firearms
You Need Practice, Not a New Rifle

Gear
Summer Archery Drills Every Bowhunter Should Do