How To Cook The Perfect Duck Breast

Course
Main
Duration
30 minutes
Serves
4
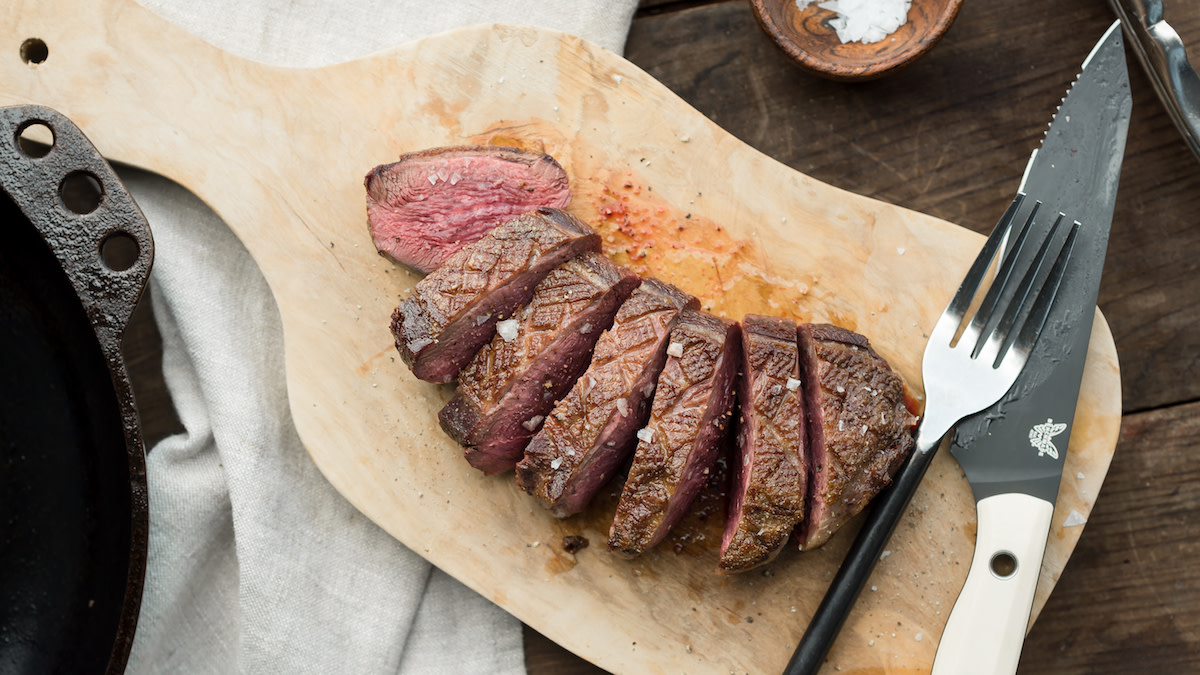
My husband and I were waterfowl hunting fools when we lived in the frigid state of North Dakota. I cooked ducks and geese on a regular basis for years and this experience taught me quite a bit about cooking with these special birds. I know that a perfectly cooked duck breast should have crispy, savory skin—a reward so good that it makes the tedious job of plucking worthwhile. Developing that crust and getting a juicy, medium-rare center is easy to do if you follow these guidelines.
Sourcing the Best Duck Breast
Ducks are often considered a specialty ingredient at high-end restaurants, and as hunters, we have the opportunity to indulge in this delicacy right at home. Out of all the wild game available to eat, ducks have the most variable flavor because of their diet. Generally speaking, most dabbling ducks are delicious as they mostly eat acorns, corn, and rice. These include mallard, pintail, wood duck, teal, and wigeon. Avoid using diver ducks that eat aquatic species, like canvasbacks or buffleheads, and check out Cal’s tips on cooking diver ducks instead.
Geese and cranes are also excellent when seared in a pan. Sandhill cranes and Specklebellies have earned the nickname, “ribeye in the sky” for a reason. I’ve also eaten more than enough snow geese to know they are very delicious and don’t deserve the bad reputation they’ve been given. If you’re working with tougher Canada goose breasts, this steakhouse goose recipe is one of my all-time favorites.
If hunting wild game isn’t in the cards for you, search for local farms in your area who may be raising pastured ducks, or visit your local butcher shop. Pekin ducks are popular since they are mild-flavored and have a high fat content, but if you find a farmer raising heritage breeds, such as Muscovy or Rouen, you’ll be rewarded with more flavorful meat.
Preparation
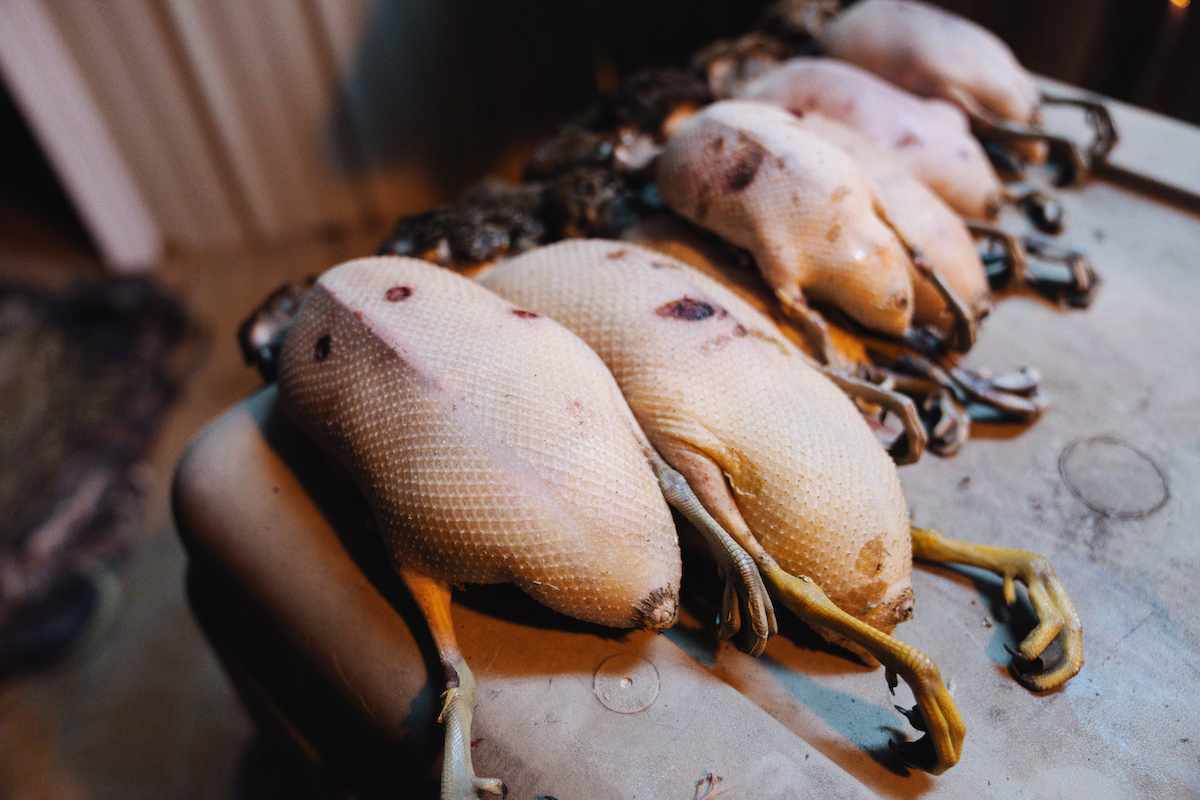
When preparing to cook a duck or goose breast, I check the amount of fat first. I’ve seen ducks with a thick layer of fat that resembles a domestic raised bird, and I’ve seen some with so little insulation that the skin is nearly transparent. Fat matters when cooking because it acts as a barrier to heat transfer. A lean duck will cook very fast, whereas a fatty duck will take a little longer to render, so you’ll need to determine your cooking method based on fat content.
Start by pulling the meat out of the fridge 30 minutes to an hour before cooking. This is important for two reasons. The first is so that the meat cooks more evenly. The second is because cold skin hitting a hot pan will produce condensation. That extra moisture inhibits the ability to get a crispy crust which leads me to my next point—the meat needs to be dry.
If the meat is fresh, it shouldn’t take more than a good blot of paper towels. Frozen meat will release a lot of liquid while thawing. In that case, pat it dry and let it chill uncovered in the refrigerator for an hour or two.
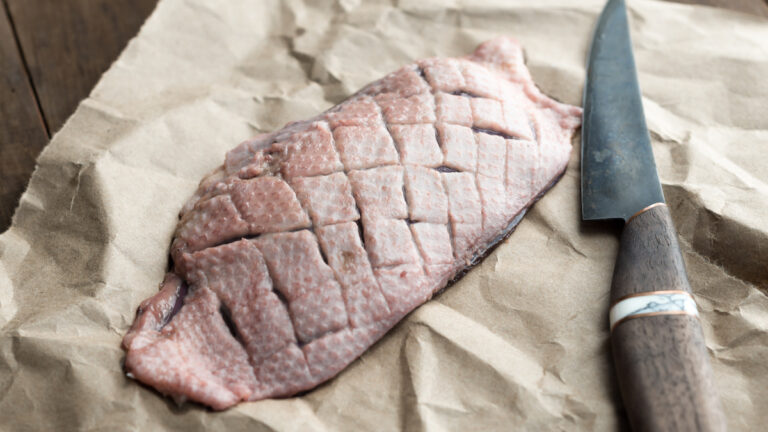
To help the fat render during cooking, score the skin by making cross-hatch marks with a sharp knife. While cutting, pull the skin taught with your fingers to be sure you’re only slicing the skin and fat, not the meat underneath. If there are holes from pellets, be gentle and work around those areas. If you have a duck or goose breast with little to no fat, I wouldn’t score the delicate skin to avoid the risk of puncturing through to the meat.
Just before cooking, season with coarse sea salt and fresh cracked pepper. Keep in mind that the longer the salt rests on the skin, the more moisture it will draw out. Just be aware of this and pat dry again before cooking if necessary. Sometimes I like to use a flavorful rub with woody herbs like rosemary and thyme.
Cooking Methods
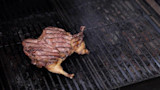
There are several methods for cooking ducks. If you want to cook them whole, with legs still attached, either roasting at high temperature or smoking over low heat are both good options. For skinless breasts, you can soak in your favorite steak marinade and fire it up on the grill. But if you’re looking for deliciously crispy skin, searing the breast in a skillet is the way to go.
Cooking a Fatty Duck
If the duck you’re cooking was well fed, then properly rendering the fat is the key to avoiding dreaded chewy skin. Even though it seems counterintuitive, you need to start with a cold skillet. You can use stainless steel, but I like cast iron best because it takes longer to heat up, giving more time for the fat to render.
You’ll lay the breast skin-side down in the cold pan, be sure not to over-crowd. You won’t need to use any cooking oil. Now, turn the burner on between medium and medium-high. As it heats up, you should hear the breast softly sputter and gurgle. If it’s frying loudly, reduce the heat.
As the breast cooks, it will contract and dome up in the center. Use a spatula and gently press down on the center so that the skin gets full contact with the pan. Flip it when the crust is brown and crispy and sear on the second side to finish, usually for less time than the first side. You’re aiming for medium-rare doneness, which is 130 degrees. Use a meat thermometer or press on the meat to feel for doneness like you do with steaks.
Cooking Skinless Ducks
I understand that not everyone has the time to pluck their ducks. Or perhaps your duck took one too many BBs to the chest, making the process difficult. I cook skinless ducks, (and ducks with very little fat) a little differently.
Remember that point about fat being a barrier to heat transfer? Fatty birds start in a cold pan to allow time for the fat to render out. If you prepare a skinless duck this way, it will cook the meat directly, giving you either overcooked meat with crispy skin, or perfectly cooked meat with rubbery skin. To remedy this situation, I treat them just like I would a venison steak by searing in a preheated skillet with oil or store-bought duck fat until it hits the desired temperature.
Resting
As with any meat, be sure to allow it to rest on a cutting board for 6-8 minutes so the juices have time to redistribute themselves in the meat. Don’t cover it with foil! This steams the breast and softens the skin you worked so hard to get crispy.
Serving
While the meat rests, this is the perfect opportunity to create a quick pan sauce in the skillet that you cooked the duck in. I’m particularly fond of using a blend of bourbon, stock, and orange juice like in this recipe. If a sauce seems like too much, at the very least, don’t let that rendered fat go to waste! You can quickly stir-fry a side dish of mushrooms or par-cooked veggies in the skillet, or pour the hot fat into mashed potatoes for serving.
Ingredients
- 4 skin-on duck, small goose (such as Specklebelly or Snow), or Sandhill Crane breasts (see notes for skinless)
- Coarse sea salt
- Fresh cracked pepper
Also works with
Preparation
- Remove the duck breasts from the refrigerator about an hour before cooking. Blot the skin with paper towels to remove as much moisture as possible. Using a sharp knife, score the skin and fat in a crosshatch pattern, being careful not to cut all the way through to the meat. (It helps to pull the skin taut with your fingers to be sure you’re only slicing the skin and fat.) Set aside to come to room temperature.
- Just before cooking, season both sides of the duck with salt and pepper. If your ducks have a visible layer of fat underneath the skin, lay them skin-side down in a cold cast-iron pan and turn the burner to medium heat. (If you’re cooking with skinless ducks or ducks with very little visible fat, refer to the notes below for cooking.) As the pan heats up, you should hear the breast softly sputter and gurgle; if it’s frying loudly, reduce the heat.
- As the breast cooks, it will contract and dome up in the center. Use a spatula to gently press down on the center or place a heavy baking dish on top of the meat so the skin gets full contact with the pan. Cook until the skin is brown and crispy, about 3 minutes for a duck breast or about 5 minutes for goose. Flip the breast, and sear on the second side until the meat reaches between 128°F and 130°F. If you don’t have a meat thermometer, press into the breast with your tongs and feel for doneness like you would a steak. The total cook time should be 5 to 6 minutes for a small wild duck breast, 6 to 7 minutes for a large wild duck breast, or 8 to 9 minutes for a wild goose breast or domestic duck breast.
- Transfer to a cutting board to rest for 6 to 8 minutes before serving.
Note:If working with a skinless duck, or a duck with virtually no fat under the skin to render, pre-heat a drizzle of rendered duck fat or neutral oil (such as avocado or grapeseed) in a skillet over medium-high heat. Sear the breasts for 3 to 4 minutes on each side, or until the meat hits about 128°F - 130°F.
Shop
Sign In or Create a Free Account
Related

Cooking Techniques
How to Cook Diver Ducks

Cooking Techniques
How to Grill a Whole Duck
Cooking Techniques
Video: How to Cook Nabeta

Reviews
How To Cook The Perfect Duck Breast
Course
Main
Duration
30 minutes
Serves
4
My husband and I were waterfowl hunting fools when we lived in the frigid state of North Dakota. I cooked ducks and geese on a regular basis for years and this experience taught me quite a bit about cooking with these special birds. I know that a perfectly cooked duck breast should have crispy, savory skin—a reward so good that it makes the tedious job of plucking worthwhile. Developing that crust and getting a juicy, medium-rare center is easy to do if you follow these guidelines.
Sourcing the Best Duck Breast
Ducks are often considered a specialty ingredient at high-end restaurants, and as hunters, we have the opportunity to indulge in this delicacy right at home. Out of all the wild game available to eat, ducks have the most variable flavor because of their diet. Generally speaking, most dabbling ducks are delicious as they mostly eat acorns, corn, and rice. These include mallard, pintail, wood duck, teal, and wigeon. Avoid using diver ducks that eat aquatic species, like canvasbacks or buffleheads, and check out Cal’s tips on cooking diver ducks instead.
Geese and cranes are also excellent when seared in a pan. Sandhill cranes and Specklebellies have earned the nickname, “ribeye in the sky” for a reason. I’ve also eaten more than enough snow geese to know they are very delicious and don’t deserve the bad reputation they’ve been given. If you’re working with tougher Canada goose breasts, this steakhouse goose recipe is one of my all-time favorites.
If hunting wild game isn’t in the cards for you, search for local farms in your area who may be raising pastured ducks, or visit your local butcher shop. Pekin ducks are popular since they are mild-flavored and have a high fat content, but if you find a farmer raising heritage breeds, such as Muscovy or Rouen, you’ll be rewarded with more flavorful meat.
Preparation
When preparing to cook a duck or goose breast, I check the amount of fat first. I’ve seen ducks with a thick layer of fat that resembles a domestic raised bird, and I’ve seen some with so little insulation that the skin is nearly transparent. Fat matters when cooking because it acts as a barrier to heat transfer. A lean duck will cook very fast, whereas a fatty duck will take a little longer to render, so you’ll need to determine your cooking method based on fat content.
Start by pulling the meat out of the fridge 30 minutes to an hour before cooking. This is important for two reasons. The first is so that the meat cooks more evenly. The second is because cold skin hitting a hot pan will produce condensation. That extra moisture inhibits the ability to get a crispy crust which leads me to my next point—the meat needs to be dry.
If the meat is fresh, it shouldn’t take more than a good blot of paper towels. Frozen meat will release a lot of liquid while thawing. In that case, pat it dry and let it chill uncovered in the refrigerator for an hour or two.
To help the fat render during cooking, score the skin by making cross-hatch marks with a sharp knife. While cutting, pull the skin taught with your fingers to be sure you’re only slicing the skin and fat, not the meat underneath. If there are holes from pellets, be gentle and work around those areas. If you have a duck or goose breast with little to no fat, I wouldn’t score the delicate skin to avoid the risk of puncturing through to the meat.
Just before cooking, season with coarse sea salt and fresh cracked pepper. Keep in mind that the longer the salt rests on the skin, the more moisture it will draw out. Just be aware of this and pat dry again before cooking if necessary. Sometimes I like to use a flavorful rub with woody herbs like rosemary and thyme.
Cooking Methods
There are several methods for cooking ducks. If you want to cook them whole, with legs still attached, either roasting at high temperature or smoking over low heat are both good options. For skinless breasts, you can soak in your favorite steak marinade and fire it up on the grill. But if you’re looking for deliciously crispy skin, searing the breast in a skillet is the way to go.
Cooking a Fatty Duck
If the duck you’re cooking was well fed, then properly rendering the fat is the key to avoiding dreaded chewy skin. Even though it seems counterintuitive, you need to start with a cold skillet. You can use stainless steel, but I like cast iron best because it takes longer to heat up, giving more time for the fat to render.
You’ll lay the breast skin-side down in the cold pan, be sure not to over-crowd. You won’t need to use any cooking oil. Now, turn the burner on between medium and medium-high. As it heats up, you should hear the breast softly sputter and gurgle. If it’s frying loudly, reduce the heat.
As the breast cooks, it will contract and dome up in the center. Use a spatula and gently press down on the center so that the skin gets full contact with the pan. Flip it when the crust is brown and crispy and sear on the second side to finish, usually for less time than the first side. You’re aiming for medium-rare doneness, which is 130 degrees. Use a meat thermometer or press on the meat to feel for doneness like you do with steaks.
Cooking Skinless Ducks
I understand that not everyone has the time to pluck their ducks. Or perhaps your duck took one too many BBs to the chest, making the process difficult. I cook skinless ducks, (and ducks with very little fat) a little differently.
Remember that point about fat being a barrier to heat transfer? Fatty birds start in a cold pan to allow time for the fat to render out. If you prepare a skinless duck this way, it will cook the meat directly, giving you either overcooked meat with crispy skin, or perfectly cooked meat with rubbery skin. To remedy this situation, I treat them just like I would a venison steak by searing in a preheated skillet with oil or store-bought duck fat until it hits the desired temperature.
Resting
As with any meat, be sure to allow it to rest on a cutting board for 6-8 minutes so the juices have time to redistribute themselves in the meat. Don’t cover it with foil! This steams the breast and softens the skin you worked so hard to get crispy.
Serving
While the meat rests, this is the perfect opportunity to create a quick pan sauce in the skillet that you cooked the duck in. I’m particularly fond of using a blend of bourbon, stock, and orange juice like in this recipe. If a sauce seems like too much, at the very least, don’t let that rendered fat go to waste! You can quickly stir-fry a side dish of mushrooms or par-cooked veggies in the skillet, or pour the hot fat into mashed potatoes for serving.
Ingredients
- 4 skin-on duck, small goose (such as Specklebelly or Snow), or Sandhill Crane breasts (see notes for skinless)
- Coarse sea salt
- Fresh cracked pepper
Also works with
Preparation
- Remove the duck breasts from the refrigerator about an hour before cooking. Blot the skin with paper towels to remove as much moisture as possible. Using a sharp knife, score the skin and fat in a crosshatch pattern, being careful not to cut all the way through to the meat. (It helps to pull the skin taut with your fingers to be sure you’re only slicing the skin and fat.) Set aside to come to room temperature.
- Just before cooking, season both sides of the duck with salt and pepper. If your ducks have a visible layer of fat underneath the skin, lay them skin-side down in a cold cast-iron pan and turn the burner to medium heat. (If you’re cooking with skinless ducks or ducks with very little visible fat, refer to the notes below for cooking.) As the pan heats up, you should hear the breast softly sputter and gurgle; if it’s frying loudly, reduce the heat.
- As the breast cooks, it will contract and dome up in the center. Use a spatula to gently press down on the center or place a heavy baking dish on top of the meat so the skin gets full contact with the pan. Cook until the skin is brown and crispy, about 3 minutes for a duck breast or about 5 minutes for goose. Flip the breast, and sear on the second side until the meat reaches between 128°F and 130°F. If you don’t have a meat thermometer, press into the breast with your tongs and feel for doneness like you would a steak. The total cook time should be 5 to 6 minutes for a small wild duck breast, 6 to 7 minutes for a large wild duck breast, or 8 to 9 minutes for a wild goose breast or domestic duck breast.
- Transfer to a cutting board to rest for 6 to 8 minutes before serving.
Note:If working with a skinless duck, or a duck with virtually no fat under the skin to render, pre-heat a drizzle of rendered duck fat or neutral oil (such as avocado or grapeseed) in a skillet over medium-high heat. Sear the breasts for 3 to 4 minutes on each side, or until the meat hits about 128°F - 130°F.