How to Cook Fish Over Fire
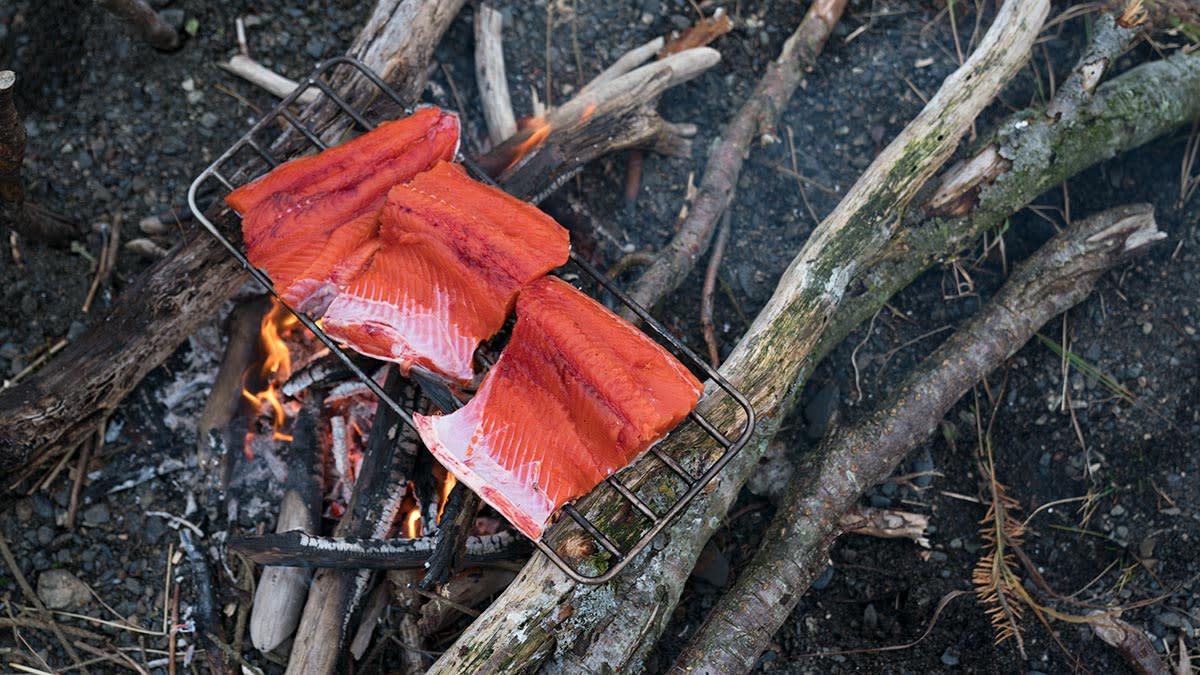

Anthropologists estimate that humans conquered fire about 400,000 years ago. That event likely predated even the development of language, but I have to imagine those contemporary humans appreciated the benefits that flames added to their meat and fish—even if they couldn’t articulate it. Even today, it’s hard to describe the distinct satisfaction that comes from cooking over fire.
I grew up around campfires, and cooking over them has become second nature. I’ve spent countless hours coaxing damp wood toward ember in backcountry landscapes like theBoundary Waters Canoe Area. Under evergreen canopies, friends and family come together in clouds of pungent smoke to share incredible food. There’s no secret to a great meal under the stars; you only need two things—campfire and camaraderie (andmaybe a little whiskey). When these essential elements are properly combined, lifelong friendships ascend from the previous night’s ashes. Food is a language that everyone understands, and food—especially freshly caught fish—cooked over an open fire speaks to a primal and integral part of everyone I know.
You’ll find many different styles and techniques for cooking fish over an open fire. From straight to the coals to searing in a cast-iron pan, there’s no shortage of ways to turn the fruits of an afternoon’s fishing into a campfire meal.
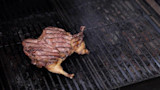
Caveman Style
Sticking a fish straight onto blazing hot coals or flames is as primitive as it gets. Steve calls it Caveman Style in the MeatEater TV“Wild to Table: Memorable Meals” episode. I find that just the thought of this makes me smile. It’s a fun way to freak out your camp buddies too, when you throw their freshly cleaned dinner into the fire.
As simple as it sounds, it does take some technique to pull it off. I like to burn the flame down to red hot coals and flatten an area large enough for the catch of the day. Score the fish skin crosswise into diamond shapes before laying the fish into the coals. Make sure to flip it only once, allowing the coals to create a charred skin that will peel when you’re ready to eat. This technique is a ton of fun with northern pike since the whole crew can dig in with their hands and avoid the dreaded Y-bones. Season the flesh with a little salt and a squeeze of lemon and you’re good to go.
The other variant of this method is the fish-on-a-stick style that Steve demonstrates on the episode mentioned above. With your cleaned and gutted catch, slide a sturdy, sharpened stick through the mouth and poke it into the flesh at the rear of the rib cage. Jab some smaller sticks through the belly meat perpendicular to your spit stick in order to stabilize the fish and keep it from spinning or falling off. Then you slowly roast the fish near the flames, much like you would a marshmallow, until it’s cooked through.
Hobo Style
Many years ago in Cub Scouts, I was introduced to thehobo dinner—a simple but effective, all-in-one way to cook a meal over a fire. I spent many evenings staring into the coals, waiting for my tinfoil-wrapped meal of sizzling meat and veggies to finish cooking.
This method is fantastic for almost any fish, and in particular, whole fish. Simply gut, scale, and clean your catch and stuff it with anything you might have on hand like wild herbs, vegetables, or sliced lemon. Rub down the fish with a little oil so it doesn’t stick to the tinfoil, then wrap it tightly with a few layers of foil so no moisture escapes. Place the fish next to hot coals for indirect heat, flip and turn a few times and check for doneness when you think it’s been in long enough. You must rely on smell, sound, and feel when using this technique. Trust your instincts and you won’t be disappointed.
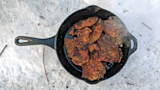
Shore Lunch Style
The most common style of open fire cooking in fish camp is the classicshore lunchcooked in a cast iron pan. Freshwater fish like walleye, pike, trout, and panfish have been gracing our plates with their pan-fried goodness for decades with this simple recipe.
This technique is much like battering and frying fish at home, but with the added volatility of fire. You can’t just turn down the flame, so controlling the heat is critical, or the result will be burnt fish. Small, low fires or fresh hot coals work best for using a pan or skillet. A grill grate to place over the fire will help keep the heat controlled and the pan stable.
First fillet your fish and remove the skin. Dust the fillets with Shore Lunch, Panko, breadcrumbs, cornmeal, or even just salt and pepper, pour some cooking oil in the pan and place it over the fire. When the oil starts to bubble, set the fillets in the skillet and pan-fry until the downward side is golden brown, then flip. Remove the fillets when the second side is lightly browned as well, usually not more than a few minutes per side.
Then there’s pan-frying vs. deep frying. Pan-frying involves cooking one side of the fish in light oil or fat and then flipping to finish. Deep frying involves submerging the entire fish or fillet in oil. When deep frying, make sure to leave at least an inch of space between the surface of the oil and the top of the pan or the oil will spill over, causing an unwanted extra fire. Deep frying is excellent for whole panfish like bluegills and crappies.
Tools of the Trade
Before you start cooking, it’s essential to have everything you need within arm’s reach. I’m a firm believer in the old cook’s adage,mise en place, everything in its place. This saying only rings truer when cooking over an open fire. Make sure to have multiple sizes of wood to feed the fire. Are your ingredients cut? Are utensils nearby? As soon as that fish hits the pan, there’s no going back or pressing pause. Being prepared is key to the final result, and sure, fire can be intimidating, but once you’ve mastered the techniques above, you’ll find nothing more satisfying than a fresh fish meal cooked over an open fire.
I suggest having a few cooking tools to make open fire preparations much easier. Racks that hold whole fish, folding fire grates with or without legs, and tripods that hang grill grates or pots are all relatively affordable and easy to transport. These tools help elevate the fish over the fire to prevent charring and overcooking. My favorite of these three is the tripod. It’s a multi-purpose cooking tool that allows you to fry, boil, braise, grill, and smoke. The tripod is unique in the fact that you can lower or raise whatever you are cooking over the fire.
The tripod is perfect forstew and soup, so while you’re frying up that classic shore lunch, you can have dinner simmering in a pot, too. Nothing should go to waste in camp, at least if I have my way. There’s still plenty of that walleye or trout left to go around after filleting.Grill the headsand add the carcass to a pot with any vegetables and aromatics that you have on hand. Or, if you’re lucky to be in foraging season at the time, a short walk can yield all you need.
Cooking over fire is by far my favorite way to test my culinary skills. There’s a simplicity to it that brings me closer to my primal self. It allows me to eat with my hands, get a little messy, and have a lot of fun. The results are amazing when done right, and I would argue it’s pretty tough to find anything, anywhere, as beautiful as a perfectly cooked piece of fish over a fire. Respect the fire and it will respect you, and your experience will go far beyond a full stomach. I’ll leave you with my favorite quote from one of the fathers of the conservation movement, Sigurd Olson:
“In years of roaming the wilds, my campfires seem like glowing beads in a long chain of experience. Some of the beads glow more than others, and when I blow on them ever so softly, they burst into flame. When that happens, I recapture the scenes themselves, pick them out of the almost forgotten limbo of the past, and make them live.”
Shop
Sign In or Create a Free Account
Related
Cooking Techniques
How to Make Shore Lunch Fried Fish on the Ice
Cooking Techniques
Video: How to Cook Beaver Tail