Video: How to Remove Backstraps from a Deer

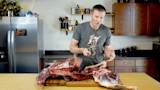
Every week for the next month or so, we’ll be bringing you in-depth butchering videos and articles to help you make the most of your kills and catches. Janis Putelis, Ryan Callaghan, and other accomplished butchers and cooks will share knife tips and techniques they’ve learned over decades of handling wild game. This week, the Latvian Eagle demonstrates how to remove a whitetail deer backstrap.
The backstraps, or loins, are many people’s favorite pieces of venison. They’re relatively easy to remove, but lazy knife work can leave a lot of meat on the bone. I like to get every last mouthful of meat off any animal I kill, so I take a very deliberate approach to my backstraps. Following these steps will produce a better product.
The backstraps are two large muscles that follow most mammals’ spines alongside the vertical spinous processes (the bone “fins” that stick up off the spine) and sit on top of the rib cage. They run forward from the pelvic bone all the way up into the neck. The cuts you make will be horizontal along the vertebrae and vertical along the ribs, assuming the deer is laying on its side.
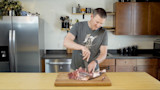
First, you’ll want to remove the front shoulder and some very thin meat and facia covering the backstrap. Then pick a point somewhere in the middle of the back to make an incision along the vertebrae in to where the ribs meet the spine. Follow those vertebrae closely as you work forward to where the backstrap braids into the neck meat.
Then make shallow cut along the ridge where the tops of the ribs make a hard angle to free the backstrap. You should be able to see a white line of silver skin at this junction. Continue cutting carefully down along the ribs to the spine as you work forward into the neck. Pick a point to end the cut where the backstrap disappears into the neck meat. Where your vertical and horizontal cuts intersect, you can start lifting the backstrap and slicing it free of the skeleton.
Scraping your knife edge against bone can dull it, so try to make your slices backward following the direction of the ribs. Continue your cut back along the spine to the corner where it intersects the pelvis. Then cut back along the short ribs, continuing to lift up and free the whole muscle, taking care to follow the contours of the ribs and vertebrae to extract the most meat possible. Then carve along the pelvic bone into the corner with the spine to create the end of your backstrap cut and pull it free. Finally, clean off any fat or damaged meat. We like to leave the sinew casing on the outside of the muscle intact for freezing as it will protect the meat and can be trimmed later. But, if you’re giving the meat as a gift, it’s nice to get it trimmed up and oven-ready for folks who might not know how.
I view the backstrap as made up of three distinct sections. There’s the forward section, roughly from the neck to the shoulder, that’s pretty sinewy and tough. Then there’s the middle section—the round, sinew-free, choice cut—from the shoulder to the back of the ribcage. Then the backstrap becomes flatter along the short ribs to the pelvis in the rear section. That’s also very good meat but not as thick. We like to use that forward section for burger and stew meat, but the middle and rear parts are high quality and should be saved for roasts and steaks. Click here to read Danielle Prewett’s recipe forthe perfect backstrap steak.
We worked with the Benchmade Knife Company to make the perfect knife for removing backstraps and everything else you need to do to turn a deer carcass into pretty packages of meat in the freezer. It’s called theMeatcrafter Knife and you should check it out.
Shop
Sign In or Create a Free Account
Related
Butchering & Processing
Video: How to Remove Silverskin
Butchering & Processing
Video: How to Debone a Venison Hindquarter