What You Need to Know About Glassing Terrain

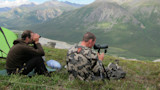
The act of looking for animals from a spot-and-stalk position is usually referred to as “glassing,” since you’re almost always usingbinocularsorspotting scopes. Success as a glasser begins with the ability to pick out the right places to do your glassing from.
The criteria for a good glassing position varies according to location, but generally, you’re looking for an area that gives you a relatively unobstructed view of the surrounding country. Often, but not always, such positions are located on areas that provide a vantage point which rises above the surrounding topography. But of course, there’s more to picking an observation point than just looking for a high spot.
Besides having good visibility, you should select a fairly comfortable position or you’ll have a hard time staying put for any appreciable amount of time. Depending on the circumstances, you might need a spot that offers either a windbreak or a touch of breeze, or perhaps shade or direct sunlight, though you never want to set up where you’re looking directly into a rising or setting sun.
Timing and Topography
Experienced glassers will have spots that they prefer in the morning and others for the evening depending on where the animals have been seen before and where the sun is in relation to where they are looking. Glassing knobs with 360-degree views are great, of course, but so is that little shelf of rock that lets you peek down into a narrow wedge of a valley floor that includes a couple of prime game trails. Especially if that little shelf of rock is close to a few other good vantage points.
It sucks to put all your eggs in one basket by climbing to some lonely high point and then not having anywhere convenient to move to when it doesn’t produce. In other words, it’s a lot better to work a string of high spots that are connected by a continuous ridgeline than it is to scale an isolated peak.
Know the Wind + Sunlight Direction
Wind direction matters. It matters less and less as you get higher and farther from your target area, but it’s of vital importance when you’re sitting close to where you expect to see animals. If you’re glassing a few meadows that are only 200 yards away and you have the wind at your back, you’re running the risk of blowing all of the game out of there. You also want to consider your visual presence. It’s best to select areas where you can maintain a low profile.
Having a backdrop of brush or rock is helpful, because it keeps you from skylining yourself. Getting into the shadows is better than being in direct light, unless you’re freezing cold and need the sun. And if you are in the sun, take care to hide or shade shiny objects such as watches, rifle barrels, and tripod legs. Nothing screams “I’m up here!” to an animal quite like a flashing beacon of reflected light that’s bouncing off the lens of your spotting scope.
Not all good glassing spots are up high, either. There are certain types of country that are more suited to glassing from the bottom up. Such locations include cliffy areas, where climbing up high requires a serious investment of time and energy. Also when you’re glassing up into open basins or hanging valleys or looking at a semi-open hillside that would be impossible to glass from above.
When you’re selecting a glassing position, remember that your goal is to find an animal and then go after it. If you’re up on a rock spire towering 2000 feet above the valley floor, it’s going to take you a long time to climb down when you do see something. Always consider the position of the sun and then be realistic about how much time you have to reach an area that you’re looking at. If you’ve got an hour of daylight left on the last day of the hunting season, it won’t do you much good to be glassing a bunch of locations that are a mile away.
If you’re hunting in the morning, on the other hand, you have a much longer window of time in which to reach any animals that you happen to locate. And if you’ve got several days before the season ends, you can even change position on subsequent hunts in order to get closer to really far-out animals that you might have located. You might then need to find a new and closer glassing location in order to re-locate those animals once you get into effective stalking range, but that’s all part of the fun.
Time for Target Acquisition
Once you’ve selected a good glassing location and taken your position, it’s time to actually start looking for animals. Now you’re relying on your game-eye, a term that refers to one’s ability to spot animals in their natural habitats. It’s nearly impossible to train someone to have a good game-eye, as it can only be achieved through time and practice and even then, some people will just never learn how to be good at spotting game. It seems to have little to do with the natural quality of your eyesight.
There are plenty of guys with 20/20 vision who can’t spot squat for game, just as there are a lot of guys with bottle-bottom glasses who see animals that would escape the notice of 95% of other hunters. With that said, though, there are some tips and tricks that can help you do a better job of locating game.
Dissecting the Landscape
Most experienced glassers use a divide-and-conquer when confronted with a vast amount of turf that needs to be picked apart for animals. Basically, they break the landscape into manageable chunks and then scour those individual chunks with the help of binoculars and/or a spotting scope.
When doing this, start with the easy pickings. For instance, imagine a large hillside that’s covered in vegetation types ranging from grassy openings to thick brush to scattered stands of mature timber. Cover those large openings with your binoculars first, simply because it’s easy to quickly scan them and rule out the presence of any game that might be standing in plain sight.
Next, check the smaller openings. If you still haven’t found what you’re looking for, it may be time to put your binoculars on a tripod or stabilize them against your knees and start doing some detail work. Go back to those openings and scour the edges, and give a careful look at any brushy patches out in the middles of the openings.
Then start picking apart those large expanses of brush, looking for any holes or thinly canopied areas that you can see into. Use your binoculars to pry your way into every possible nook and cranny that might be holding an animal: shadows cast by trees and brush; sheltered areas beneath overhanging rocks; the areas along or near game trails.
As you look into tougher and tougher locations, make sure to slow down more and more. No successful glasser would take just a quick glance at a promising hillside and then call it quits. Check everything multiple times, and make a mental list of any intriguing shapes or shadows that you couldn’t see clearly. You can come back to examine these spots with a spotting scope once you’ve completed your initial few passes with a set of binoculars. All the while, remember that you’re not just looking for animals; you’re looking for parts of animals as well. A bit of antler glistening in the sun, a twitching ear, a shadow cast by an animal’s leg.
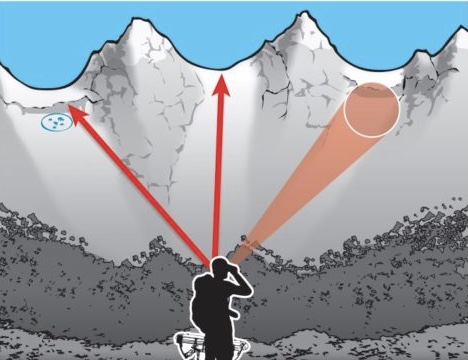
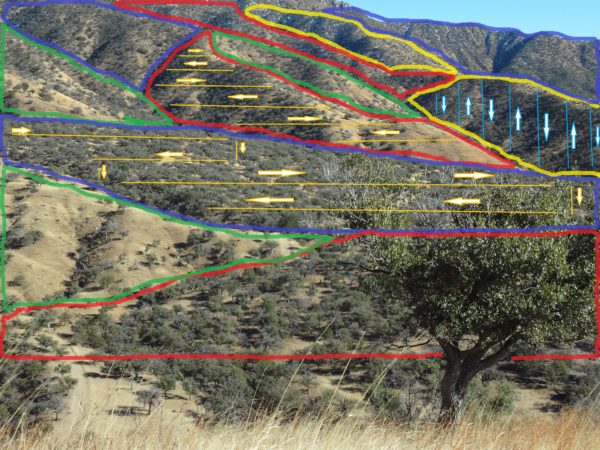
Another way to break down a large area is to glass it using a grid pattern. This works especially well in areas with a more homogenous appearance that isn’t conducive to the divide-and-conquer method. It can also be used in conjunction with divide-and-conquer; see illustration below. To grid, you divide the overall view into manageable pieces and cover those pieces with your binoculars in the same sort of back-and-forth pattern that a typewriter uses to cover a page.
Simply pan your binos from one end the area to the other, then tilt them up or down a slight bit and pan across the next strip of cover. For the sake of mixing it up, you can grid top-to-bottom if you like. Be sure to allow for plenty of overlap on each pass so that you don’t miss anything. When looking at a small hillside, one or two passes might be enough to rule out the presence of game. But in seriously vertical country, or when you’re looking from a very high vantage point, it might take nine or ten passes to fully cover a patch of terrain.
Glassing strategies such as divide-and-conquer and gridding are hugely helpful, but when using these techniques it’s only natural that you’re going to focus the bulk of your energy on those areas where you most expect to see game. Identifying such areas is a learned skill that comes from a lifetime of hunting and observing animals. But there are some shortcuts to mastering this discipline. At all times, keep in mind the three basic things that critters need, shelter, food and water and look for the places that provide these necessities.
For big game, shelter is typically synonymous with bedding areas, which are usually located in proximity to good avenues of escape. Some species, such aswhitetail deer, prefer to bed in thick vegetation, where they are hidden from view. Others, such as mountain goats, bed out in the open where they can see predators from a long ways off and where they have steep cliffs to their back so that they can climb to safety when pursued.
Food is most often found in open or semi-open areas where there’s adequate sunlight to foster the growth of preferred low-lying big game grub such grasses, forbs and shrubs. Such openings might be found amid sparse stands of aspen, creek-side clearings, grazing pastures, the edges of beaver ponds, the bottoms of avalanche slides, agricultural fields, orchards, or in areas cleared by forest and brush fires.
Water sources differ according to location as well. It could be a high-country seep in the Rockies, a man-made water catchment in the desert Southwest, a mud puddle along a dirt road in California, a bubbling brook in Maine, a vast swamp in the Southeast. Learn how the animals in your chosen hunting area are using the habitat to get what they need, and you’ll quickly become a better hunter.
Recognizing patterns is equally important, or perhaps even more important, than recognizing habitat features. What this means is that when you see an animal you’re able to figure out why it’s hanging out where it is. You can then take that bit of knowledge and use it to your advantage by searching out others that offer the same sets of circumstances — and hopefully locating animals there as well.
As an example of what I’m saying, let’s say that you’re watching a big pasture. There could be many things about this corner that make it special: it’s lower or higher than the rest of the pasture; it’s wetter or drier than the rest of the pasture; it’s shadier or sunnier than the rest of the pasture. it’s breezier or calmer than the rest of the pasture; it’s closer or farther away from a cattail marsh than the rest of the pasture. Whatever the deciding factor might be, it’s the smart hunter’s responsibility to figure it out and then extend that piece of knowledge to the next patch pasture that he happens to hunt.
Another sort of replicable thing that you should strive to understand is how a particular animal looks in a particular setting. Hunters often find that it takes them a while to spot the first deer of a day, but then as soon as they find one, they start spotting deer all over the place. Often, this happens because the hunter has suddenly figured out what a deer looks like in the context of a particular backdrop of vegetation and quality of light.
In other words, finding a mule deer in dry grass (look for the white rump) is nothing like finding a mule deer in the snow (look for the brown body), which itself is nothing like the maddeningly frustrating task of finding a mule deer against a patchwork of snow and dry grass. But once you see an animal in a certain type of setting, something in your head clicks and you suddenly know what you’re looking for. Achieving that moment of clarity is one of the many joys of spot-and-stalk hunting.
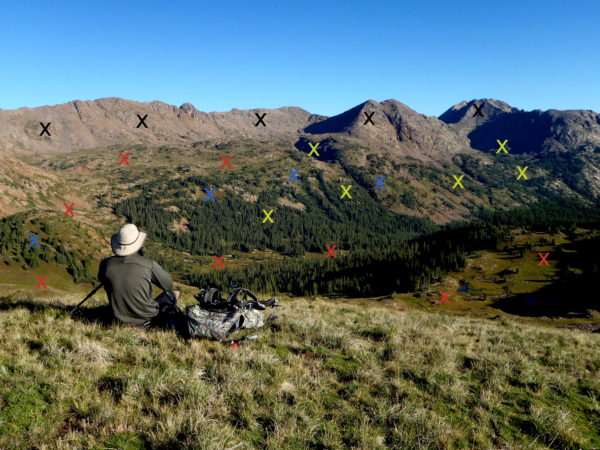
This is a classic high country basin where elk, deer, sheep, and goats might be found. In this instance, the glasser is looking for elk and deer. All the X’s beside the black ones are possible locations to spot elk and deer.
Red Icons
These spots are where the glasser looks first and looks fast. Big openings, void of much cover where an animal will stick out.
Blue Icons
These spots are covered during the 2nd pass. Medium sized openings with scattered trees and cover that might conceal part or all of an animal.
GreenIcons
These spots are either so small that they’re not really openings but just gaps between trees, or are so far away (like the green x’s far right) that a spotting scope might be needed to glass it well. These are also spots that you might glass up a bedded animal.
Black Icons
These spots are not going to hold elk or deer so no need to glass them until the afternoon doldrums set in and you look up there in hopes of catching a goat or sheep.
When you’re sitting up on a glassing position for an hour or so without seeing anything, you’ll inevitably start wondering how long you should wait before moving on. There is no simple answer to this question, as it really comes down to what animal you’re hunting and what kind of terrain you’re hunting in. If your glassing an alpine basin for Dall sheep in Alaska, for instance, you pretty quickly determine whether or not there’s a pure white animal standing against a backdrop of black shale and green grass.
Conversely, if you’re hunting the brushy mountains of Sonora Mexico forCoues deer, otherwise known as gray ghosts, you might spend two or three days in one spot before you pick out the deer that you knew all along must be there. In that sort of terrain, you’re not just glancing around for something white. Instead, your eyes are prying into every little nook and shadow in search of a leg, an ear, or an antler tine. In those situations, confidence plays a huge role. Sometimes, you must force yourself to believe in your spot and know that something’s out there, even if you don’t actuallyreallybelieve it.
Another reason to hold tight is that bedded animals will eventually get up and move around, and you need to be watching when they do. Many hunters are good enough to find bedded game on occasion, but only the best of the best can do it consistently. When an animal is on its feet, however, the movement will usually catch your eye long before the actual shapes of the animal do. What’s more, animals that are up on their feet aren’t necessarily in view.
Big game usually moves slowly as it feeds, often just taking one step every few minutes. You could easily be watching a hillside of oaks for wild pigs and not see a lone boar simply because he’s spending an hour in a narrow out-of-view draw that happened to collect a bunch of acorns that rolled down the slope after falling from their trees. Suddenly that boar steps out from the draw and there he is, seemingly emerging from thin air.
Another thing to consider is the shifting light. As the sun moves across the sky, shadows change and either lighten or darken an animal enough for you to see it. And the shifting rays of fun can reveal things as well. You could be staring at a huge patch of willows and not see a single thing, and then suddenly the sun busts through the clouds and you see the palm of a moose antler as clearly as if it were firefly lighting up in the pitch of night.
Speaking of light, many species of big game are crepuscular, or active primarily during the twilight periods of dawn and dusk. If you had two hours a day to glass for animals, you’d be wise to pick the first and last hours of the day. That’s when you’re going to spot 75% of the game you see. In general, it’s very hard to rule out an area until you’ve had the chance to study it during those magical moments of rising and falling light.
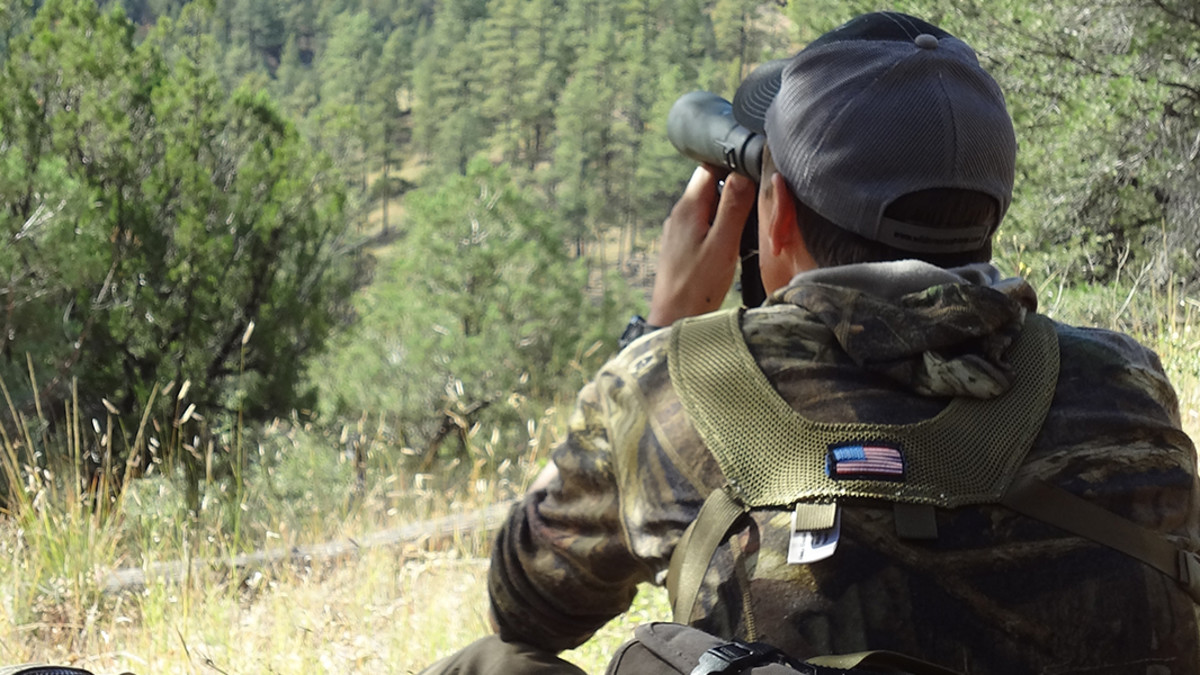
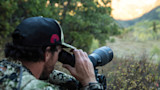
Binoculars vs Spotting Scopes
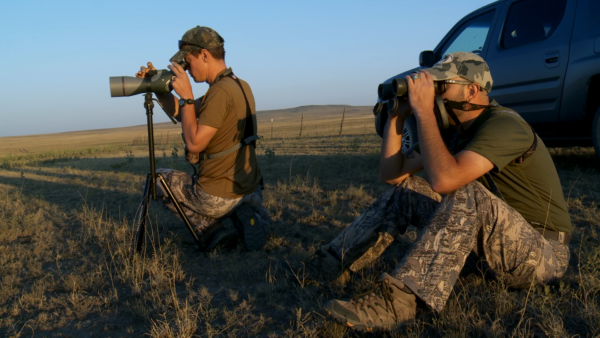
There aren’t many serious glassers who spend hour upon hour staring through a spotting scope. Not only can spotting scopes give you eye fatigue in short order, but the field of view on a spotting scope is typically much smaller than that of binoculars.
Instead, do most of your glassing through a set of binos, preferably on a tripod. Use the spotting scope primarily as a specialty tool for investigating suspicious looking (i.e., gamey) shapes and objects, and also for judging the size and/or legality of distant animals that you initially found through your binoculars.
Now and then, of course, you’ll use your scope to scan faraway country that’s simply out of reach for a pair of binoculars, but give your eyes a break as you soon as you start to feel any discomfort. You’ll want your eyes to feel fresh and ready when you finally get a chance to look through your rifle scope and make your shot.
Shop
Sign In or Create a Free Account
Related
Hunting Gear
What You Need to Know About Hunting Binoculars
Hunting Gear
How to Use Spotting Scopes for Hunting