Tips for Staying Comfortable on a Backcountry Hunt


No matter how grueling a hunt gets, I can usually hack it as long as I’m able to get a decent amount of sleep at night. There are certain tips to keep you comfortable on a backcountry hunt to keep you out longer.
Sounds simple enough, but in thebackcountry, it can be a never-ending challenge. Wet clothes, soggy ground, cold temperatures, high winds, and uneven sleeping surfaces can work singly or together to make you miserable, pathetic, and whiny at a time when you should be content, focused, and silent. In fact, I’d say that getting quality sleep is one of the greatest challenges that face a backcountry hunter.
Meeting this challenge is not a matter of accumulating lots of excesslayersand gear. Organizing all this stuff, and trying to keep it dry, can actually lead to more problems and more lost sleep. Instead, sleeping success comes down to getting the right gear, mastering the right tricks, and knowing what things matter and what things don’t. Remember: better sleep=better hunter.
Tents
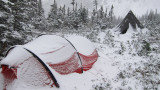
There are many specialized tents that might have their place in a well-outfitted hunter’s gear closet, but the vast majority of your hunting needs will be served by a free-standing 3-season tent. Great options are available fromNemo,Mountain Hardware,REI,Kelty,Sierra Designs, andBlack Diamond.
When chosen properly, these are light enough to carry on a7-day backpack huntand durable enough to withstand several years’ worth of intense use. They can shelter you from rain, wind, and sun, and will withstand all but the worst of winter blizzards if they’re carefully staked out and supported with guylines. Here are some other tent tips.
- Insect repellents and sunblock can be extremely corrosive to tent fabric. Keep that stuff out.
- A foot-print or plastic ground cloth is a must-have to protect from rain and/or ground moisture. In a downpour, take care that it is not sticking out and catching water that will pool and get you soaked.
- Choosing a proper tent site is important. You’ll sleep better if it’s flat. A great way to test for this and also check for rocks and sticks that will jab you while you sleep is to lay down on your chosen tent location before you pitch your tent. Clear out any limbs, sharp rocks, roots, or pokey debris. You’re doing this for comfort and also to keep your tent from getting pierced.
- Keep in mind large-scale risks like dead trees or overhanging limbs, especially during windy conditions ahead of snowfall. You don’t want to be sleeping there when that big cottonwood finally decides to tip over.
- Take your boots off and leave them in the vestibule or outside of the tent. This keeps dirt out of your living space, which is good for your tent’s fabric and also good for your comfort. If you keep your boots outside, make sure to keep them covered — and also make sure you check them for scorpions or other critters before putting them back on.
Tipi Shelters
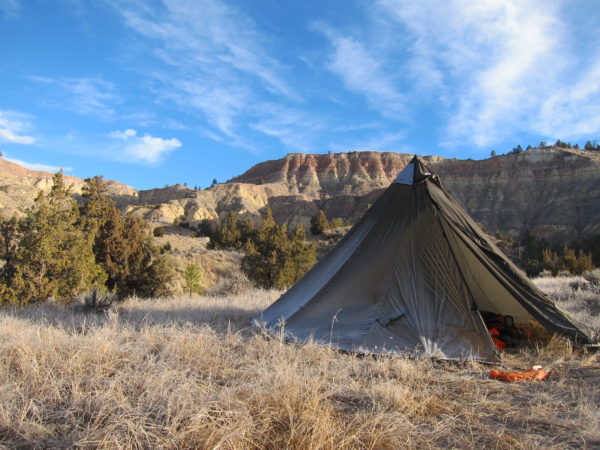
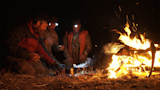
For large parties and long backcountry trips and if your party is free of heavy-duty snorers, ultra-light tipi tents are a great option. For the space they offer they weigh next to nothing and can be paired with a titanium pack stove to create a portable, heated structure. Tipi tents are also great as communal cooking and eating shelters, especially during cold or wet weather. Check out the tipi-style tents made byKifaruandSeek Outside.
Tarp Shelters
If you are going ultra-light or ultra-hardcore, another great option is to learn how to make a simple shelter out of a tarp and parachute cord. A well-made tarp shelter can protect you from rain and snow, but keep in mind that they offer little in the way of insulation and nothing in the way of insect protection.
Bivy Shelters: Why You Shouldn’t Buy One
Bivy sacks always seem like a great idea when you’re packing for a trip. What could be better than a miniature tent weighing a pound or so that stuffs down to the size of a water bottle? They’re especially pleasurable to have along on those dry and sunny trips when you never actually have to get them out. You sleep under the stars, thankful that you’re packing such a light and breezy load.
The problem with bivy sacks comes when you actually need them. Then, with the rain coming down and the wind howling, you immediately realize that you’re in a pickle. You can zip the thing up tight and soak your clothes and sleeping bag with the condensation of your own breath, or you can open it up and soak your clothes and sleeping bag with water from the heavenly skies.
The best way out of this situation is to abandon the fallacy that bivy sacks are a reliable alternative to tents. For a great compromise, get a quality single-man tent that allows you to sit up straight and drag your backpack inside with you. When you emerge after the storm, dry and ready to go, you won’t be lamenting those extra pounds that you have to tote around.
Sleeping Bags
The two most important factors to consider when selecting a sleeping bag are temperature rating and fill type. Temperature rating is just what it sounds like, the minimum projected temperature that you can comfortably endure in the sleeping bag while wearing base layers.
These ratings are famously inaccurate; you should always use a bag that’s rated for at least 10 degrees colder than what you’ll actually encounter.
Fill type refers to whether the bag is insulated with down or synthetic materials. Down bags are lightweight and compress well, but they are useless once they get wet. Synthetic bags are heavier and bulkier, though they still function well enough when wet that you can enjoy a comfortable night’s sleep.
As for temperature ratings, a 15-degree bag is a great all-around, all-purpose sleeping that’ll keep you comfortable in the vast majority of hunting scenarios you’re likely to encounter. You can unzip the thing in warmer temperatures, and you can add a fleece liner in colder temperatures.
If you’ve got the money for a second and third bag, round out your collection as needed with a 30-degree or 40-degree summer bag and a -15-degree cold weather bag. If you encounter extreme cold, you can double up your bags or use a fleece liner to squeeze another 10 degrees of comfort out of a single bag.
Always remember that you lose the majority of your heat through the ground, especially frozen ground, so do not underestimate the importance of an insulated sleeping pad in cold conditions.
Sleeping Pads
There are three main types of sleeping pads on the market: closed-cell foam, non-insulated inflatable, and insulated inflatable.
For the guy or gal that can sleep comfortably at home while lying on a tile floor, the closed cell foam pad will suffice. The benefits of this style are the ease of use and the durability. Since there is no air inside, punctures are not a concern and you don’t need to place a ground tarp between the pad and the earth. Because of its durability, the foam pad can also be folded and used as a seat while you’re relaxing by the campfire– something you should never do with an inflatable pad. Look to Therma-Rest Ridgerest pads for high quality closed-cell products.
For those requiring a little more comfort, inflatable pads deliver. While typical closed-cell foam pads give you 3/4” of padding, inflatable pads offer from 1” to 3.5” of padding. They easily absorb small rocks, roots, and other lumps you might be lying on. Non-insulated inflatables are by far the lightest option, some weighing just over 1/2 pound.
For cold weather, the insulated inflatables add another layer of protection between you and frozen ground. As insulating materials, manufacturers use both down and synthetics, while others use heat-reflecting materials to keep the warmth in. Insulation does add a little weight, if only a few ounces. For an all-around sleeping pad that can be used anywhere and anytime, theNemo Astro Insulated Sleeping Padis one of the best, maybe the best, on the market.
The thing to remember about inflatable pads, though, is that they require great care. They are easily punctured by sticks, rocks, thorns, even by rubbing against other gear inside your pack. Always place a tarp between the pad and bare ground, and carry a patch kit.
Additional Tips for Staying Warm at Night
- Before bed, boil some water and fill your water bottle. Tighten down the lid and put the bottle of hot water inside a sock and place that on your abdomen or on the inside of your legs. If you’ve got a second bottle, put it down by your feet. If you’re boiling creek water in order to sterilize it, you’ve now got two bottles of clean water waiting for you when you wake up.
- Put clothes on, or take clothes off. Staying warm requires you to have plenty of room inside your bag for trapped air. Too few clothes can leave you feeling cold because there’s not enough material to trap air, too many clothes can also leave you feeling cold if you’re scrunched in so tight that there’s inadequate pockets to accommodate warm air. In other words, a giant puffy coat might do more good on top of your sleeping bag than inside of it. Or put that coat under your sleeping bag where it can augment the effects of your sleeping pad.
- Wear a hat and face mask. You lose a high percentage of your body heat through your head. A beanie or balaclava can keep your core temp where it needs to be.
- Snuggle. Yes, snuggle. In a pinch, sleeping close to your hunting partner can greatly increase your collective warmth.
- Maintain your bag. Clean it, dry it well, and store it by hanging it unpacked. Down bags can clump and be of no value if not properly handled, and synthetic bags will degrade over time if not taken care of. Treat your bag not only as something that keeps you comfortable but as something that keeps you alive as well.
Sign In or Create a Free Account
Related
Hunting Gear
Tips for Cooking on a Backcountry Hunt
Hunting Gear
Hydration on a Backcountry Hunt