
Course
Small Bites
Duration
3+ hours, plus marinating time
Serves
3 pounds
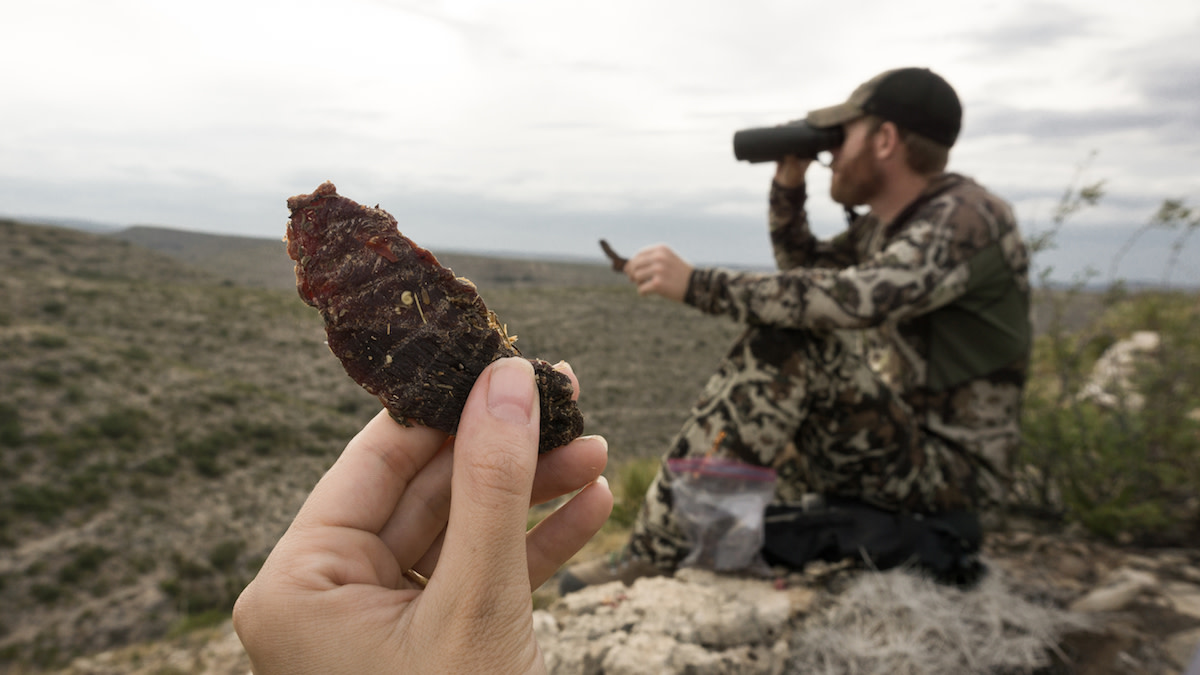
Is there anything better to snack on during a hunt than wild game jerky? This fall, skip the gas-station junk and make your own batch of jerky flavored like sweet, maple syrup breakfast sausage to eat during your mid-morning glassing sessions. Jerky is a great way to stay fueled while in the backcountry and it’s easy to make at home.
Selecting the Right Meat
Wild game, like deer, elk, antelope, duck, or even goose, is a great choice of meat to use for jerky because it’s so lean. Fat can go rancid easily causing spoilage, so if you choose beef don’t use a cut with intramuscular fat. It’s also important to use a cut of meat that’s relatively tender, which is pretty much any muscle from the hind quarter, and be sure to trim any tough silverskin away with a sharp knife.
One of the most important things to keep in mind when making jerky is that the way you cut it matters. First, make sure that you’re cutting against the grain. This means that if the muscle fibers are all moving in one direction, you will slice it perpendicular to the grainline so that when you take a bite, you’re not gnawing on long, stringy pieces of meat. You also want thin slices, between ⅛- and ¼-inch thick, and for everything to be as equally sized as possible. If some pieces are a little thicker than others, use a meat mallet and very gently pound it until they reach the same thickness. It’s helpful to cut the meat while it’s still half-frozen to get those even sized pieces. Uniformity will yield consistency, making your jerky dry equally.
Marinade and Seasoning
Having the right marinade is just as crucial as getting the right cut of meat. The marinade not only provides the flavor that makes jerky so damn addicting, but it serves a functional purpose—preservation! This recipe has equal parts maple syrup and apple cider vinegar, both which provide a balance of taste. The herbs and fennel seeds add flavor and when all combined, gives it that breakfast sausage flavor we crave in the mornings. Last but not least, the salt enhances the marinade and acts as a preservative, which is important if we want our jerky to be shelf stable.
The ratios of these ingredients—acid, salt, and sugar—is a good template for other popular jerky flavors, like teriyaki, or black pepper, so the ingredients can be substituted to suit your needs. Just keep in mind that maintaining the perfect balance of sweet and spicy is key in a good jerky recipe. Just make sure to marinate in the refrigerator for at least 6 hours, but preferably for 24 to really infuse the meat. The longer you marinate, the saltier it will be.
To really step out of the box and experiment with some different flavors, check out our recipes for Thai chili, chipotle cherry, and coffee chili jerky.
Drying Methods, Temperature, and Time
When it comes time to dry the jerky, there are a few different routes you can take. The easiest is to use a countertop electric dehydrator. They come with several trays so that you can spread meat across, leaving room for circulation, and it maximizes efficiency. I also like them because they have low heat options as you want to dehydrate at 165℉.
You can also dehydrate in an oven using the convection mode, but most can’t go low enough and you may have to crack the door open using a wooden spoon.
The last option is to use a smoker, which adds another layer of flavor, but isn’t always the most practical. For more details on smoking jerky, click here.
Whatever method you choose, just make sure to dry it for the right amount of time. The finished product should have a slight bend and feel like leather. If you try bending it and it snaps in half, it's over-dried. Timing depends on the thickness of the meat, but generally it takes anywhere from 3 to 5 hours.
Storage and Food Safety
For safety reasons, you need to store your jerky appropriately. I once prepared jerky a month in advance for an early season archery hunt in New Mexico. I placed it in a vacuum sealed bag and stored it in the refrigerator until I left for the hunt. The cold meat and the hot outside air temperature created condensation, and within a day the meat developed mold and I had to throw the entire batch away. It was a stupid mistake that I'll never make again.
Jerky will keep at room temperature in an airtight container for about a week or two. If you plan to make jerky for a hunting, hiking, or camping trip, you want to prepare it right before the trip, make sure it’s very dry, and for added insurance, I like to include pink curing salt (Instacure) to the marinade to inhibit growth of unwanted bacteria, such as Clostridium botulinum. I suggest placing it in a vacuum-sealed bag or a mylar bag with an oxygen absorber to increase shelf life.
For longer storage to eat at home, you can refrigerate it for a few months and enjoy it as a snack, you can also freeze it for a few years. Just keep whatever you don’t eat chilled in the refrigerator.
If you’re new to jerky-making, try this favorite recipe of mine. Once you feel comfortable, try playing around with the ingredients and make this recipe your own. You’ll find that jerky is an easy and delicious way to have a protein-rich snack, and there's nothing better than making it with wild meat that you’ve sourced yourself.
Ingredients
- 3 lbs. venison roast or Canada goose breast
- 4 cloves of garlic
- 1 tbsp. fennel seeds
- 3 tbsp. kosher salt
- 1 tsp. black pepper
- 1 tsp. red pepper flakes
- 2 tbsp. dried sage
- 2 tbsp. dried thyme
- ½ cup maple syrup
- ½ cup apple cider vinegar
- ½ cup water
- ½ tsp. Instacure No. 1 (optional)
Also works with
Special equipment
Preparation
- Slice the meat across the grain between ⅛- and ¼-inch thick. This is easier to do when the meat is chilled in the freezer for an hour, or hasn’t fully defrosted yet. Place all the sliced meat in a large, resealable bag.
- If you have a mortar and pestle, smash the fennel seeds, kosher salt, and garlic cloves until you reach a rough paste. Stir into a bowl with the remaining spices, then whisk in the water, maple syrup, and apple cider vinegar until well mixed.
- Pour liquids into the bag with the meat and mix to coat each piece on both sides. Marinate in fridge for up to 24 hours, tossing and mixing the bag periodically.
- Remove the meat from the marinade and squeeze off excess liquid. Lay each piece of meat on dehydrator trays with space in between the slices. Set the dehydrator to 165°F and dry the jerky for 3 to 5 hours, or until completely dry.
- If you don’t have a dehydrator, use your oven set at the lowest temperature or the “keep warm” feature (no higher than 225°F), and crack the door open with a crushed beer can or wooden spoon. Place the meat on a rack for airflow and flip when halfway done. The final texture should be bendable, but still holding its shape and not cracking.